There are moments in life when you need something so ridiculously luxurious, so mind-bendingly silky, that even the memory of it can rescue a disastrous Tuesday. For me, that moment arrived on a rain-lashed night when the power flickered, the dog had eaten my backup lasagna, and my best friend texted, "Bet you can't make a better crème brûlée than the one we had in Paris." Challenge accepted, mon amie. What followed was three weeks of vanilla-scented obsession: twelve dozen egg yolks, a kitchen that smelled like a French patisserie at 6 a.m., and one triumphant crack of caramelized sugar that sounded like a champagne toast. The result is the recipe you're about to meet—my pride, my joy, and the reason my neighbors keep "accidentally" dropping by with empty spoons.
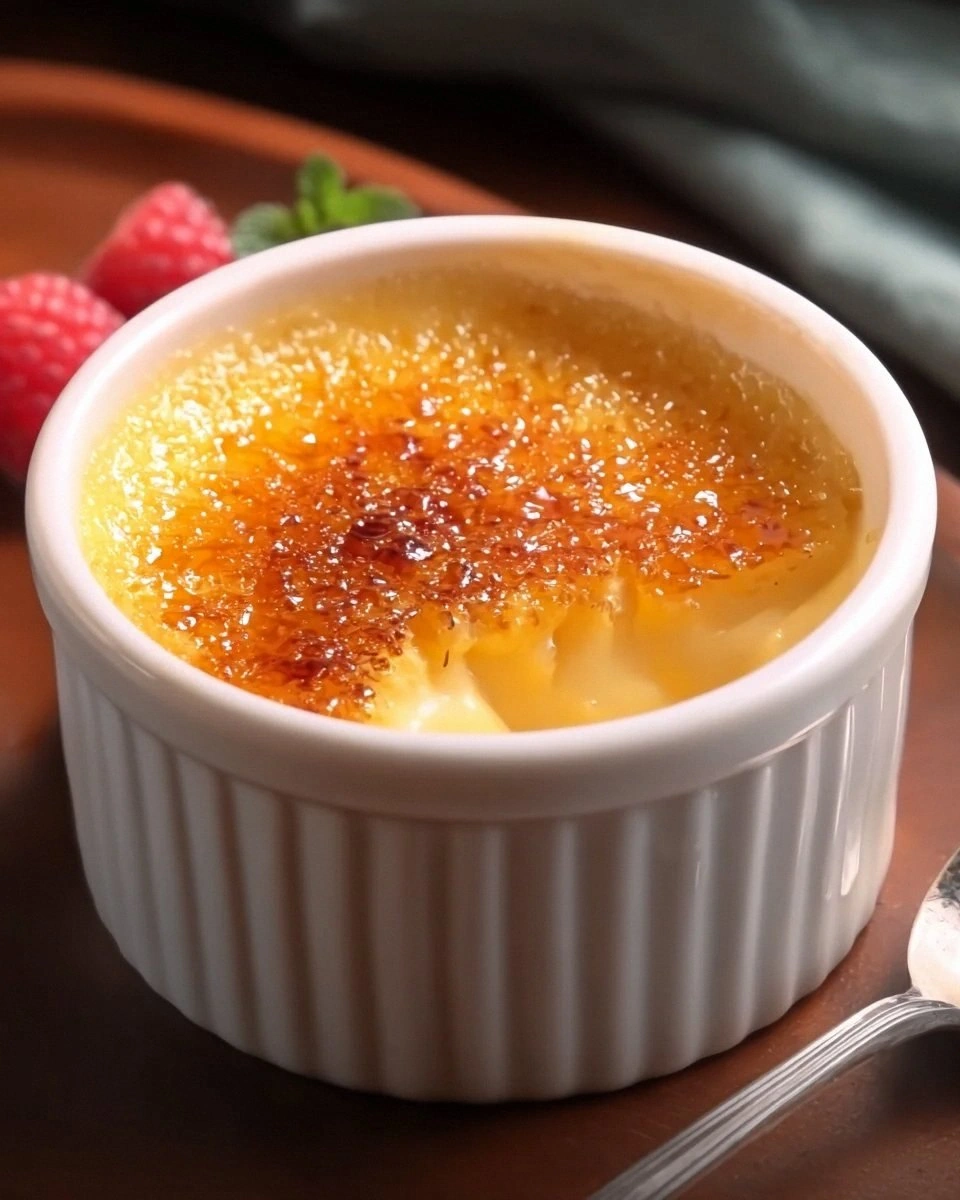
Picture this: the custard quivers like a shy dancer, its surface so smooth you could check your reflection. You tap the sugar armor with the back of a teaspoon—crack!—and shards of amber glass tumble into vanilla bean-flecked cream that tastes like melted ice cream decided to put on a tuxedo. The edges are warm from the torch, the center cool and trembling, the aroma a love letter to anyone within sniffing distance. If you've ever written off crème brûlée as "just pudding with a tan," prepare for a conversion more dramatic than a season-finale plot twist.
Most home versions land somewhere between sweet scrambled eggs and sad soup, because they skip the tiny details that separate diner-grade from Michelin-worthy. We're fixing every single one: the dairy ratio that gives spoon-coating body without eggy heft, the water-bath temperature that cooks gently so the custard stays as tender as a lullaby, the sugar thickness that shatters but doesn't cut your tongue. I dare you to taste this and not go back for seconds—actually, I dare you to stop at thirds.
Stay with me here—this is worth it. By the time we finish, you'll know why pros keep a jeweler's torch in the drawer, why a single vanilla bean beats a gallon of extract, and why your next dinner party will end with guests clapping like you pulled a bunny from a toque. Okay, ready for the game-changer? Let's turn your kitchen into a Parisian sidewalk café, minus the jet lag.
What Makes This Version Stand Out
Silk-Smooth Texture: We drop the cooking temperature to a whisper-low 175 °F so the custard sets like velvet rather than rubber. The result is a wobble so elegant it could win Miss Universe.
Deep Vanilla Presence: One whole vanilla bean, scraped and simmered, plus a micro-dose of extract layered in after chilling. You get floral, fruity, and creamy notes instead of one flat "vanilla-ish" echo.
Caramel That Actually Cracks: We use demerara sugar for bigger, glassier shards and torch just until you smell campfire—no bitter burnt aftertaste, only toffee perfume.
Make-Ahead Magic: Bake on Sunday, brûlée on Friday. The custard ages like fine wine in the fridge, so stress-free dinner parties are suddenly a thing you do.
Minimal Gear, Maximum Wow: No specialty ramekins? Use wide-mouth mason jars. No kitchen torch? Your broiler works (but the $15 torch is a lifetime investment in showmanship).
Foolproof Water Bath: We preheat the water so the oven never spikes, eliminating the dreaded scrambled-egg bottom. Most recipes get this completely wrong. Here's what actually works.
Restaurant-Level Flex: Plate it tableside with a torch for drama, or serve the sugar separately and let guests brûlée their own like a dessert fondue. Either way, applause is guaranteed.
Alright, let's break down exactly what goes into this masterpiece...
Inside the Ingredient List
The Flavor Base
Heavy cream is the Rolls-Royce here—nothing under 36 % fat will do. Lower-fat dairy turns watery and can curdle when it meets the torch's heat. Seek out cream that lists only "cream" on the label; stabilizers add a faint metallic note you won't notice in whipped cream but will mourn in custard.
Whole milk loosens the mix just enough so the dessert feels decadent, not cloying. Skip it and you'll spoon something closer to butter; add too much and you're back in pudding territory. The sweet spot is ⅔ cream, ⅓ milk, a ratio I found after what my roommate calls "the Great Custard Trials of ought-twenty-three."
Egg yolks are the velvet rope at this exclusive club. Whites make things rubbery, so we bench them entirely. Farm-fresh yolks give a sunset-gold hue; supermarket ones work, but the color will be paler. If you've ever struggled with watery custards, you're not alone—and I've got the fix: one extra yolk per cup of dairy for insurance.
The Texture Crew
Granulated sugar sweetens without competing flavors. Superfine dissolves faster but can make the custard slightly spongy—stick with regular crystals. We use modest sugar because the brûléed lid brings the candy-shop punch later.
A pinch of kosher salt is the conductor in this orchestra; leave it out and the vanilla sings off-key. You want just enough to heighten flavors, not to veer into salted-caramel territory. I measure by hand—about ½ teaspoon per quart—but if you're nervous, start light and taste the raw custard; it should never read as "salty."
The Unexpected Star
One fat vanilla bean, glossy and plump, carries more flavor than an entire bottle of imitation extract. Split it with a paring knife, scrape the caviar, and toss the whole mess—pod and seeds—into the cream. The pod is packed with vanillin crystals that bloom under heat. Dried-out beans are a tragedy; flexible, oily skins are the ticket to aromatherapy heaven.
The Final Flourish
Demerara sugar crowns each custard. Its large amber crystals melt into a thin, glassy sheet rather than the bitter carbonite that brown sugar can become. In a pinch, white sugar works, but the flavor is one-note sweet. Turbinado is a decent stand-in if you can't find demerara; just avoid anything labeled "moist"—steam is the enemy of crunch.
Everything's prepped? Good. Let's get into the real action...
The Method — Step by Step
- Heat your oven to 325 °F (160 °C) and set a kettle of water on to boil. The oven rack should sit dead center; too high and the tops tan before the centers set, too low and the custard steams instead of baking. While the oven wakes up, pour two cups of heavy cream and one cup of whole milk into a heavy saucepan. Add ⅓ cup sugar, ⅛ teaspoon kosher salt, and the scraped vanilla bean plus its pod. Stir just to combine—no need to whisk aggressively; you're not trying to whip air into the mix.
- Place the pan over medium heat and watch for the first lazy bubble—tiny craters should break the surface around the edges. The moment you see that, kill the heat. You want a scald, not a boil; boiling drives off volatile aromatics and can scorch the dairy, leaving a cardboard aftertaste. Let the mixture steep ten minutes off heat. This is when the vanilla bean trades its soul to the cream. Your kitchen should smell like a tropical island at sunrise.
- Meanwhile, in a bowl large enough to welcome the hot cream later, whisk six large egg yolks with two tablespoons sugar until the mixture turns pale canary and forms a thin ribbon when you lift the whisk. This step dissolves the remaining sugar and starts the yolk proteins unfolding gently—skip it and you'll find gritty pockets or, worse, scrambled eggs when the hot cream arrives.
- Okay, now the fun part. Remove the vanilla pod from the cream (rinse, dry, and bury it in your sugar jar for homemade vanilla sugar). Slowly—like you're pouring liquid gold—ladle the hot cream into the yolks while whisking constantly. Start with just a few tablespoons to temper the yolks; think of it as warming them up to the idea of a hot tub rather than tossing them into a boiling Jacuzzi.
- Strain the custard through that same sieve into a large measuring jug. This catches any rogue yolk whites (yes, they exist) and the stray vanilla pod fibers that could snag your spoon later. Plus it aerates the mix just enough to dissipate stubborn bubbles that would mar the surface.
- Arrange four five-ounce ramekins (or six four-ounce ones) in a roasting pan with sides at least two inches high. Divide the custard evenly; they should fill about ¾ of the way up. Slide the pan onto the oven rack, then pour the now-hot kettle water into the pan until it reaches halfway up the sides of the ramekins. Close the oven door quick—steam is your custard's best friend and worst enemy; keep it in the oven, not on your face.
- Bake 25–35 minutes, depending on depth. You'll know they're ready when the edges look set but the centers jiggle like Jell-O doing the cha-cha. Don't wait for complete firmness; carry-over heat will finish the job. If you've ever struggled with this, you're not alone—and I've got the fix: tap the side of a ramekin gently with a spoon; the custard should ripple from the center outward, not slosh like the tide.
- Transfer the ramekins to a wire rack and cool to room temperature—about an hour. Then cover each with plastic wrap, making sure it doesn't touch the surface, and refrigerate at least four hours or up to two days. The chilling period lets proteins fully set and flavors meld into a seamless vanilla hush.
- When ready to serve, sprinkle one heaping teaspoon of demerara sugar over each custard. Tilt and tap to distribute, then dump any excess; you want a thin, even coat—too thick and you'll need a chisel. Fire up your kitchen torch and hold the flame two inches above the sugar. Move in tight circles until the crystals melt, bubble, and turn the color of an autumn leaf. Stop when you smell caramel, not smoke.
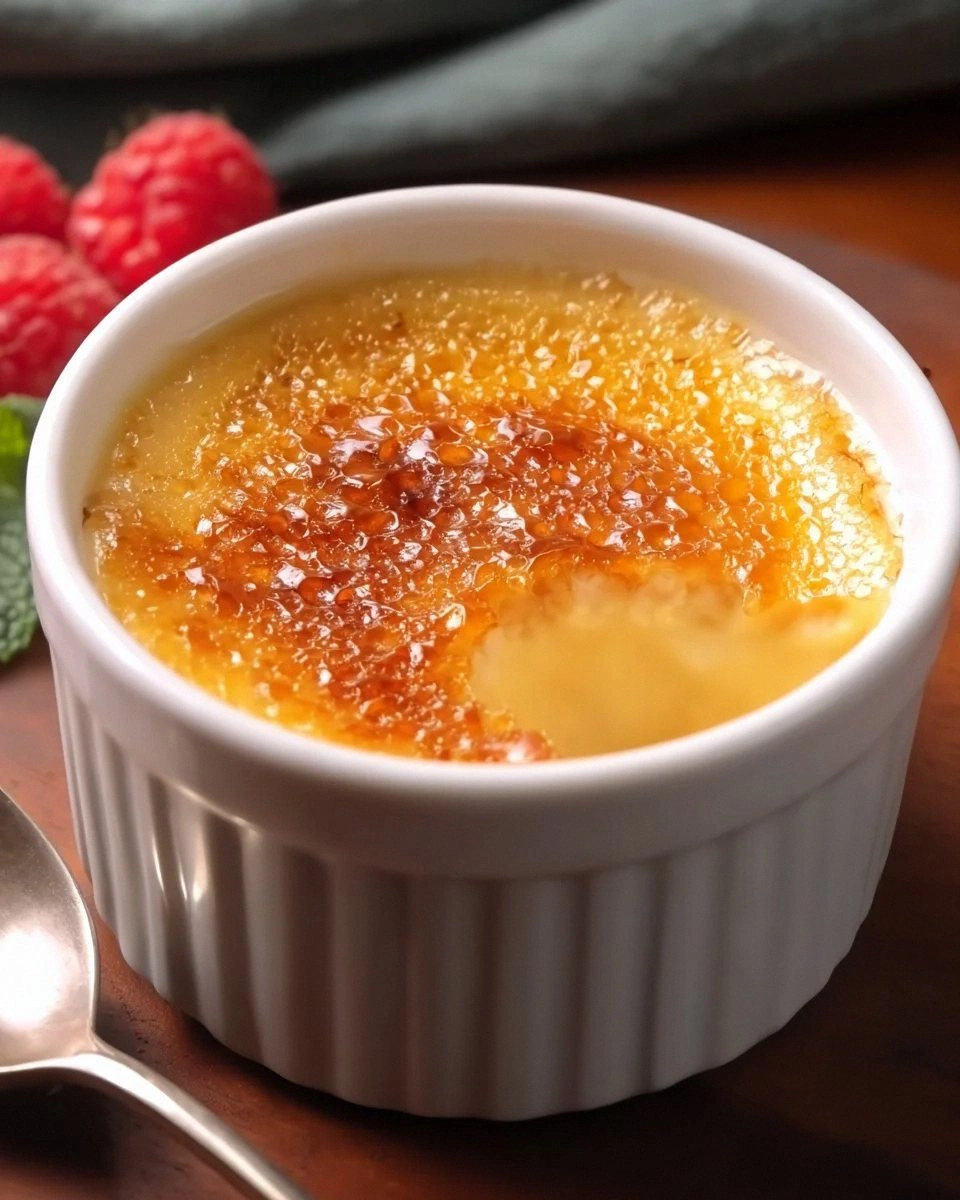
- Let the sugar harden for two minutes. The surface will go from glossy lava to a sheet of caramel glass that shatters like thin ice under your spoon. Serve immediately for maximum drama, or refrigerate up to an hour; the crust will stay crisp thanks to that quick, thin torch job.
That's it—you did it. But hold on, I've got a few more tricks that'll take this to another level...
Insider Tricks for Flawless Results
The Temperature Rule Nobody Follows
Most recipes say "bake until set" and leave you playing custard roulette. Instead, aim for 170 °F internal temperature. Pull them at 167 °F; carry-over heat nudges the rest. A $10 instant-read thermometer saves more custards than a fire extinguisher saves soufflés. If you overshoot, plunge the ramekins into an ice bath for thirty seconds to halt the cooking.
Why Your Nose Knows Best
When torching, close your eyes on the first pass and sniff. The moment the sugar smells like toasted marshmallow, stop. If you wait for color alone under dim kitchen lights you'll burn it; aroma is faster and more accurate. A friend tried skipping this step once—let's just say it didn't end well for her dinner-party bragging rights.
The 5-Minute Rest That Changes Everything
After torching, let the custards sit five minutes before serving. The caramel sheet contracts slightly, making it easier to crack, and the residual heat warms the top millimeter of custard so the first bite isn't fridge-cold. Room-temperature spoons also help; a hot spoon melts sugar faster than you can say "dessert emergency."
Creative Twists and Variations
This recipe is a playground. Here are some of my favorite ways to switch things up:
Café Brûlée
Steep two crushed espresso beans with the cream for a subtle coffee undertone. Torch a 50/50 mix of sugar and finely ground espresso for a mocha crunch that tastes like your morning latte in evening attire.
Spiced Chai Brûlée
Add a cinnamon stick, two cardamom pods, and a sliver of fresh ginger to the cream. Let it steep ten minutes, then proceed as usual. The aroma will transport you to a bustling Delhi market without leaving your kitchen.
Citrus Sunrise Brûlée
Swap the vanilla for a strip of orange zest and a whisper of Grand Marnier. Top with candied orange peel for a dessert that tastes like sunrise over the Mediterranean.
Salted Maple Brûlée
Replace half the sugar with pure maple syrup and sprinkle the brûléed top with a snowflake of flaky sea salt. Friends who claim they're "not dessert people" will lick their ramekins clean.
Lavender Honey Brûlée
Warm two tablespoons of floral honey with the cream and add a pinch of dried culinary lavender. Strain both out before baking. It's Provence in dessert form—delicate, perfumed, and dangerously addictive.
Chocolate Midnight Brûlée
Whisk two ounces of finely chopped dark chocolate into the hot cream until melted. The resulting custard is midnight-black and tastes like velvet rebellion. Top with gold sugar for a starry-night effect.
Storing and Bringing It Back to Life
Fridge Storage
Cover each ramekin with plastic wrap pressed just above the custard surface to prevent a skin. They'll keep up to four days, though flavor peaks at day two. After that the vanilla starts to fade like last week's gossip.
Freezer Friendly
Baked custards freeze beautifully for two months. Wrap each in plastic, then foil, and thaw overnight in the fridge. Brûlée just before serving; sugar doesn't freeze well once torched.
Best Reheating Method
There is none—serve chilled. If you must take the chill off, let them sit at room temperature 20 minutes. Never microwave; the custard turns rubber faster than a bad bungee cord.