When I was ten, my grandmother would pull a battered wooden churn from the cellar every summer and invite us to watch the transformation of fresh strawberries into a silky, pink cloud of ice cream. The scent of ripe berries mixed with the faint buttery aroma of churned cream still transports me to that sun‑drenched garden, where laughter echoed between the rows of tomato vines.
This classic dessert hails from the European tradition of hand‑churned frozen treats, a method that predates modern ice‑cream makers yet delivers a texture that feels both rustic and refined. The simplicity of a few high‑quality ingredients allows the natural sweetness of strawberries to shine without being masked by excessive sugar or artificial flavors.
In this article you will discover how to balance the sweetness of strawberries with the richness of heavy cream, how to achieve a perfectly smooth texture without a professional machine, and why a short chilling period before churning makes all the difference. By the end, you’ll be equipped to recreate a timeless summer indulgence in any kitchen.
Let’s dive in, gather the freshest berries, and start a tradition that will become a beloved staple in your own home.
🌟 Why This Recipe Will Capture Your Heart
Strawberry Ice Cream Homemade Churned is more than a dessert; it’s a celebration of seasonality, texture, and the joy of making something from scratch.
- ✨ Freshness Unmatched: Using ripe strawberries you pick yourself guarantees a flavor that store‑bought mixes can never replicate.
- ✨ Creamy Perfection: The ratio of cream to milk creates a luxurious mouthfeel while keeping the ice cream light enough for warm days.
- ✨ No‑Additive Assurance: No stabilizers, emulsifiers, or artificial flavors—just pure, wholesome ingredients.
- ✨ Hands‑On Experience: The manual churn engages you in the process, turning cooking into a tactile, meditative ritual.
- ✨ Versatile Base: Once mastered, you can swap strawberries for mango, blueberry, or even savory herbs.
- ✨ Crowd‑Pleaser: Its vibrant color and fresh taste make it a show‑stopper at parties, picnics, and family gatherings.
🥗 The Ingredients
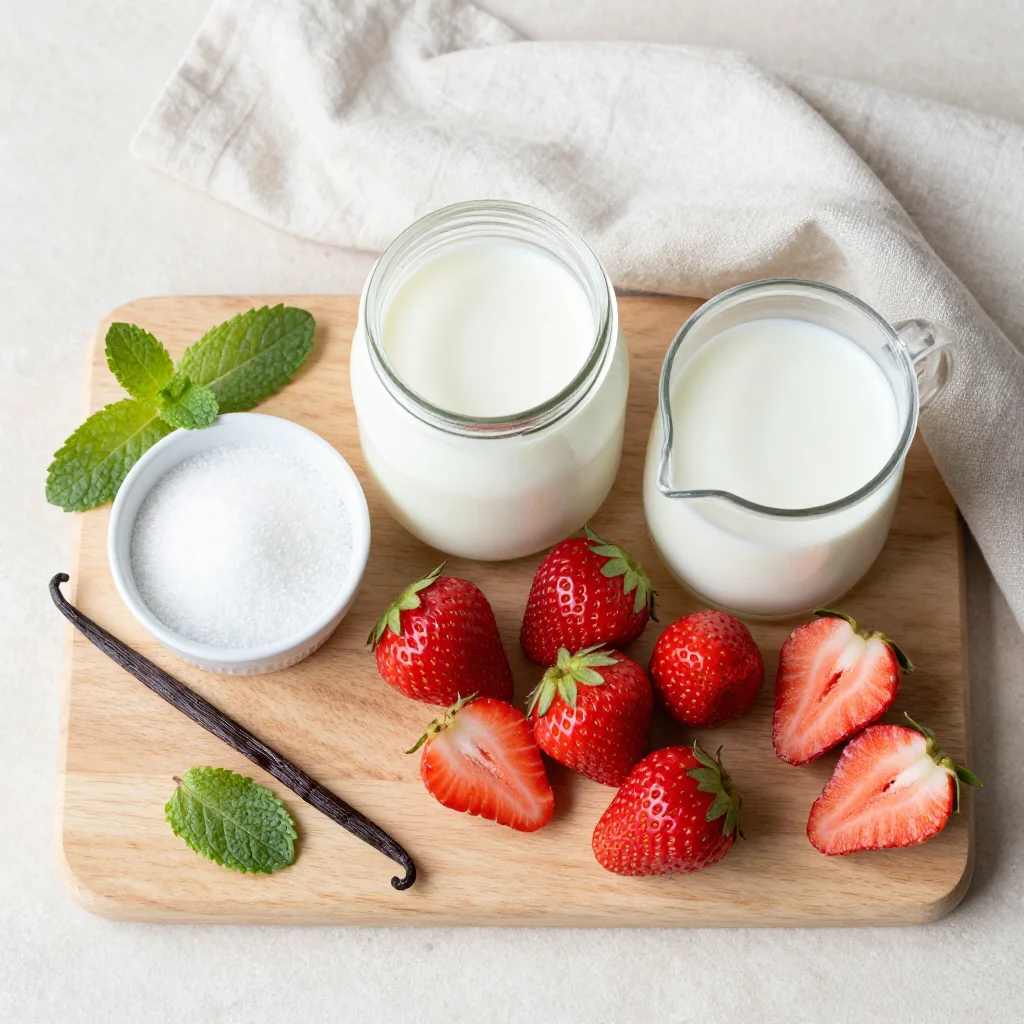
📝 Complete Ingredient List
For the Ice Cream Base:
For the Strawberry Swirl (optional):
🔍 Focus on Key Ingredients
Fresh Strawberries
Strawberries are the heart of this ice cream. Their natural acidity balances the sweetness, while their bright pigments give the dessert its signature hue. Look for berries that are firm yet yielding to a gentle press, and avoid any with white or green spots, which indicate overripeness.
Heavy Cream
Heavy cream contributes the luxurious body and prevents icy crystals from forming during the churn. A higher butterfat content (35 % or more) creates a smoother mouthfeel and helps carry the strawberry flavor evenly throughout each bite.
Vanilla Extract
Pure vanilla extract adds a subtle aromatic depth that rounds out the fruit’s brightness. Avoid imitation vanilla; the natural vanilla’s complex profile elevates the overall flavor profile without competing with the berries.
🔄 Quick Substitutions
| If you don’t have… | Use instead… |
|---|---|
| Fresh strawberries | Frozen strawberries, thawed |
| Heavy cream | Coconut cream (for dairy‑free) |
| Granulated sugar | Honey or maple syrup (adjust amount) |
👨🍳 Step‑by‑Step Instructions
Follow these detailed steps to transform simple ingredients into a silky, strawberry‑kissed delight.
📋 Phase 1: Preparation and Mise en Place
Gather, measure, and prep every component before you start the churn.
Puree the strawberries
Place the hulled strawberries in a food processor. Pulse until a smooth puree forms, stopping to scrape down the sides. The puree should be glossy and free of large chunks; this ensures an even flavor distribution later.
Combine sugar and puree
Transfer the strawberry puree to a medium saucepan. Stir in the granulated sugar and a pinch of sea salt. Heat gently over medium‑low, stirring until the sugar fully dissolves and the mixture becomes slightly syrupy, about 3‑4 minutes. Do not let it boil.
🔥 Phase 2: Churning and Freezing
This is where the magic happens—turning a liquid base into a frozen delight.
Cool the mixture
Remove the saucepan from heat and let the strawberry‑sugar mixture cool to room temperature. To speed up cooling, place the bowl in an ice bath, stirring occasionally. The mixture should be cool but not chilled before adding dairy.
Incorporate dairy
Stir in the heavy cream, whole milk, and vanilla extract into the cooled strawberry base. Mix until fully combined, creating a homogenous, pale‑pink liquid.
Churn the ice cream
Pour the mixture into a hand‑crank churn (or a stand mixer fitted with a whisk attachment). Churn for 20‑30 minutes, or until the mixture thickens to a soft‑serve consistency. The churn’s motion incorporates air, giving the ice cream its light texture.
✨ Phase 3: Finishing and Serving
Finalize the texture, add optional swirl, and present beautifully.
Optional strawberry swirl
If you desire a ribboned effect, fold the sliced strawberries mixed with powdered sugar into the churned ice cream gently, creating marbled streaks. This adds texture and bursts of fresh flavor.
Freeze to set
Transfer the soft‑serve ice cream into an airtight container. Press a piece of parchment paper directly onto the surface to prevent ice crystals. Freeze for at least 2 hours for a firmer consistency.
Serve
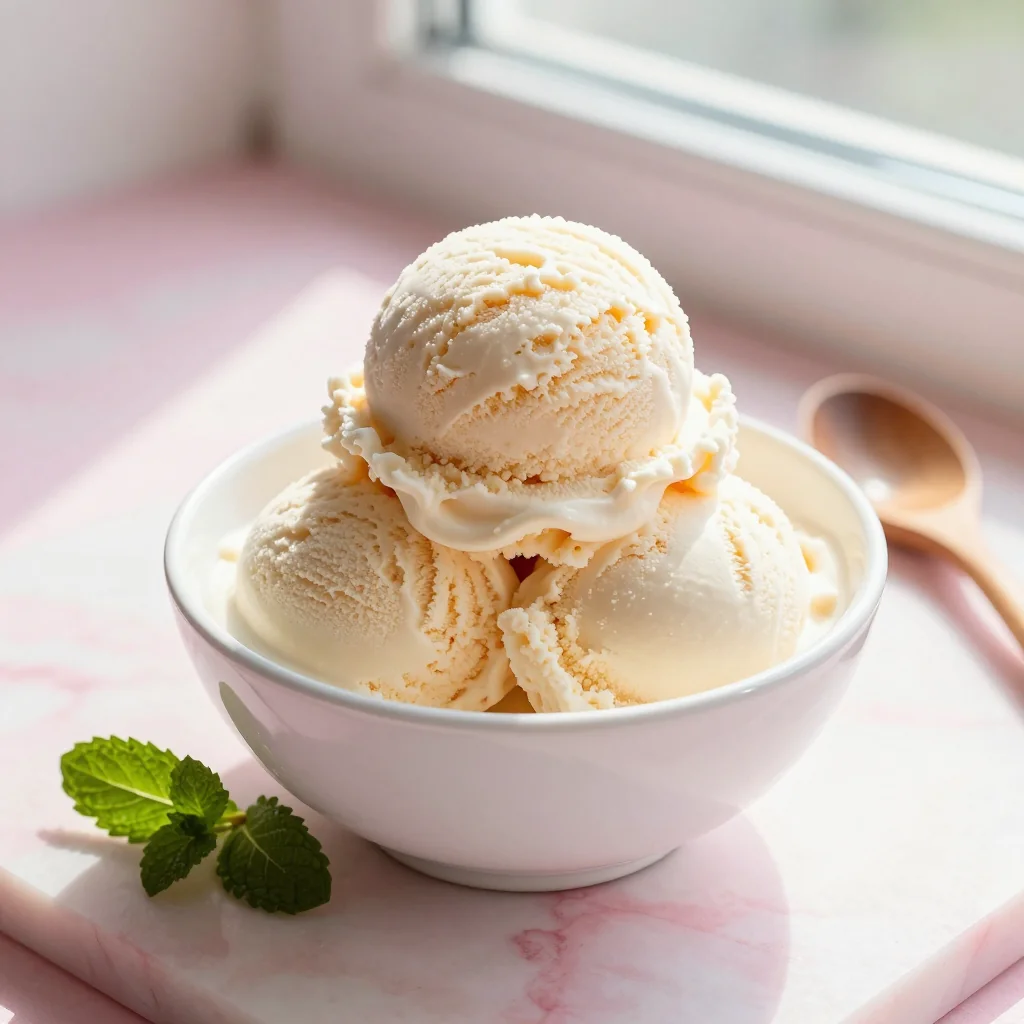
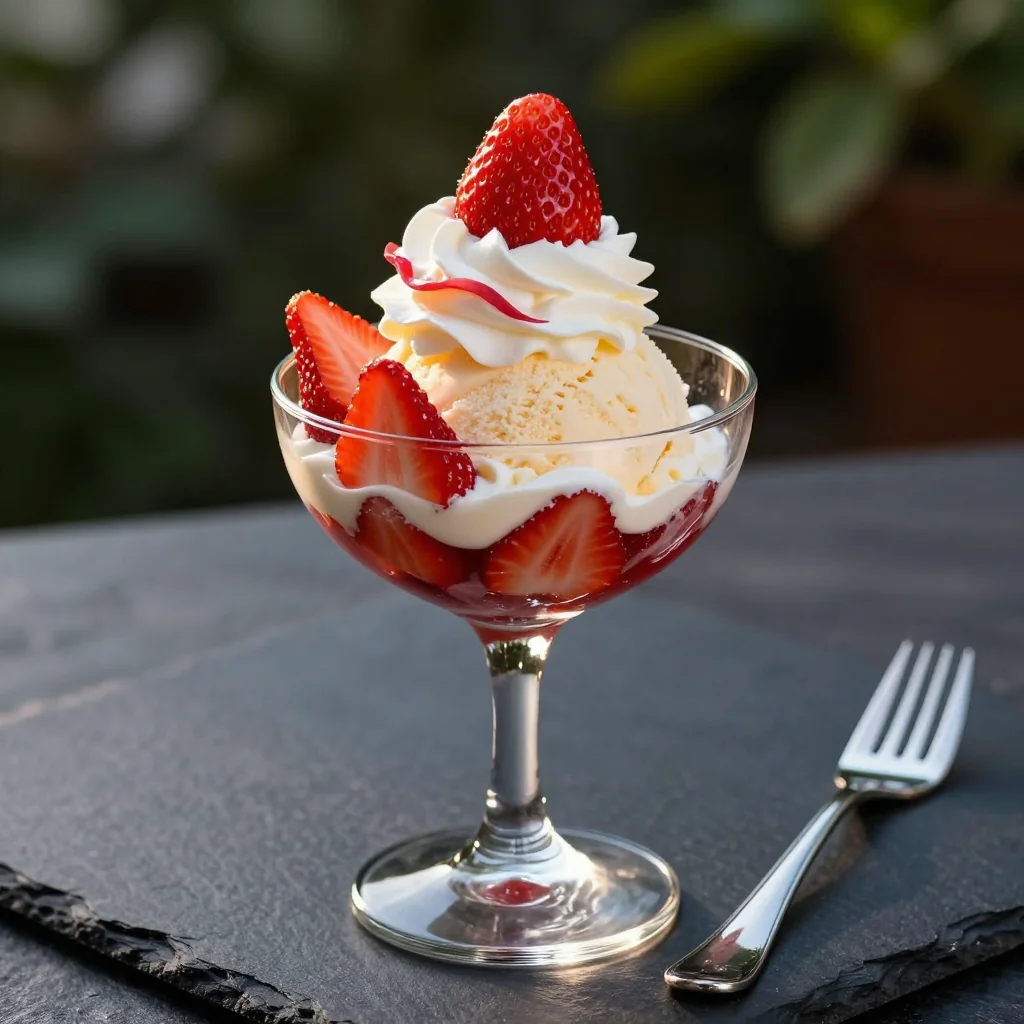
Scoop the ice cream into chilled bowls. Garnish with a fresh strawberry, a sprig of mint, or a drizzle of strawberry coulis for extra visual appeal.
💡 Expert Tips and Tricks
🛒 Choosing the Right Ingredients
Pick strawberries that are fully red with a glossy sheen. Avoid any with white or green patches, as they indicate under‑ripeness and will introduce unwanted tartness. For cream, a higher fat content (35 % or more) is essential; low‑fat alternatives will result in a grainier texture. When selecting sugar, opt for fine granules that dissolve quickly, preventing any gritty feel.
🔪 Preparation Techniques
Before pureeing, gently rinse strawberries under cold water and pat dry. Removing excess moisture prevents the mixture from becoming too watery, which could lead to ice crystals. When chopping the garnish strawberries, slice them thinly to allow quick softening during the final freeze.
🌡️ Mastering the Churn
The key to a smooth ice cream lies in consistent churn speed and temperature control. Keep the churn bucket in the freezer for at least 30 minutes before starting; a cold bucket reduces the time needed to reach the desired consistency. If the mixture seems too soft after the allotted churn time, continue for another 5‑10 minutes—don’t rush the process.
🍽️ Presentation and Service
Serve the ice cream in chilled glass bowls or classic waffle cones for a textural contrast. A drizzle of balsamic reduction can add a sophisticated sweet‑sour note, while a handful of crushed pistachios provides a pleasant crunch. Always garnish just before serving to maintain the ice cream’s pristine temperature.
🏆 Pro Secrets
Elevate your homemade ice cream from delicious to restaurant‑quality with these insider techniques.
- 🎯 Controlled Sugar Dissolution: Dissolve sugar in the strawberry puree over low heat rather than adding it cold. This ensures the sugar integrates fully, preventing a gritty mouthfeel and stabilizing the frozen matrix.
- 🎯 Fat‑to‑Water Ratio Optimization: The 3:2 ratio of cream to milk (300 ml to 200 ml) creates a perfect balance. Too much milk yields a watery texture; too much cream can become overly rich and freeze too hard.
- 🎯 Acid Balance: Lemon juice not only brightens flavor but also helps prevent ice crystal formation by lowering the freezing point, resulting in a smoother final product.
- 🎯 Air Incorporation Timing: Introduce air early in the churn (first 10 minutes) when the mixture is still fluid. Later stages should focus on thickening rather than aeration to avoid over‑whipping.
- 🎯 Temperature Shock Prevention: Transfer the churned ice cream to a pre‑chilled container; sudden temperature changes can cause micro‑crystal formation, leading to a coarse texture.
- 🎯 Final Texture Check: When the ice cream reaches a soft‑serve consistency, test by placing a small spoonful on a cold plate. If it holds its shape without melting instantly, it’s ready for the freezer.
"The secret to great ice cream is respecting the ingredients and giving the process time to work its magic." — Massimo Bottura
🔄 Variations and Adaptations
Strawberry Ice Cream is a versatile canvas. Below are several ways to customize it for dietary preferences, flavor twists, and special occasions.
🥬 Vegan Version
Replace heavy cream with full‑fat coconut cream and whole milk with oat milk. Use agave syrup or maple syrup instead of granulated sugar, adjusting to taste. The coconut base adds a subtle tropical note that pairs beautifully with strawberries.
- Substitution 1: 300 ml coconut cream (refrigerated and scooped)
- Substitution 2: 200 ml oat milk (unsweetened)
- Substitution 3: 100 g agave syrup (or adjust to 80 g for less sweetness)
🌶️ Flavor Variations
Explore different flavor pathways while keeping the strawberry backbone intact.
Spicy Chili‑Strawberry:
Add ½ tsp finely ground cayenne pepper to the puree and a drizzle of honey before chilling. The heat accentuates the fruit’s sweetness.
Mediterranean Basil‑Strawberry:
Blend a handful of fresh basil leaves into the puree for an herbaceous twist. Finish with a sprinkle of toasted pine nuts on serving.
Asian Matcha‑Strawberry:
Stir 1 tsp matcha powder into the churned ice cream just before the final freeze. The earthy green balances the bright red.
⚠️ Dietary Adjustments
Gluten‑Free:
This recipe is naturally gluten‑free; ensure any optional toppings (e.g., cookie crumbs) are certified gluten‑free.
Lactose‑Free:
Use lactose‑free milk and a dairy‑free cream alternative such as almond or cashew cream. The texture may be slightly lighter.
Low‑Calorie:
Reduce sugar to 70 g, substitute half the heavy cream with low‑fat milk, and incorporate a tablespoon of Greek yogurt for added protein without excess calories.
👶 Kid‑Friendly Version
For younger palates, cut back on lemon juice and use a milder sweetener like honey. Serve with fun toppings like rainbow sprinkles or crushed graham crackers to make the experience playful.
📦 Storage and Reheating
🧊 Storage
In the Refrigerator:
- Duration: Up to 3 days
- Recommended container: Airtight glass jar
- Tip: Cover surface with parchment paper to avoid ice crystals.
In the Freezer:
- Duration: Up to 2 months
- Method: Store in a shallow metal pan for quicker freezing, then transfer to a sealed container.
- Defrosting: Move to the refrigerator for 2‑3 hours before serving.
💡 For best texture, let the ice cream soften for 5‑10 minutes at room temperature before scooping.
♨️ Reheating
🔥 Oven (Recommended for baked desserts):
- Preheat to 160 °C (320 °F).
- Cover the ice cream with foil to prevent surface drying.
- Heat for 5‑7 minutes, just until slightly softened.
- Remove foil and continue for 2 minutes if you desire a warm interior.
⚡ Microwave (Quick):
- Cover with a microwave‑safe lid.
- Heat on medium power for 30‑45 seconds.
- Stir gently; repeat in 15‑second bursts if needed.
🍳 Stovetop (For sauces):
Gently melt the ice cream in a saucepan over low heat, stirring constantly, to create a strawberry‑cream sauce for desserts.
🍷 Perfect Pairings
🥗 Accompaniments
- Fresh Berry Salad: Mix sliced kiwi, blueberries, and a drizzle of honey for a light, refreshing side.
- Shortbread Cookies: Their buttery crunch contrasts the creamy ice cream beautifully.
- Mint Chocolate Chip Sorbet: A palate‑cleansing intermezzo between servings.
🍷 Wine & Beverage Pairings
- Prosecco: Its effervescence lifts the fruitiness and adds a celebratory touch.
- Rosé (dry): The subtle berry notes echo the strawberry flavor without overwhelming it.
- Non‑Alcoholic: Sparkling water with a splash of elderflower cordial offers a fragrant, light companion.
🍰 Completing the Meal
Start with a crisp arugula‑pear salad, follow with the strawberry ice cream as a palate‑pleasing dessert, and finish with a drizzle of dark chocolate ganache for an indulgent finale.
❓ Frequently Asked Questions
Q: Can I use a regular blender instead of a food processor for the strawberry puree?
A: Absolutely. A high‑speed blender works well; just pulse to avoid over‑processing, which can introduce excess air and affect texture. Stop once the puree is smooth and glossy.
Q: How do I prevent ice crystals from forming during freezing?
A: The key is a rapid churn and a cold churn bucket. Additionally, the sugar and lemon juice lower the freezing point, while the high butterfat content from the cream inhibits crystal formation. Stirring the ice cream a few minutes before the final freeze also helps.
Q: My ice cream turned out too hard after freezing. What went wrong?
A: This can happen if the churned mixture was too dense before freezing or if the freezer temperature is set too low. Next time, ensure the churn reaches a soft‑serve consistency and consider adding a tablespoon of vodka or a sugar‑alcohol mixture to lower the freezing point.
Q: Is it possible to make this recipe without a churn?
A: Yes. After chilling the base, whisk it vigorously every 30 minutes while it freezes, repeating 3‑4 times. This manual “freeze‑stir” method incorporates air and breaks ice crystals, mimicking a churn.
Q: Can I add other fruits or mix‑ins?
A: Certainly! Raspberries, mango, or even a swirl of caramel can be folded in after churning. Just keep the total volume similar to maintain the balance of cream and fruit.
Q: How far in advance can I prepare the ice cream?
A: The base can be made up to 24 hours ahead and kept refrigerated. Churn it just before serving for the freshest texture, or churn early and store the finished ice cream in the freezer for up to two months.
🎉 Let’s Get Scooping!
Strawberry Ice Cream Homemade Churned is a celebration of simple, high‑quality ingredients transformed through a hands‑on process that rewards patience and attention. By mastering the balance of fruit acidity, dairy richness, and precise temperature control, you’ll create a dessert that feels both nostalgic and contemporary. Whether served in a rustic bowl at a backyard picnic or plated elegantly for a dinner party, this ice cream is sure to impress.
Now that you have the full roadmap, give it a try, experiment with the suggested variations, and make it your own. Share your results, ask questions, and let the community know how you personalized this classic treat.
Have you tried this recipe?
Leave a comment and rating below! Share your photos on Instagram with #StrawberryChurned for a chance to be featured.
Strawberry Ice Cream Homemade Churned
A velvety, ruby‑red treat that captures the essence of summer in every spoonful.
📝 Ingredients
Ice Cream Base
Optional Strawberry Swirl
👨🍳 Instructions
- 1 Puree the hulled strawberries until smooth.
- 2 Heat the puree with sugar and a pinch of salt until the sugar dissolves.
- 3 Cool the mixture to room temperature.
- 4 Stir in heavy cream, whole milk, vanilla, and lemon juice.
- 5 Chill the base for 20 minutes in the refrigerator.
- 6 Churn the mixture for 20‑30 minutes until soft‑serve consistency.
- 7 Fold in optional strawberry swirl if desired.
- 8 Transfer to an airtight container and freeze for at least 2 hours.
- 9 Serve in chilled bowls, garnish with fresh strawberries or mint.
- 10 Enjoy and share with friends!
🥗 Nutritional Information (per serving)
*Values are estimates based on standard ingredient data.
📚 You Might Also Like
Blueberry Ice Cream with Lemon Zest
Mango Sorbet with Chili
Classic Vanilla Bean Ice Cream


💬 Comments & Reviews
Leave a Comment
No comments yet. Be the first to share your thoughts!