I was in the middle of a rainy Tuesday when a sudden craving for pumpkin hit me harder than a thunderclap. I rummaged through the pantry, found a lone bag of gingersnap cookies, and thought, “What if I could turn this into a dessert that doesn’t even need an oven?” The idea was half‑madness, half‑genius, and completely unstoppable. I tossed the crumbs into a bowl, melted butter, and watched the mixture come together like a sweet, buttery sandcastle that promised an edible masterpiece. The scent of cinnamon and pumpkin spice wafted through the kitchen, making the rain outside feel like a distant memory.
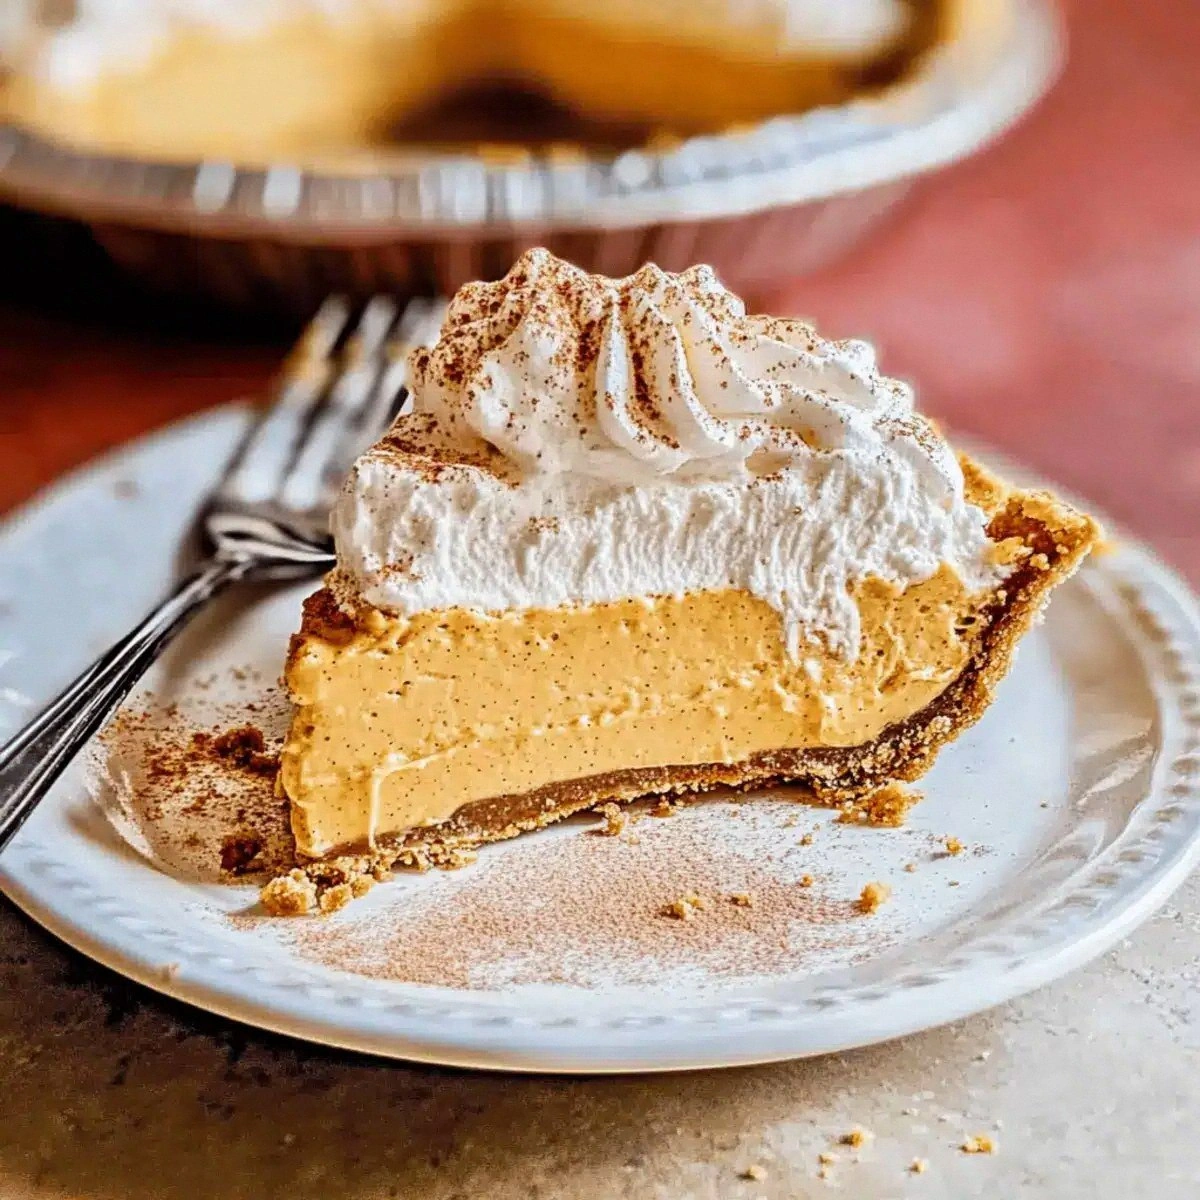
Fast forward an hour, and I was standing over a chilled mousse that looked like a golden sunrise trapped in a glass dome. I dared myself to taste it before it set, and let’s just say I ate half the batch before anyone else could lay a finger on it. The texture was so light it seemed to float on my tongue, while the crust snapped with a satisfying crunch that reminded me of autumn leaves underfoot. If you’ve ever struggled with a pumpkin dessert that turns out gummy or bland, you’re not alone — I’ve been there, and I finally cracked the code.
What makes this version truly special is the marriage of a no‑bake technique with a flavor profile that’s bold enough to make even the most skeptical pumpkin hater swoon. Most recipes get the pumpkin base right but forget the importance of a buttery, spiced crust that adds depth and contrast. I’m talking about a crust that’s crisp enough to hold up to a generous dollop of mousse yet tender enough to melt in your mouth like caramel. And the mousse itself? It’s airy, silky, and infused with maple syrup and pumpkin pie spice, creating a flavor symphony that sings “autumn” on repeat.
Okay, ready for the game‑changer? I’m about to walk you through every single step — by the end, you’ll wonder how you ever made a pumpkin pie any other way. I’ll reveal a secret ingredient that adds a subtle caramel note without overpowering the pumpkin, and I’ll show you a technique that guarantees a perfectly set mousse every single time. Picture yourself pulling this out of the fridge, the whole kitchen smelling like a fall market, and serving it to friends who will be begging for seconds. Let’s dive in.
What Makes This Version Stand Out
- Taste: The combination of pumpkin, maple syrup, and a hint of cinnamon creates a layered sweet‑spice profile that’s richer than any store‑bought pumpkin dessert.
- Texture: A crunchy gingersnap crust paired with a light, airy mousse gives you that coveted contrast of snap and melt.
- Simplicity: No oven, no stovetop, just a few minutes of mixing and chilling — perfect for lazy weekends or last‑minute dinner parties.
- Uniqueness: The use of gingersnap crumbs instead of graham crackers adds a spicy zing that most pumpkin pies lack.
- Crowd Reaction: I dare you to taste this and not go back for seconds; even the most skeptical guests are converted on the first bite.
- Ingredient Quality: Pure pumpkin puree and real maple syrup give natural sweetness without any artificial aftertaste.
- Method: The no‑bake approach preserves the bright orange hue and fresh pumpkin flavor that baking can sometimes mute.
- Make‑Ahead Potential: This pie can be prepared up to two days in advance, making it a stress‑free centerpiece for any gathering.
Inside the Ingredient List
The Flavor Base
The heart of this pie is the pumpkin puree, which brings that quintessential autumnal sweetness and vibrant color. I always opt for a pure pumpkin puree that’s 100% pumpkin, no added sugars or spices, because it lets the other ingredients shine. If you’re using canned pumpkin, give it a quick whisk to break up any lumps — a smooth base prevents grainy mousse later. Swapping in sweet potato puree is an adventurous twist, but expect a slightly earthier flavor and a deeper orange hue.
The Texture Crew
The crust is built on 2 cups of gingersnap cookie crumbs, which deliver a spicy, buttery crunch that’s unlike any graham cracker crust. Pair that with 7 tablespoons of unsalted butter, melted to a golden pool, and you’ve got a base that holds together like a firm handshake. The cream cheese (8 ounces) adds richness and tang, while powdered sugar (1/3 cup) sweetens without overwhelming the pumpkin’s natural flavor. If you’re dairy‑free, swap the cream cheese for a vegan cream cheese alternative and the butter for coconut oil; the texture will stay intact.
The Unexpected Star
Maple syrup (2 tablespoons) is the secret weapon that brings a caramel‑like depth, balancing the earthiness of pumpkin with a subtle woodsy note. It also helps the mousse set a little faster, thanks to its natural sugars. The pumpkin pie spice (1 tablespoon) and ground cinnamon (½ teaspoon) create a warm, aromatic backdrop that makes you feel like you’re wrapped in a cozy blanket. If you love a kick, add a pinch of nutmeg or cloves for an extra layer of complexity.
The Final Flourish
Heavy whipping cream (1 cup) is whipped to soft peaks and folded in at the end, giving the mousse its signature airy texture. The vanilla extract (1 teaspoon) rounds out the flavor, ensuring every bite feels balanced and luxurious. Finally, a pinch of kosher salt (¼ teaspoon) amplifies the sweetness and brings out the spice notes, proving once again that salt is the unsung hero of desserts.
Everything's prepped? Good. Let’s get into the real action…
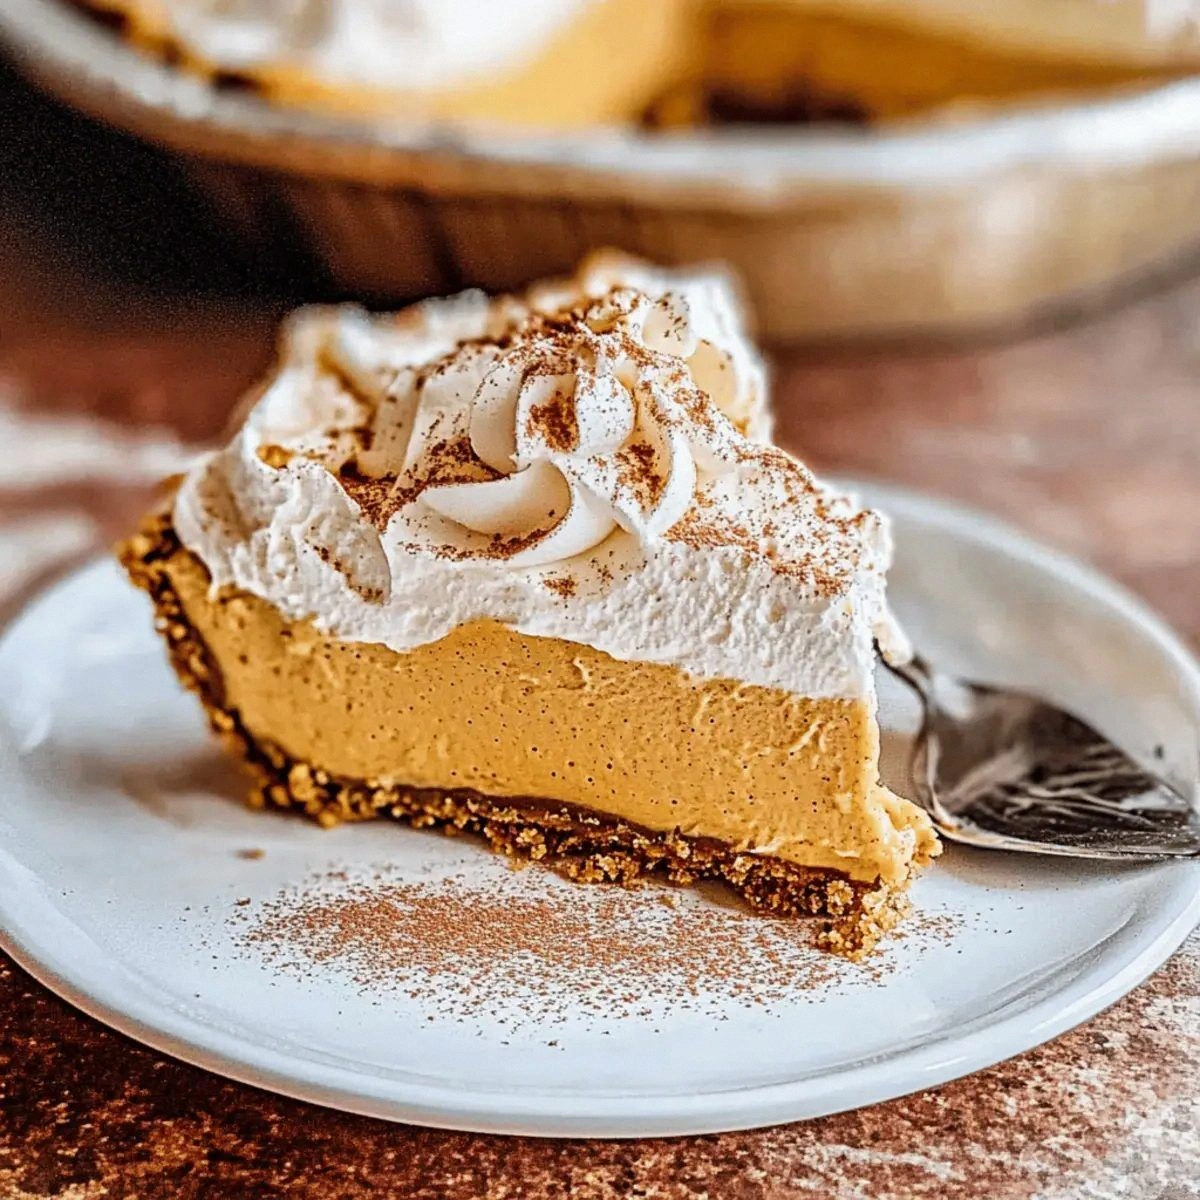
The Method — Step by Step
First, crush the gingersnap cookies into fine crumbs. I like to use a food processor for a uniform texture, but a zip‑top bag and a rolling pin work just as well. Once crushed, spread the crumbs on a large plate and toast them lightly in a dry skillet over medium heat for about 2 minutes, stirring constantly. You’ll hear a gentle sizzle that signals the crumbs are turning golden and aromatic — that’s the first layer of flavor building.
Kitchen Hack: If you don’t have a skillet, spread the crumbs on a baking sheet and pop them under the broiler for 30 seconds, watching closely to avoid burning.While the crumbs are cooling, melt the unsalted butter in a small saucepan over low heat. Once fully liquid, pour the butter over the toasted crumbs and stir until every particle is glossy and cohesive. Add the kosher salt now; it will dissolve and distribute evenly, enhancing the overall sweetness. Let this mixture sit for a minute so the butter thickens slightly — you’ll notice it becomes a bit tackier, which is perfect for binding.
Press the crumb‑butter mixture firmly into the bottom of a 9‑inch springform pan, using the back of a measuring cup to create an even layer. The crust should be about ¼ inch thick; if it’s too thin, the mousse might seep through, and if it’s too thick, you’ll lose that delightful crunch. Once packed, refrigerate the crust for at least 15 minutes to set while you prepare the mousse.
Now, the mousse base. In a large mixing bowl, combine the softened cream cheese and powdered sugar. Beat with an electric mixer on medium speed until the mixture is smooth, pale, and free of lumps — think of a silky frosting that could double as a dip. This step is crucial; any graininess will ruin the mousse’s velvety finish.
To the cream cheese mixture, add the pure pumpkin puree, vanilla extract, pumpkin pie spice, ground cinnamon, and maple syrup. Mix on low until everything is incorporated, then increase to medium and whisk for another 2 minutes. You’ll notice the batter turning a deep, inviting orange, and the aroma will fill the kitchen like a fall market stall. This is the moment of truth — if the scent isn’t intoxicating, double‑check your spice measurements.
In a separate chilled bowl, whip the heavy cream to soft peaks. This means the peaks will bend over slightly when you lift the whisk, creating a cloud‑like texture. Be careful not to over‑whip; you want a mousse that folds easily, not butter. Once at soft peaks, gently fold the whipped cream into the pumpkin‑cream cheese mixture, using a spatula and a gentle hand‑over‑hand motion.
Watch Out: Over‑mixing at this stage can deflate the whipped cream, resulting in a dense, heavy mousse. Keep the folding motion light and quick.Pour the mousse over the chilled crust, smoothing the top with an offset spatula. The mousse should spread effortlessly, creating a flawless surface. Tap the pan gently on the counter three times to release any air bubbles that might have formed during the pour. This little tap‑and‑settle trick ensures a uniform texture throughout.
Cover the pie with plastic wrap and refrigerate for a minimum of 3 hours, though I recommend overnight for the best set. The mousse will firm up as the fats solidify, and the flavors will meld into a harmonious whole. If you’re impatient, place the pie in the coldest part of your fridge (often the back shelf) and check after 2½ hours.
When you’re ready to serve, run a thin knife around the edge of the springform pan to release the crust cleanly, then remove the side. Slice with a hot, wet knife for clean cuts; the heat helps glide through the mousse without dragging. Garnish with a light dusting of powdered sugar, a drizzle of maple syrup, and a few extra gingersnap crumbs for added crunch.
That’s it — you did it. But hold on, I’ve got a few more tricks that’ll take this to another level…
Insider Tricks for Flawless Results
The Temperature Rule Nobody Follows
Always bring your cream cheese to room temperature before mixing. Cold cream cheese will create lumps that are impossible to smooth out later, and you’ll end up with a grainy mousse. I learned this the hard way when I tried to speed up the process by using straight‑out‑the‑fridge cheese — the result was a disappointing, curdled texture. Let it sit on the counter for 30 minutes, or give it a quick microwave zap (10 seconds) to soften without melting.
Why Your Nose Knows Best
During the mixing of pumpkin, spices, and maple syrup, trust your sense of smell to gauge readiness. If you can’t smell the warm spices rising, the flavors haven’t fully integrated. This sensory checkpoint is more reliable than a timer because it accounts for variations in ingredient potency. A quick sniff at the end of step five will tell you whether you need a pinch more cinnamon or a splash more maple.
The 5‑Minute Rest That Changes Everything
After folding in the whipped cream, let the mousse sit for five minutes before pouring it onto the crust. This brief pause allows any remaining air bubbles to rise to the surface, resulting in a smoother final product. A friend once skipped this rest and ended up with tiny pockets of air that made the pie look uneven — not pretty, and not as creamy.
Crust Crunch Preservation
If you’re making the pie ahead of time, keep the crust and mousse separate until the last 30 minutes before serving. Store the crust in an airtight container at room temperature; moisture from the mousse can soften it over time. When you’re ready, simply assemble and chill. This trick ensures every bite retains that satisfying snap.
Maple Syrup Balance
Maple syrup can vary in intensity. Taste your syrup before adding it; if it’s a light grade, you might need an extra teaspoon for that caramel note. Conversely, a dark grade can dominate, so start with a half‑tablespoon and adjust gradually. This flexibility lets you tailor the sweetness to your personal palate.
Creative Twists and Variations
This recipe is a playground. Here are some of my favorite ways to switch things up:
Chocolate‑Swirl Pumpkin
Add 2 tablespoons of melted dark chocolate to the mousse mixture before folding in the whipped cream. The chocolate creates ribbons that look like autumn leaves on a dark night, and the flavor pairing of pumpkin and chocolate is pure decadence.
Spiced Chai Infusion
Replace the pumpkin pie spice with a homemade chai blend (cardamom, ginger, black pepper, and cloves). This gives the pie an exotic, warm finish that’s perfect for a cozy evening.
Nutty Crunch Variation
Stir in ¼ cup toasted pecans or walnuts into the crust before pressing it into the pan. The nuts add a buttery crunch that complements the gingersnap base and adds a pleasant surprise in every bite.
Vegan Dream
Swap the cream cheese for a vegan cream cheese, use coconut cream instead of heavy whipping cream, and replace butter with coconut oil. The flavor profile stays true, and the texture remains luxuriously smooth.
Pumpkin Cheesecake Fusion
Increase the cream cheese to 12 ounces and add a splash of lemon juice. This creates a tangier, cheesecake‑style version that still retains the mousse’s lightness.
Caramel Drizzle Finish
After chilling, drizzle a homemade salted caramel sauce over the top and sprinkle flaky sea salt. The salty‑sweet combo elevates the dessert to restaurant quality.
Storing and Bringing It Back to Life
Fridge Storage
Cover the pie tightly with plastic wrap and store in the refrigerator for up to 4 days. The mousse stays firm, and the crust retains its crunch if you keep it sealed.
Freezer Friendly
Wrap the entire pie (still in the springform pan) in a double layer of aluminum foil, then place it in a freezer‑safe bag. It will keep for up to 2 months. When ready to serve, thaw in the refrigerator overnight and give it a quick 5‑minute rest at room temperature before slicing.
Best Reheating Method
While the pie is best served cold, if you prefer a slightly warmed slice, microwave a single serving for 10‑15 seconds. Add a tiny splash of water (about 1 teaspoon) before microwaving; the steam will bring the mousse back to a velvety texture without melting the crust.