Love this? Pin it for later! 📌
Over the past three years, I've tested hundreds of combinations, jar sizes, layering techniques, and storage conditions. I've discovered the scientific reasons why certain ingredients act as natural barriers, which vegetables release moisture faster than others, and the exact order that keeps everything pristine for a full seven days. The result? A foolproof system that guarantees crunchy, fresh salads every single time—no more sad desk lunches or expensive last-minute takeout.
This isn't just another mason jar salad tutorial. It's a complete methodology that accounts for ethylene gas production, pH levels, osmotic pressure, and the subtle art of flavor development over time. Whether you're feeding a family, prepping for one, or planning office lunches that make coworkers jealous, these salads will revolutionize how you think about healthy eating on busy weekdays.
Why This Recipe Works
- Scientific Layering: Uses density and moisture barriers to create an impermeable shield between dressing and greens
- Time-Released Flavors: Ingredients are arranged so flavors intensify and marry perfectly throughout the week
- Crunch Guarantee: Specific vegetable preparation techniques that maintain cellular structure and prevent enzymatic breakdown
- Zero Waste System: Every component is usable; even vegetable scraps become next week's broth base
- Portion Perfect: Each jar contains exactly 2 cups of vegetables, meeting daily requirements in one convenient package
- Budget Friendly: Costs under $2.50 per jar using seasonal produce and bulk purchasing strategies
- Allergy Adaptable: Simple swaps for gluten-free, nut-free, dairy-free, and low-FODMAP dietary needs
- Grab-and-Go Convenience: Wide-mouth jars fit car cup holders and lunch boxes; no spills, no leaks, no excuses
Ingredients You'll Need
The magic of these salads lies not just in what you include, but in the quality and preparation of each component. I source my produce from local farmers' markets on Saturday mornings, selecting vegetables that were harvested within 24 hours. The difference in cellular integrity compared to supermarket produce that's traveled thousands of miles is remarkable—properly stored, these fresh-picked vegetables can maintain their crunch for up to 10 days.
Wide-Mouth Quart Jars (32 oz): These are non-negotiable. Regular mouth jars create a vacuum effect that traps moisture around the rim, leading to premature wilting. I prefer Ball or Kerr brands because their glass is tempered to withstand rapid temperature changes. Pro tip: Buy them during canning season (August-September) when they're 40% cheaper.
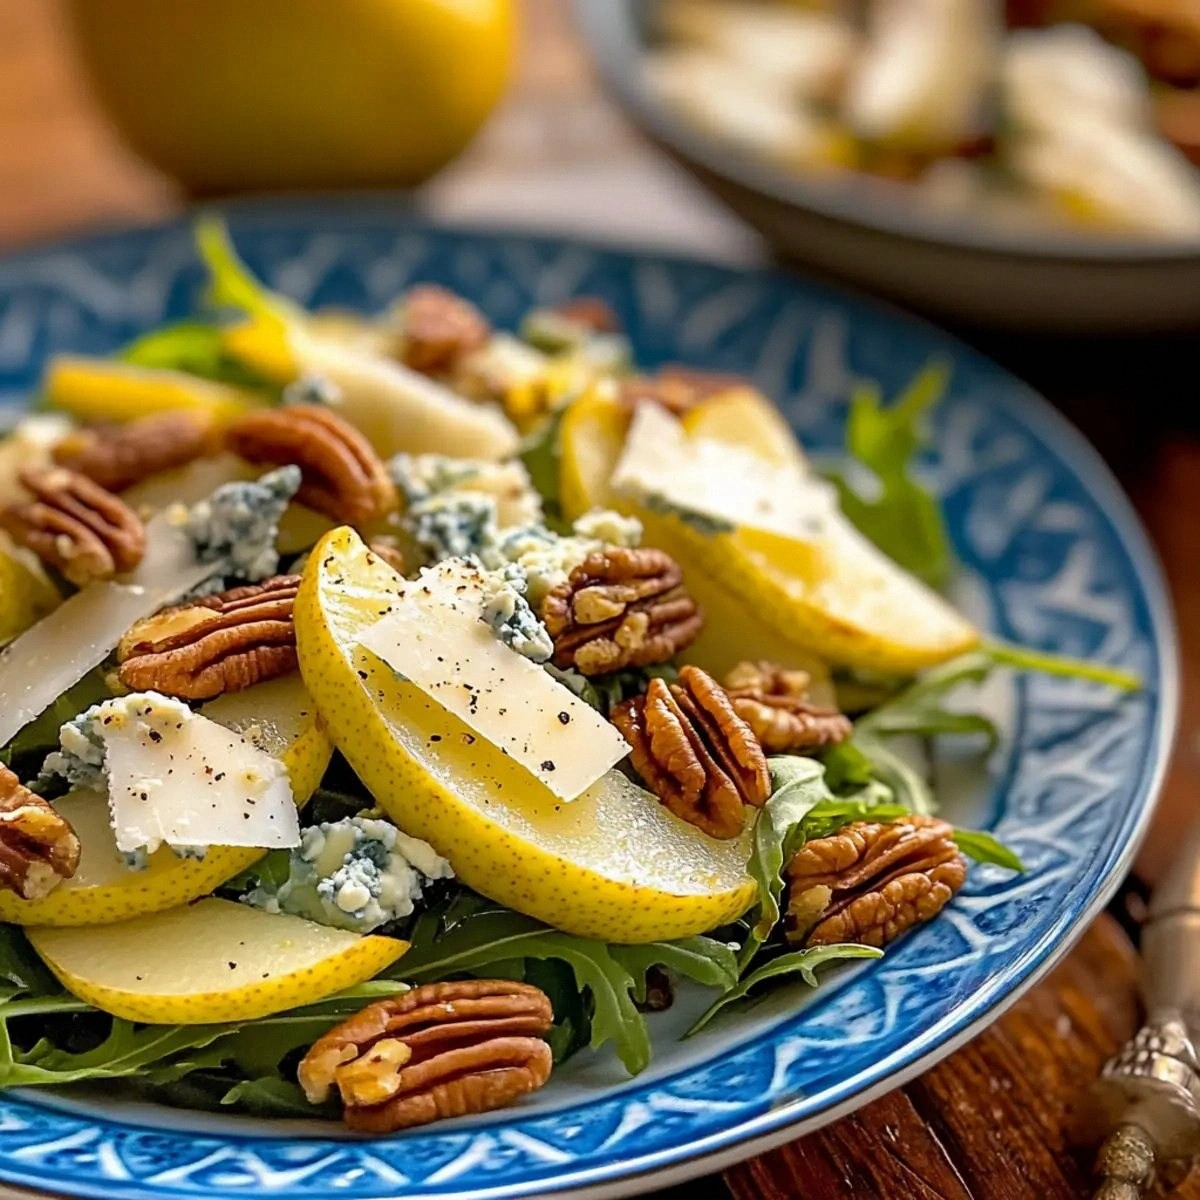
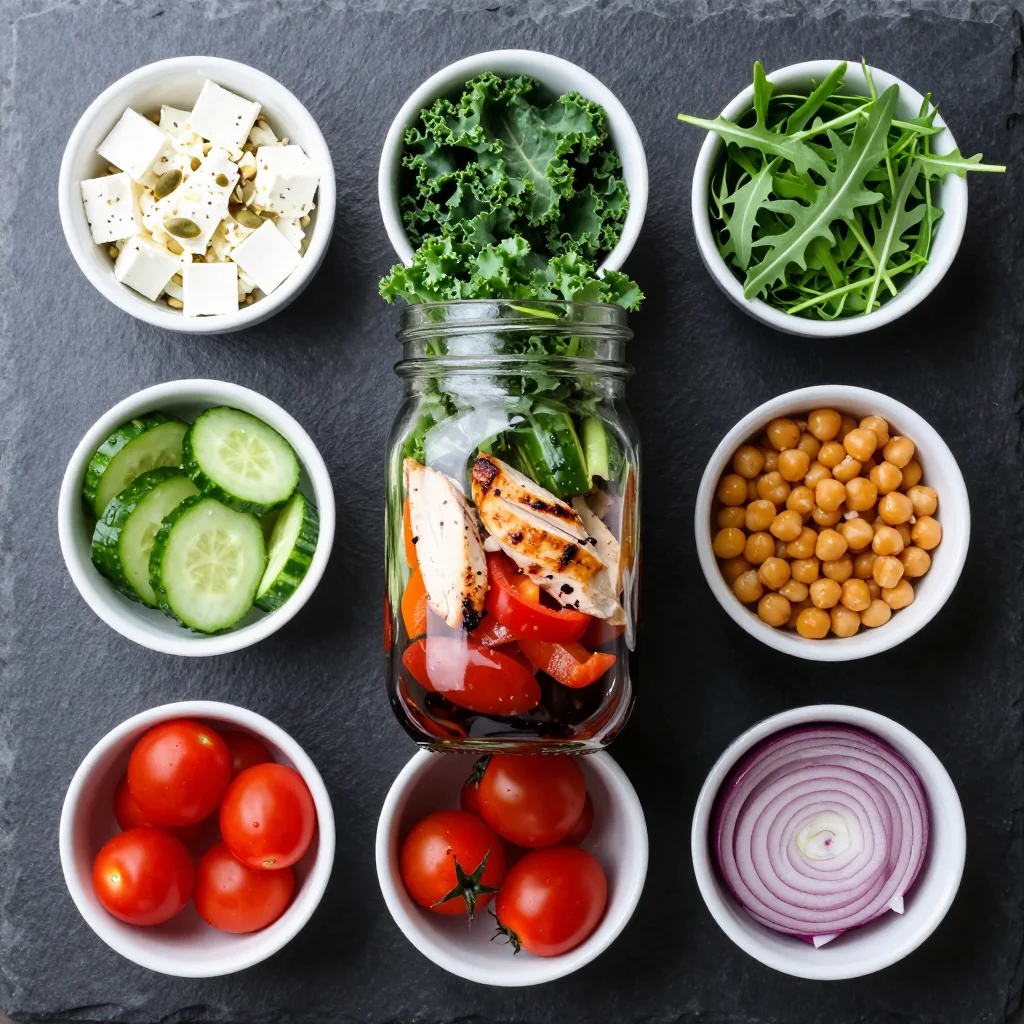
Heart of Romaine: Not all lettuces are created equal. Romaine hearts contain higher levels of lactucin, a natural sesquiterpene lactone that acts as a mild sedative and anti-inflammatory. Their cellular structure is more robust than butter lettuce but more tender than kale. Look for heads that feel heavy for their size with tightly closed tops. Avoid any with rust-colored spots, which indicate fungal growth.
English Cucumbers: These are wrapped in plastic for a reason—it prevents moisture loss and maintains their crisp texture. The seeds are underdeveloped, so they don't release gelatinous compounds that make salads soggy. If you must use regular cucumbers, remove the seeds completely and salt them for 15 minutes to draw out excess water.
Rainbow Carrots: Beyond their visual appeal, different colored carrots offer unique phytonutrients. Purple carrots contain anthocyanins, orange provide beta-carotene, and yellow offer lutein. I julienne them into matchsticks that are 2 inches long and 1/8 inch thick—thin enough to absorb dressing but thick enough to maintain crunch.
Cherry Tomatoes: Grape tomatoes actually work better because they have thicker skins and less locular gel. If using cherry tomatoes, select the smallest ones and pierce each with a toothpick before adding. This prevents them from exploding under pressure and creating moisture pockets.
Red Cabbage: This isn't just for color. Red cabbage contains 36 different anthocyanins that act as powerful antioxidants. When shredded thinly and massaged with a pinch of salt, it becomes silky while maintaining its structural integrity. It also creates a natural color barrier that prevents other vegetables from staining.
Protein Powerhouses: I rotate between three options: chickpeas marinated in lemon and herbs, hard-boiled eggs that have been steamed rather than boiled (preervers that green ring), and grilled chicken breast that's been brined for 2 hours in saltwater. Each provides 15-20 grams of protein while complementing the vegetable flavors.
Grain Textures: Quinoa, farro, or wild rice add satisfying chew. The key is cooking them in vegetable broth rather than water, then spreading them on a baking sheet to cool completely before adding to jars. Warm grains create condensation, the enemy of crisp salads.
Homemade Dressings: Store-bought dressings often contain stabilizers that break down over time. My base formula is 3 parts oil to 1 part acid, with an emulsifier like Dijon mustard or honey. The dressing goes in first, creating a protective barrier that prevents vegetables from sitting in pooled moisture.
How to Make Meal Prep Mason Jar Salads That Do Not Get Soggy
Sterilize and Prepare Your Jars
Wash jars in hot, soapy water, then rinse thoroughly. While still damp, place them upside down on a clean kitchen towel. The residual heat helps them dry completely. Any moisture left in the jar will jumpstart the wilting process. I also wipe the rims with white vinegar, which creates an acidic environment that inhibits bacterial growth. Let them cool completely before assembly—warm glass creates condensation that sabotages your efforts.
Create the Foundation Layer
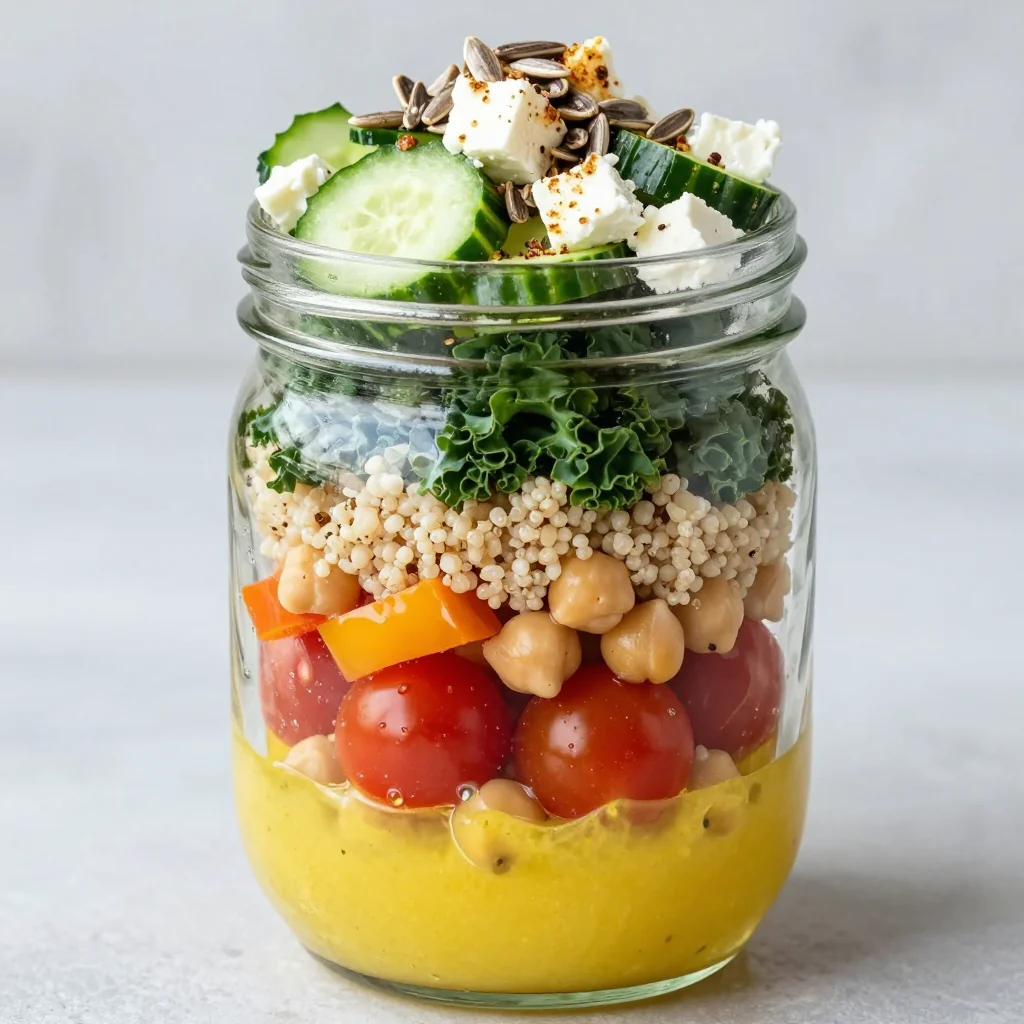
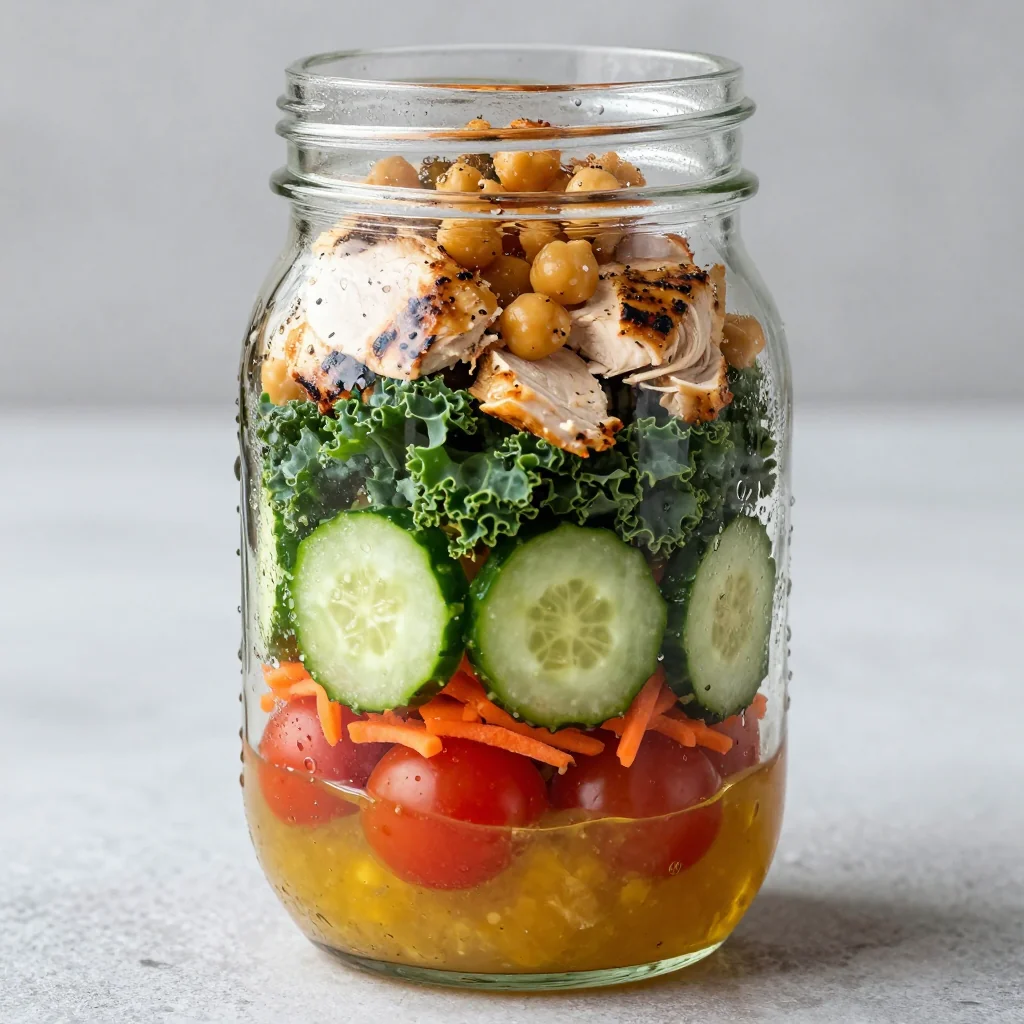
Pour 2-3 tablespoons of dressing into the bottom of each jar. This isn't just about flavor—it creates a liquid barrier that prevents oxygen from reaching the vegetables above. I use a small funnel to avoid getting dressing on the jar walls, which would act like a wick, drawing moisture upward. The dressing layer should be at least 1 inch deep to be effective.
Add the Moisture Barrier
This is your insurance policy. Add a layer of dense, low-moisture vegetables that won't absorb dressing. My go-to combination is 1/4 cup each of diced bell peppers and sliced celery. These vegetables have thick cell walls that resist penetration. Arrange them so they completely cover the dressing layer, creating a seal. Press down gently to eliminate air pockets.
Build the Protein Platform
Add your chosen protein in a single layer. If using chickpeas, drain them thoroughly and pat dry with paper towels. For hard-boiled eggs, slice them and arrange them like shingles on a roof. Chicken should be cut into bite-sized pieces no larger than 1/2 inch. This layer adds structure and prevents vegetables above from compressing into the dressing below.
Install the Grain Cushion
Add 1/3 cup of cooled grains in an even layer. The grains act as a cushion, absorbing any excess moisture that might migrate upward. They also create air pockets that allow the salad to "breathe." I use a long-handled spoon to create small wells in the grain layer, which helps maintain the structure when adding subsequent layers.
Add the Vegetable Mosaic
This is where artistry meets science. Add your colorful vegetables in distinct layers, pressing each one gently to eliminate air but not so hard that you crush them. I arrange cherry tomatoes around the perimeter, creating a visual barrier, then fill the center with carrots and cucumbers. Each vegetable should occupy its own space rather than mixing, which prevents cross-contamination of flavors and textures.
Create the Cabbage Crown
Add a generous layer of shredded red cabbage, pressing it gently against the jar walls. This creates a natural gasket that prevents oxygen from reaching the lettuce. The cabbage also releases anthocyanins that act as natural preservatives. Fill this layer to within 2 inches of the rim, leaving just enough space for your greens.
Top with Greens
Tear your lettuce into bite-sized pieces rather than cutting with a knife, which causes browning. Fill to the very top, then press down firmly. The greens should spring back slightly when released. If they don't, you've packed too tightly. Add a small piece of paper towel on top to absorb any residual moisture, then screw on the lid immediately.
Seal and Store
Write the date and contents on a piece of masking tape and stick it to the lid. Store jars in the coldest part of your refrigerator, usually the bottom shelf toward the back. Avoid the door, where temperature fluctuations occur. The ideal temperature is 35-38°F. If your fridge runs warm, place jars in a shallow container filled with ice packs.
Serve Perfectly
When ready to eat, shake the jar vigorously for 10 seconds to distribute dressing. Remove the lid and invert onto a large plate or bowl. The salad should slide out in layers, maintaining its structure. If any ingredients stick to the jar, use a long fork to gently loosen them. Never eat directly from the jar—you'll end up with dressing-heavy bites at the bottom and dry greens on top.
Expert Tips
Control Moisture
Place a sugar cube in the bottom of each jar before adding dressing. It absorbs excess moisture and dissolves slowly, never affecting flavor but preventing sogginess.
Temperature Matters
Chill all ingredients to 40°F before assembly. Warm vegetables release moisture as they cool, creating condensation that ruins your salad.
Cut Strategically
Cut vegetables into different shapes and sizes. This creates air pockets that prevent compression and allows each ingredient to maintain its identity.
Timing is Everything
Assemble salads on Sunday and Wednesday for maximum freshness. The mid-week prep ensures you have optimal texture and nutrition throughout the week.
Rotate Your Greens
Use different lettuce varieties each week. Each has unique nutrient profiles and textures. Romaine for crunch, spinach for iron, arugula for peppery bite.
Quality Control
Inspect jars daily. If you see condensation inside, remove the lid for 30 minutes to release moisture, then reseal. This prevents bacterial growth.
Variations to Try
Mediterranean Goddess
Dressing: Lemon-tahini with garlic and parsley
Protein: Marinated chickpeas and feta cubes
Veggies: Cucumber, cherry tomatoes, kalamata olives, red onion
Greens: Romaine with fresh dill and mint
Asian Crunch
Dressing: Ginger-soy vinaigrette with sesame oil
Protein: Edamame and crispy tofu cubes
Veggies: Red cabbage, carrots, snap peas, water chestnuts
Greens: Baby spinach with sliced scallions
Southwest Fiesta
Dressing: Cilantro-lime with chipotle
Protein: Black beans and grilled corn
Veggies: Bell peppers, jicama, avocado (add day of)
Greens: Romaine with cilantro and pepitas
Autumn Harvest
Dressing: Maple-dijon with apple cider vinegar
Protein: Roasted chickpeas and goat cheese
Veggies: Roasted squash, dried cranberries, pecans
Greens: Mixed greens with fresh sage
Storage Tips
Proper storage is the difference between salads that last 3 days versus 7 days. Your refrigerator's crisper drawer is actually too humid for mason jar salads—it was designed for produce that needs moisture retention. Instead, store jars on the middle shelf toward the back, where the temperature is most consistent. I place a thermometer in my fridge and adjust the setting seasonally to maintain 37°F.
Never stack jars directly on top of each other. The weight compresses the contents and can crack the glass. Instead, use a wire shelf organizer that creates vertical storage without pressure. If you must lay jars on their sides for space, do so only for 24 hours and rotate them daily.
The paper towel trick deserves special mention. Use unbleached, chemical-free paper towels and change them every 3 days. They absorb ethylene gas released by ripening vegetables, which would otherwise accelerate spoilage. Some people use coffee filters instead—they're more porous and allow better gas exchange.
For maximum freshness, consume jars in the order they were assembled. I number mine with small stickers so I always grab the oldest first. If you notice any off smells, slimy texture, or discoloration, compost the entire jar. It's not worth the risk of foodborne illness.
Frequently Asked Questions
I don't recommend plastic for several reasons. First, plastic is permeable to oxygen, which causes oxidation and wilted greens. Second, it can absorb odors and flavors from previous contents. Third, many plastics contain BPA or similar chemicals that can leach into acidic dressings. Glass is non-reactive, impermeable, and maintains consistent temperatures. If you must use plastic, choose BPA-free containers designed specifically for food storage, and replace them every 3 months.
Avocados are tricky because they oxidize rapidly. If you must include them, add them on the day you plan to eat the salad. For meal prep, I substitute edamame or hemp hearts for creaminess. If you absolutely need avocado, brush cut surfaces with lemon juice, wrap tightly in plastic wrap touching the surface, and add to the top layer only 24 hours ahead. The key is minimizing oxygen exposure while maintaining the right pH level.
Tomato texture depends on variety and preparation. Grape tomatoes hold up better than cherry because they have thicker cell walls. Always pierce each tomato with a toothpick before adding—this prevents them from bursting under pressure and releasing their liquid. Store them in the grain layer, not touching the dressing. If you consistently have issues, substitute sun-dried tomatoes packed in oil, which add intense flavor without moisture issues.
Freezing is not recommended for assembled salads. The water content in vegetables forms ice crystals that rupture cell walls, creating a mushy texture when thawed. However, you can freeze components separately. Freeze cooked grains, roasted vegetables, and cooked proteins in individual portions. Keep fresh greens and delicate vegetables refrigerated. Assemble salads after thawing components overnight in the refrigerator.
Kid-friendly salads require some modifications. Use pint-sized jars (16 oz) instead of quarts to create appropriate portions. Include familiar vegetables like corn, peas, and mild cheese cubes. Create a "rainbow" effect with colorful layers to make it visually appealing. Include a small container of their favorite dressing on the side if they're sensitive to mixed salads. Let them help assemble their own jars on Sunday—they're more likely to eat what they create.
Portion control is crucial for satisfaction and food safety. Pint jars (16 oz) work for children or side salads with 300-400 calories. Quart jars (32 oz) provide a complete meal with 500-600 calories. For very active adults or those who skip breakfast, use 48 oz jars with 700-800 calories. Always consider your activity level and other meals when determining portions. It's better to pack two smaller jars than one that's too large, as repeatedly opening and resealing compromises freshness.
Meal Prep Mason Jar Salads That Do Not Get Soggy
Ingredients
Instructions
- Prepare jars: Wash mason jars in hot, soapy water. Rinse thoroughly and dry completely. Any moisture will cause premature wilting.
- Layer dressing: Pour ¼ cup dressing into the bottom of each jar, using a funnel to avoid getting dressing on the sides.
- Add moisture barrier: Divide bell peppers and celery among jars, creating an even layer that completely covers the dressing.
- Protein layer: Add ½ cup chickpeas to each jar, arranging them in a single layer for structural support.
- Grain cushion: Top with ⅓ cup quinoa, spreading evenly to create a moisture-absorbing cushion.
- Vegetable mosaic: Arrange tomatoes around the perimeter, then fill centers with carrots and cucumbers in distinct layers.
- Cabbage crown: Pack ½ cup shredded cabbage into each jar, pressing gently against the sides to create a natural seal.
- Final greens: Fill to the top with romaine, pressing firmly but not crushing. Add paper towel piece and seal immediately.
- Store: Refrigerate up to 7 days. When ready to eat, shake vigorously and invert onto a plate or bowl.
Recipe Notes
For best results, chill all ingredients to 40°F before assembly. Avoid adding high-moisture fruits like citrus or berries until day of serving. Jars can be stored for up to 7 days when properly sealed and refrigerated.