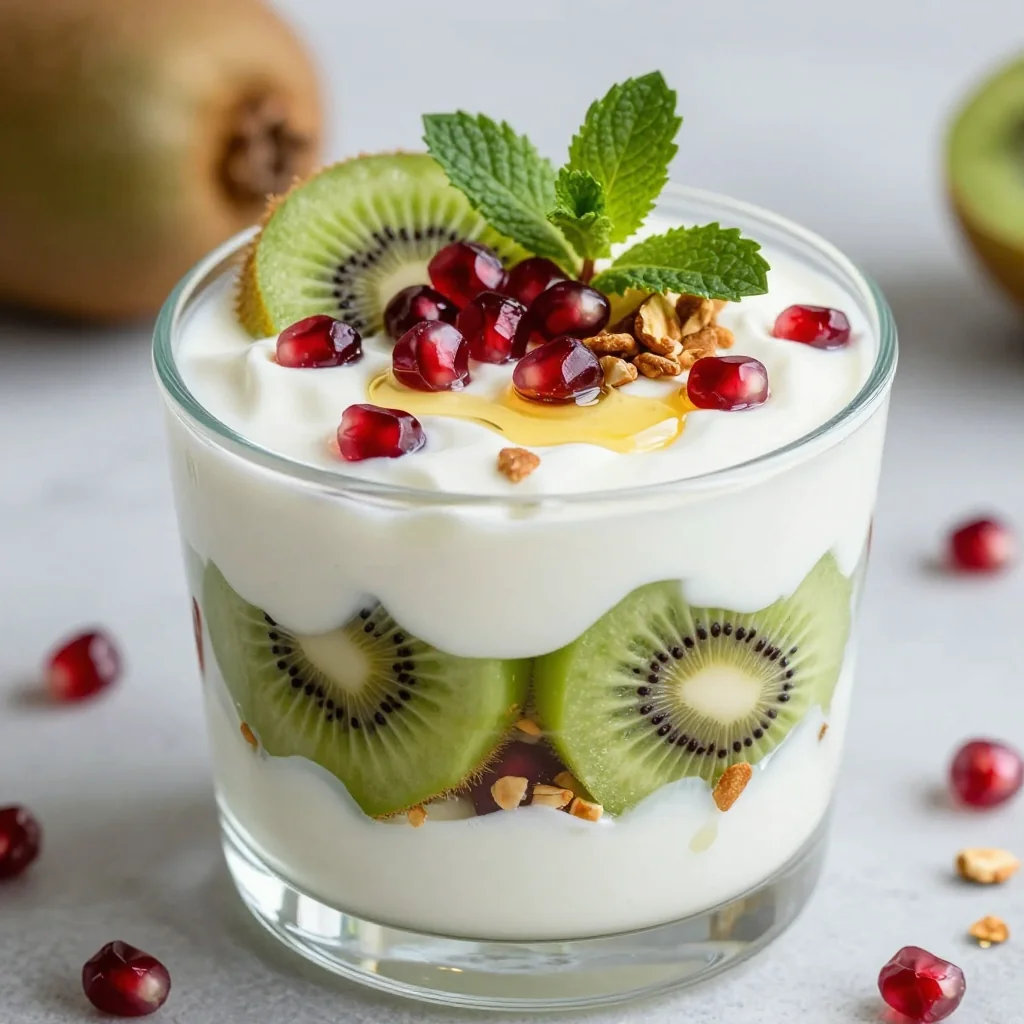
Love this? Pin it for later! 📌
Indulge in a silky, nutrient-packed dessert that satisfies your chocolate cravings while giving your body a gentle detox. This Healthy Chocolate Chia Pudding has become my go-to treat after discovering how simple healthy eating can be—no complicated ingredients, no guilt, just pure deliciousness that makes you feel amazing from the inside out.
Why This Recipe Works
- Effortless Preparation: Just 5 minutes of active time, then the fridge does all the work while you sleep
- Detox Powerhouse: Chia seeds are packed with fiber that helps eliminate toxins and supports digestive health
- Antioxidant Rich: Raw cacao powder provides powerful antioxidants that combat free radicals
- Meal Prep Friendly: Stays fresh for up to 5 days, making it perfect for weekly dessert planning
- Customizable Sweetness: Control the sugar content with natural sweeteners like maple syrup or dates
- Protein Boost: Naturally high in plant-based protein to keep you satisfied longer
- Family Approved: Even picky eaters love the rich chocolate flavor without detecting the health benefits
Last summer, after returning from a week-long wellness retreat where I learned about the incredible benefits of chia seeds, I was determined to incorporate them into my daily routine. The problem? I have an insatiable sweet tooth. Traditional desserts left me feeling sluggish and guilty, especially during bikini season. That's when this chocolate chia pudding became my saving grace. It's become my signature dessert for dinner parties—guests always request the recipe, shocked to discover it's actually good for them!
What makes this recipe truly special is its versatility. Whether you're hosting a fancy dinner party, meal prepping for the week, or simply treating yourself after a long day, this pudding delivers restaurant-quality results with minimal effort. The texture transforms magically overnight from a liquid mixture to a luxurious, spoonable dessert that rivals any chocolate mousse you've ever tasted.
Ingredients You'll Need
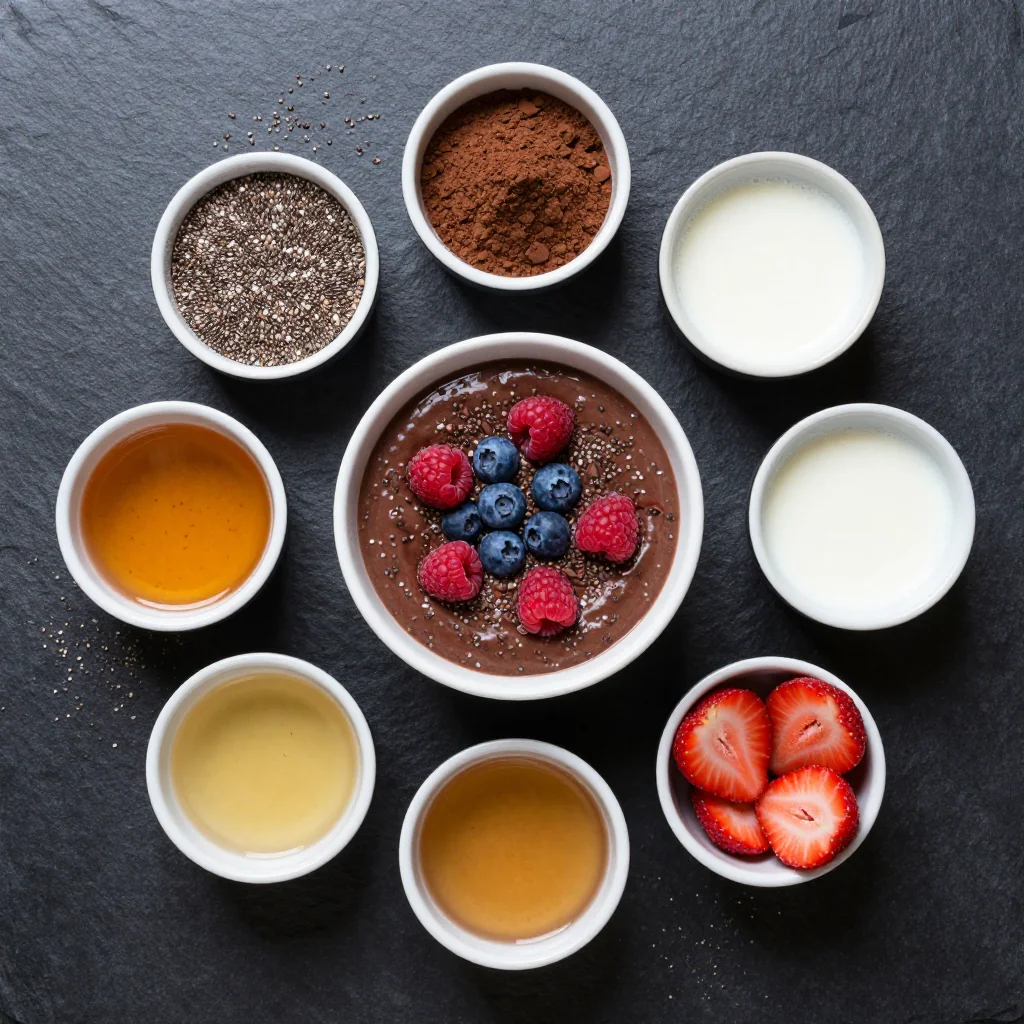
The beauty of this recipe lies in its simplicity. Each ingredient serves a specific purpose, creating a harmonious blend of nutrition and indulgence. Let me walk you through what makes each component essential:
Chia Seeds (1/2 cup)
These tiny powerhouses are the star of the show. When shopping, look for organic, black chia seeds rather than white—they have a slightly nuttier flavor and create the perfect gel-like consistency. Store them in an airtight container in a cool, dry place for up to 2 years. If you can only find ground chia seeds, reduce the quantity by 25% as they're more concentrated.
Raw Cacao Powder (1/4 cup)
Not to be confused with regular cocoa powder, raw cacao is made by cold-pressing unroasted cocoa beans. This process preserves living enzymes and removes fat while maintaining a rich chocolate flavor. It's significantly higher in antioxidants and magnesium than processed cocoa. Look for fair-trade, organic varieties with no added sugars. If you must substitute, use Dutch-processed cocoa powder but reduce the sweetener slightly as it's less bitter than cacao.
Coconut Milk (2 cups, full-fat)
The creaminess of full-fat coconut milk is essential for achieving that luxurious texture. I prefer using canned coconut milk for its rich consistency and healthy fats. Shake the can well before opening to incorporate the cream that rises to the top. For a lighter version, you can use 1 cup full-fat coconut milk mixed with 1 cup almond milk. Avoid coconut milk beverages in cartons—they're too watery and often contain additives.
Pure Maple Syrup (3-4 tablespoons)
Grade A amber maple syrup provides the perfect balance of sweetness without overwhelming the chocolate flavor. It's lower on the glycemic index than regular sugar and contains minerals like zinc and manganese. For a sugar-free option, substitute with monk fruit sweetener or stevia, but start with small amounts as they're much sweeter. Date syrup works beautifully too, adding a caramel undertone.
Vanilla Extract (1 teaspoon)
Always choose pure vanilla extract over imitation for the best flavor. The alcohol in the extract helps bloom the chocolate flavor while adding depth. For an extra special touch, try using vanilla bean paste or the seeds from half a vanilla bean.
Sea Salt (1/4 teaspoon)
A pinch of high-quality sea salt enhances the chocolate flavor and balances the sweetness. Himalayan pink salt or Celtic sea salt both work wonderfully. Don't skip this—it makes a remarkable difference in the final taste.
How to Make Healthy Chocolate Chia Pudding for Detox Desserts
Combine the Base Ingredients
In a large mixing bowl or a quart-sized mason jar, whisk together the coconut milk, maple syrup, vanilla extract, and sea salt until completely smooth. Make sure there are no lumps of coconut cream—this step is crucial for achieving that ultra-smooth texture. If your coconut milk has separated, warm it slightly in the microwave for 15-20 seconds to help it incorporate more easily.
Bloom the Cacao
Sift the cacao powder through a fine-mesh strainer directly into the liquid mixture to prevent lumps. Whisk vigorously for at least 2 minutes, ensuring all the cacao is fully incorporated and there are no dry pockets. This process, known as blooming, helps dissolve the cacao particles and develop a deeper chocolate flavor. The mixture should be rich and glossy, resembling melted chocolate.
Add the Chia Seeds
Slowly sprinkle the chia seeds into the chocolate mixture while whisking continuously. This prevents clumping and ensures even distribution. Once all the seeds are added, continue whisking for another minute to make sure every seed is coated in the chocolate mixture. This step is critical—if seeds clump together, you'll end up with unpleasant lumps in your final pudding.
Initial Rest Period
Let the mixture rest for 5 minutes—this allows the chia seeds to begin absorbing the liquid and prevents them from settling at the bottom. During this time, the mixture will start to thicken slightly. This brief pause makes a significant difference in the final texture.
Final Mix and Container Transfer
Give the mixture another good stir, breaking up any seeds that may have started to clump together. Pour into your desired serving containers—individual mason jars work beautifully for grab-and-go portions, or use a large container if you prefer to portion later. Make sure to leave at least an inch of space at the top for expansion.
The Overnight Transformation
Cover tightly with lids or plastic wrap and refrigerate for at least 6 hours, preferably overnight. During this magical transformation, the chia seeds absorb up to 10 times their weight in liquid, creating that pudding-like consistency. For the first hour, give the mixture a quick stir every 15 minutes to prevent seeds from settling. After that, let it rest undisturbed.
Quality Check and Adjustments
After the initial setting period, check the consistency. If it seems too thick, whisk in a splash of coconut milk or almond milk until you reach your desired texture. If too thin, add another tablespoon of chia seeds and let set for another hour. The perfect consistency should coat the back of a spoon but still be easily spoonable.
Final Flavor Enhancement
Before serving, give the pudding a good stir to redistribute the chia seeds evenly. Taste and adjust sweetness if needed—sometimes a touch more maple syrup brings out the chocolate notes beautifully. For an extra luxurious texture, blend half the pudding in a high-speed blender for 30 seconds, then fold it back into the unblended portion.
Expert Tips
Temperature Matters
Start with room temperature coconut milk for better blending. Cold coconut milk can cause the chia seeds to clump, while warm milk speeds up absorption too quickly, creating a rubbery texture.
Timing is Everything
For the smoothest texture, make your pudding 24-48 hours before serving. The extra time allows the flavors to meld beautifully and the chia seeds to fully hydrate, resulting in a silkier consistency.
Prevent Lumps
If you notice lumps forming during the setting process, don't panic. Simply use an immersion blender for 15-20 seconds to break them up. This creates an incredibly smooth, mousse-like texture.
Flavor Development
Add a shot of espresso or 1/2 teaspoon of instant coffee to deepen the chocolate flavor. The coffee enhances the cacao's natural notes without making the pudding taste like coffee.
Seed Quality Check
Test your chia seeds' freshness by placing a tablespoon in water. Fresh seeds will float briefly then sink and form a gel within 15 minutes. Old seeds won't gel properly, resulting in runny pudding.
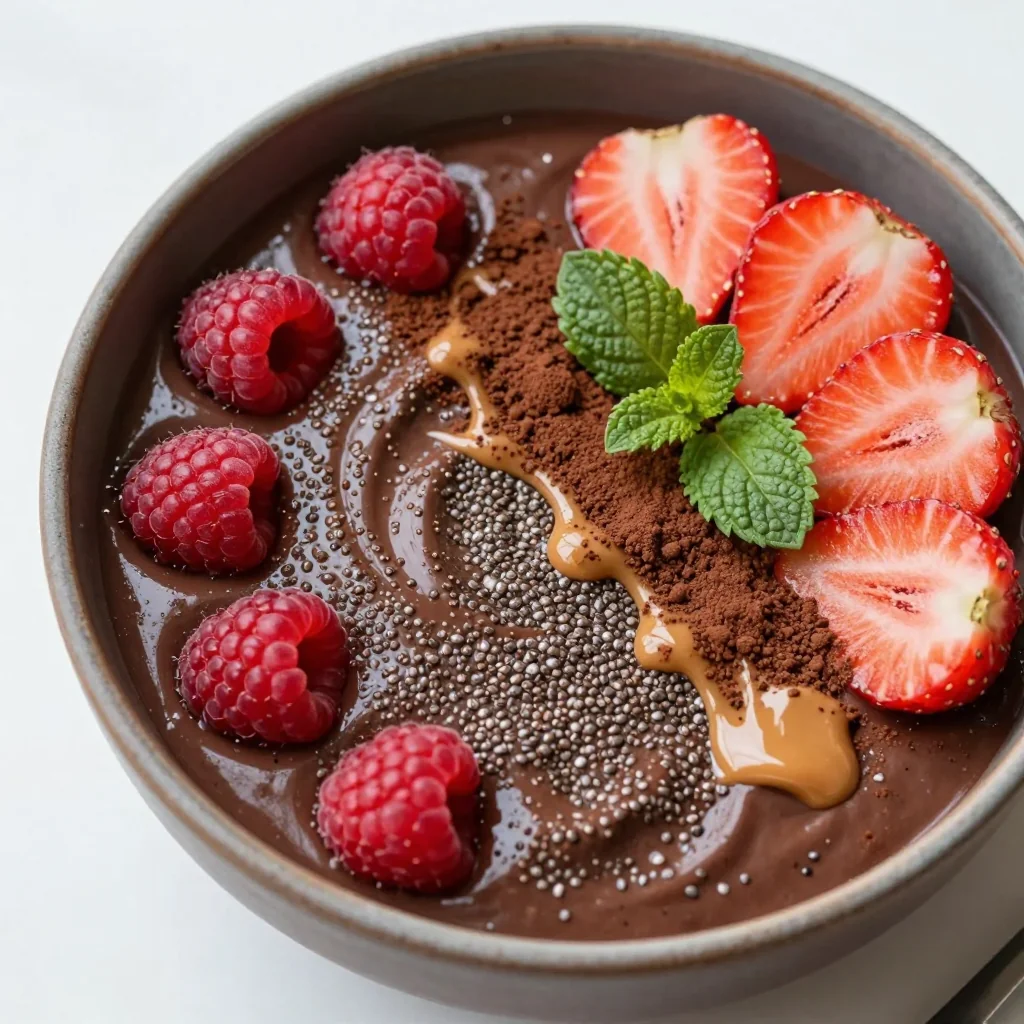
Presentation Perfect
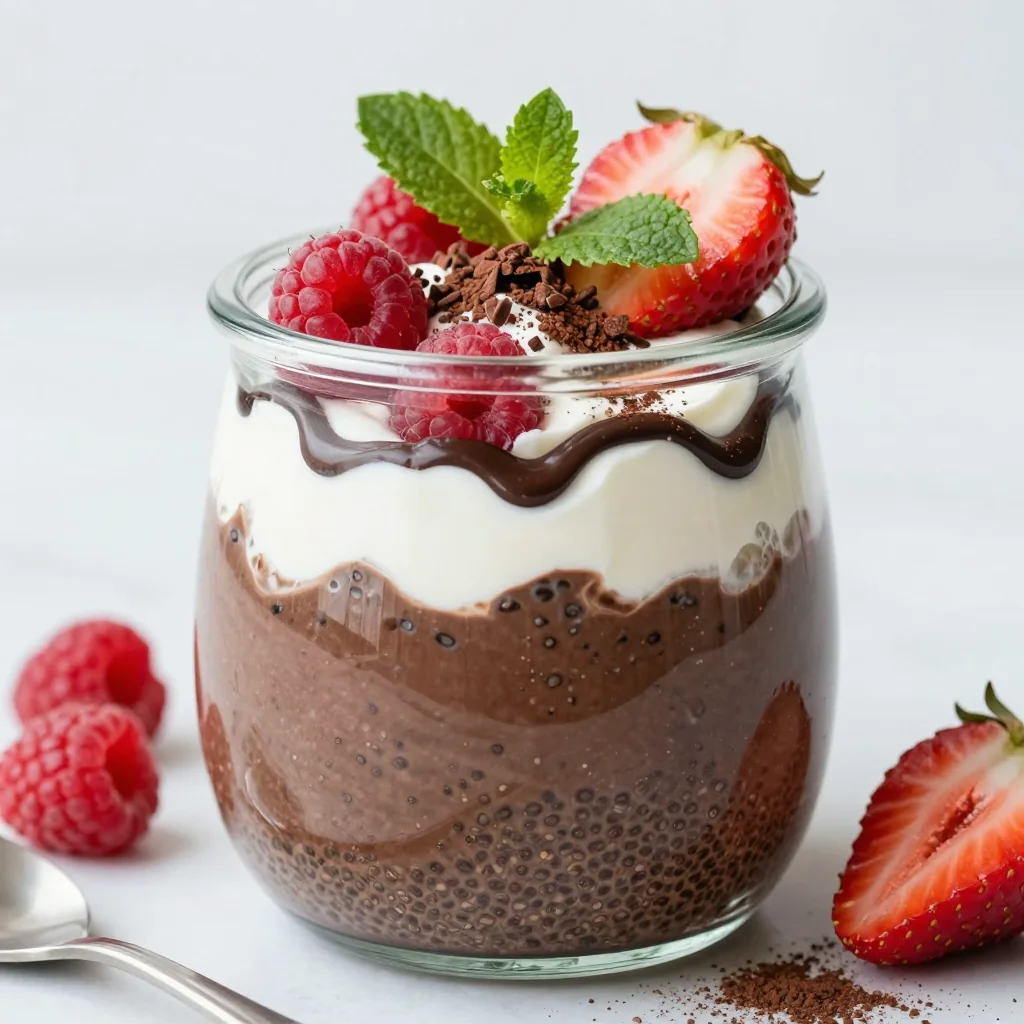
Layer your pudding with fresh berries or banana slices for a stunning parfait effect. The bright colors against the dark chocolate create an Instagram-worthy dessert that tastes as good as it looks.
Variations to Try
Mint Chocolate
Add 1/4 teaspoon peppermint extract and garnish with fresh mint leaves. Perfect for hot summer days when you need a refreshing treat.
Mexican Hot Chocolate
Add 1/2 teaspoon cinnamon, a pinch of cayenne, and an extra pinch of sea salt. This warming variation is perfect for cooler months.
Peanut Butter Cup
Swirl in 2 tablespoons of natural peanut butter before refrigerating. The combination of chocolate and peanut butter is irresistible.
White Chocolate Dreams
Replace cacao with vanilla protein powder and add 2 tablespoons cocoa butter for a white chocolate version that's equally indulgent.
Orange Chocolate
Add 1 teaspoon orange zest and substitute 2 tablespoons of maple syrup with fresh orange juice for a bright, citrusy twist.
Mocha Madness
Replace 1/2 cup of coconut milk with strong, cooled coffee for an adult version that provides a gentle caffeine boost.
Storage Tips
Proper storage is key to maintaining the perfect texture and maximizing the health benefits of your chocolate chia pudding. Here are my tried-and-true methods for keeping your pudding fresh and delicious:
Refrigerator Storage
Store in airtight containers or mason jars with tight-fitting lids. The pudding will keep for up to 5 days in the refrigerator, though it's best within the first 3 days for optimal texture. Keep away from strong-smelling foods as chia seeds can absorb odors. If you notice any separation, simply give it a good stir before serving.
Freezing Instructions
While chia pudding can be frozen, the texture changes upon thawing. Freeze in individual portions for up to 2 months. Thaw overnight in the refrigerator, then blend briefly to restore the smooth texture. Frozen portions make excellent smoothie additions—just blend with additional liquid for a nutrient-packed breakfast.
Meal Prep Success
Prepare individual servings in 4-ounce mason jars for grab-and-go convenience. These travel well to work or school when packed with an ice pack. For best results, add toppings just before serving to maintain their texture and freshness.
Frequently Asked Questions
Absolutely! While coconut milk provides the richest texture and healthy fats, you can substitute with any milk. Almond milk creates a lighter version, while cashew milk offers creaminess similar to coconut milk. Dairy milk works too, though the pudding won't be vegan. For thicker results with lighter milks, increase chia seeds by 1 tablespoon.
Several factors can cause runny pudding. Old chia seeds lose their gelling ability—test fresh seeds in water first. Ratios might need adjustment: add 1-2 more tablespoons of chia seeds and let set another 2 hours. Temperature matters too—make sure your milk isn't too cold. Finally, give it a good stir after the first hour of setting to redistribute seeds evenly.
Yes, with modifications! Replace maple syrup with stevia or monk fruit sweetener—start with a small amount as they're much sweeter. The chia seeds actually help regulate blood sugar by slowing glucose absorption. Each serving contains approximately 15g of carbs naturally from the chia seeds and coconut milk, making it a good low-carb option when sweetened appropriately.
Children can absolutely enjoy this pudding! It's a fantastic way to sneak in nutrients without them noticing. Reduce the cacao powder slightly for younger palates, and consider using cocoa powder instead of raw cacao for a milder flavor. For toddlers, blend the pudding after setting for a smoother texture that's easier to eat. The omega-3s support brain development, making it a healthy dessert option.
This recipe is naturally nut-free when using coconut milk! If you need to avoid coconut due to allergies, substitute with oat milk, rice milk, or hemp milk. Soy milk provides the most protein but may alter the flavor. For the creamiest nut-free version, use 1 1/2 cups oat milk mixed with 1/2 cup hemp milk.
Chia seeds are exceptional for detoxification due to their high fiber content, which binds to toxins and helps eliminate them through the digestive system. They're also rich in omega-3s that reduce inflammation. Raw cacao contains powerful antioxidants that combat free radicals, while its magnesium supports liver detoxification pathways. The healthy fats in coconut milk help absorb fat-soluble vitamins, supporting overall cellular detoxification.
Healthy Chocolate Chia Pudding for Detox Desserts
Ingredients
Instructions
- Mix liquid base: Whisk coconut milk, maple syrup, vanilla, and sea salt until smooth.
- Add cacao: Sift cacao powder into liquid and whisk for 2 minutes until completely smooth.
- Stir in chia: Slowly add chia seeds while whisking continuously to prevent clumps.
- Rest and stir: Let rest 5 minutes, then stir again to redistribute seeds.
- Refrigerate: Cover and refrigerate 6 hours or overnight until thick and pudding-like.
- Stir and serve: Give a final stir and top with desired toppings before serving.
Recipe Notes
For ultra-smooth texture, blend half the pudding before serving. Pudding thickens as it chills—add more milk if needed to thin. Store up to 5 days refrigerated.