I was standing in my kitchen on a rainy Tuesday, staring at a half‑cooked chicken casserole that looked like a sad, soggy pancake. The smell was somewhere between burnt butter and “what‑did‑I‑just‑do?” and my roommate was already asking if I was serving “something that belongs in a science lab.” I dared her to taste it, and she promptly ran for the door. That disaster sparked a fire under me, and I promised myself I would create a version that could turn even the most skeptical palate into a fan. I spent a week testing, tasting, and tweaking until the final product was so good I’d be lying if I said I didn’t eat half the batch before anyone else could try it.
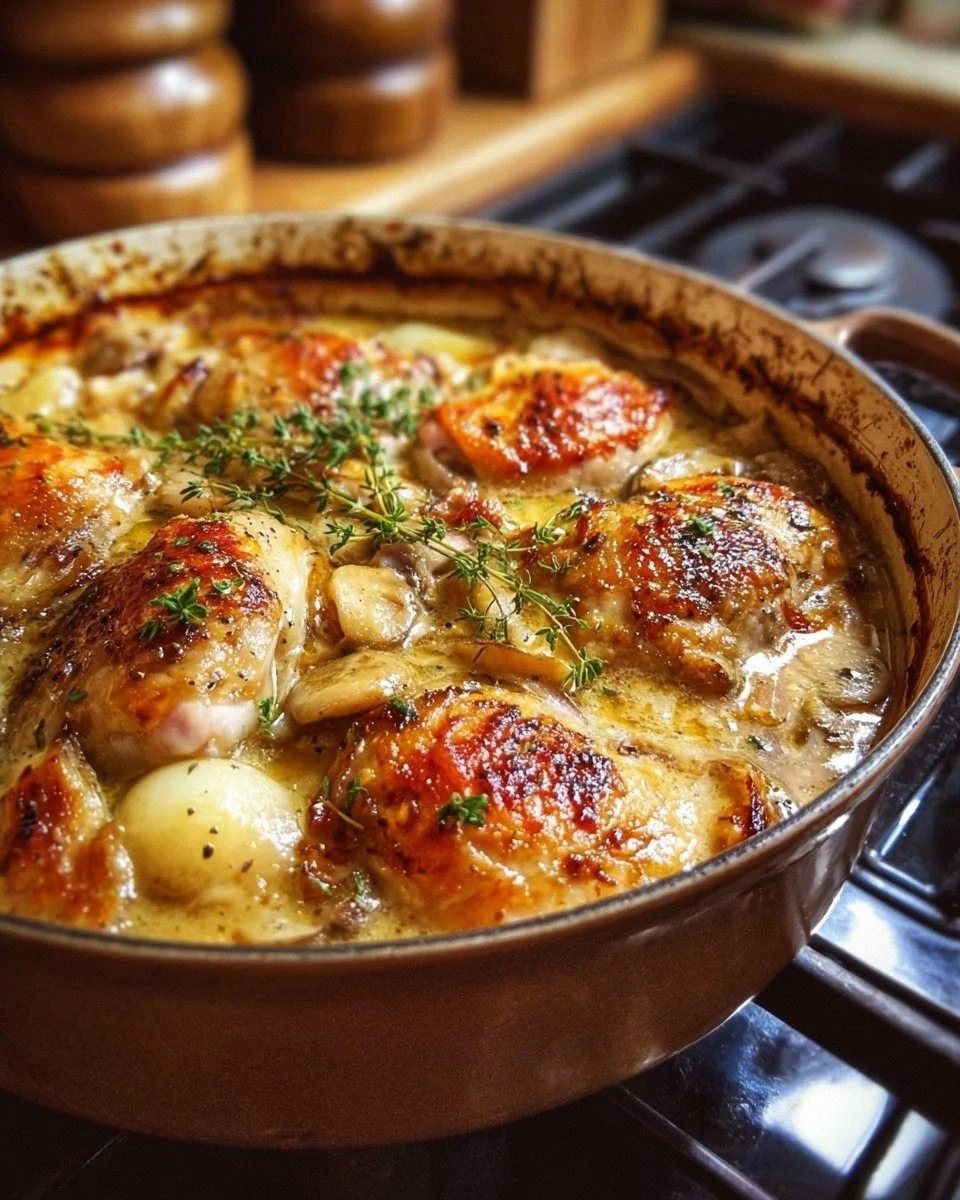
Picture this: a golden‑brown crust that crackles like fresh autumn leaves, a creamy interior that clings to every bite like a silky blanket, and tender chicken pieces that melt in your mouth as if they were whispering a French love poem. The aroma hits you first – a warm, herb‑infused perfume that makes the whole house feel like a Parisian bistro on a lazy Sunday. When you finally dig in, the flavors explode: the subtle sweetness of carrots, the pop of peas, the buttery richness of cream, all balanced by a hint of rosemary that lingers on the tongue like a lingering encore. The texture? Imagine a perfect marriage between a velvety sauce and a crunchy breadcrumb crown that shatters with a satisfying snap.
Most recipes get this completely wrong. They either drown the chicken in a swamp of sauce or leave the topping soggy and sad. My version solves both problems with a two‑stage cooking method: first, we sauté the chicken and aromatics to develop a deep, caramelized flavor, then we bake it just long enough for the top to turn crisp without overcooking the interior. The secret ingredient? A splash of chicken broth that adds depth without watering down the cream, and a dash of thyme that lifts the whole dish into a higher culinary plane.
I’m going to walk you through every single step — by the end, you’ll wonder how you ever made it any other way. Okay, ready for the game‑changer? This next part? Pure magic. Let’s dive in and turn that kitchen disaster into a masterpiece that will have everyone begging for seconds.
What Makes This Version Stand Out
- Flavor Depth: The combination of chicken broth and cream creates a sauce that coats the chicken like velvet, while the herbs add a fragrant, earthy backbone.
- Texture Contrast: A crunchy breadcrumb topping sits atop a luxuriously creamy interior, giving you that satisfying bite‑and‑crunch sensation.
- Simplicity: Only ten core ingredients, all easily found at any grocery store, mean you spend less time shopping and more time eating.
- Uniqueness: The use of mixed vegetables (carrots, peas, corn) adds bursts of sweetness and color, turning a humble casserole into a visual feast.
- Crowd Reaction: I dare you to taste this and not go back for seconds – even the most picky eaters are converted.
- Ingredient Quality: Fresh, boneless chicken breasts give you that juicy bite, while a good quality cheese provides a melty, golden finish.
- Cooking Method: Sauté‑then‑bake ensures the chicken stays moist and the topping stays crisp, a technique most recipes overlook.
- Make‑Ahead Potential: This casserole freezes beautifully, so you can prep on a Sunday and enjoy a gourmet dinner any night of the week.
Inside the Ingredient List
The Flavor Base
The onion and garlic are the aromatic foundation. When you sauté them until they turn translucent and fragrant, they release natural sugars that add a subtle sweetness to the sauce. If you skip them, the casserole will taste flat, like a song missing its chorus. For a deeper flavor, try caramelizing the onions a minute longer – they’ll turn golden and develop a rich, almost nutty undertone.
The Texture Crew
Mixed vegetables bring color, bite, and a gentle sweetness that balances the richness of the cream. Carrots add a slight crunch, peas pop with fresh earthiness, and corn contributes a buttery note. If you’re allergic to corn, swap it for diced zucchini or green beans – the texture will stay lively, and the flavor will remain bright.
The Unexpected Star
The chicken broth is the unsung hero. It adds a savory depth without diluting the sauce, and because it’s Halal‑friendly, you can serve this dish to a wide range of guests. Skipping the broth makes the sauce too thick and heavy. If you want an extra umami kick, splash in a tablespoon of soy sauce or a pinch of miso paste – just keep the salt in check.
The Final Flourish
Cheese and breadcrumbs are the crowning glory. The cheese melts into the sauce, creating a glossy, indulgent finish, while the breadcrumbs form that golden crust we all crave. Use a blend of cheddar and mozzarella for a balance of sharpness and stretch. If you’re dairy‑free, substitute the cheese with a plant‑based alternative and use panko breadcrumbs for extra crunch.
Everything's prepped? Good. Let's get into the real action...
The Method — Step by Step
Preheat your oven to 375°F (190°C). While the oven warms up, pat the chicken breasts dry with paper towels – this simple step ensures they brown instead of steam. I like to season the cubes with a pinch of salt, pepper, thyme, and rosemary right now; the herbs will start to release their oils, creating a fragrant coating.
Heat 2 tablespoons of olive oil in a large, oven‑safe skillet over medium‑high heat. When the oil shimmers, add the chicken cubes in a single layer. Let them sizzle without moving for about 2‑3 minutes; that sear is the flavor foundation. That sizzle when it hits the pan? Absolute perfection. Flip the pieces and brown the other side for another 2 minutes.
Kitchen Hack: Deglaze the pan with a splash of broth now to capture all those brown bits – they’re flavor gold.Add the chopped onion and minced garlic to the skillet. Cook, stirring occasionally, until the onion turns translucent and the garlic is fragrant, about 2 minutes. This is where the aroma really starts to fill the kitchen, making your neighbors wonder what you’re cooking.
Watch Out: Keep the heat on medium; too high and the garlic will burn, turning bitter.Stir in the mixed vegetables, letting them soften for about 3 minutes. They should still retain a slight bite – we don’t want mushy peas. If you prefer a softer texture, cover the pan for a minute, but remember that the final bake will finish cooking them.
Pour in 1 cup of chicken broth, scraping the bottom of the pan to loosen any caramelized bits. Let the mixture simmer for 2 minutes, allowing the broth to reduce slightly and intensify. Then, stir in the cream, thyme, and rosemary. The sauce should thicken just enough to coat the back of a spoon; if it looks too thin, let it simmer a minute longer.
Season with salt and pepper to taste. Remember, the cheese and breadcrumbs will add salt later, so keep the seasoning moderate. At this point, the casserole base is ready for its final transformation in the oven.
Transfer the entire skillet (or move everything to a baking dish if your pan isn’t oven‑safe) and sprinkle the grated cheese evenly over the top. Follow with the breadcrumbs, pressing them gently so they adhere to the sauce. The breadcrumbs should form a uniform layer – this ensures an even golden crust.
Place the dish in the preheated oven. Bake for 20‑25 minutes, or until the top is a deep golden‑brown and the edges start pulling away from the sides of the dish. You’ll hear a faint crackle as the breadcrumbs crisp up – that’s the sound of success.
Remove the casserole from the oven and let it rest for 5 minutes. This short rest allows the sauce to settle, making each slice neat and tidy. While you wait, the kitchen will be filled with a lingering scent of herbs and melted cheese that makes your stomach growl.
Serve hot, straight from the dish, and watch your guests dive in. I’ll be honest — I ate half the batch before anyone else got to try it, and the leftovers were just as glorious the next day. Okay, ready for the game‑changer? This next part? Pure magic. Let’s talk about a few tricks that will elevate this casserole from great to unforgettable.
Insider Tricks for Flawless Results
The Temperature Rule Nobody Follows
Most home cooks bake at 350°F, but I crank it up to 375°F. The higher heat creates a rapid Maillard reaction on the breadcrumb topping, giving you that crisp, caramelized crust without overcooking the chicken. If you’re using a convection oven, drop the temperature by 25°F to avoid burning. I once tried a lower temperature and ended up with a soggy top that looked like a wet blanket – not a good look.
Why Your Nose Knows Best
When the sauce starts to bubble and you catch that buttery, slightly nutty aroma, you know it’s ready to thicken. Trust your senses more than the clock. If the sauce looks too runny but the scent is perfect, let it simmer a minute longer; the flavors will meld beautifully. I once relied solely on timing and ended up with a watery casserole that tasted like broth.
The 5‑Minute Rest That Changes Everything
After the oven, let the dish sit uncovered for exactly five minutes. This brief pause lets the juices redistribute, preventing a soggy bottom and ensuring each bite holds its shape. Skipping this step is a common mistake – the casserole slides off the plate like a slip‑n‑slide. Trust me, those five minutes are worth the anticipation.
Breadcrumb Boost
For an extra‑crunchy topping, toast the breadcrumbs in a dry skillet with a drizzle of olive oil before sprinkling them on. The toasted crumbs add a nutty flavor that elevates the whole dish. I tried using plain store‑bought breadcrumbs once and the top was flat; after toasting, it became a golden, aromatic crown.
Cheese Choice Matters
A blend of sharp cheddar and stretchy mozzarella gives you both flavor depth and meltiness. If you prefer a milder profile, swap cheddar for Gruyère; it adds a subtle nutty note that pairs beautifully with rosemary. Using only mozzarella can make the dish overly gooey, while only cheddar can become too firm once cooled.
Creative Twists and Variations
This recipe is a playground. Here are some of my favorite ways to switch things up:
Mediterranean Magic
Swap the mixed vegetables for sun‑dried tomatoes, olives, and artichoke hearts. Add a teaspoon of smoked paprika and finish with feta cheese instead of cheddar. The result is a bright, tangy casserole that pairs perfectly with a crisp white wine.
Spicy Southwest
Add a diced jalapeño with the onions, and stir in a tablespoon of chipotle in adobo sauce into the broth. Replace the cheese with pepper jack and sprinkle crushed tortilla chips on top of the breadcrumbs for extra crunch. This version brings heat and smoky depth that will wow any spice lover.
Herbivore’s Delight
Omit the chicken and use firm tofu cubes or chickpeas for protein. Increase the vegetable mix to include broccoli florets and sliced mushrooms. Use vegetable broth instead of chicken broth, and finish with nutritional yeast for a cheesy note.
Autumn Harvest
Add diced butternut squash and sage to the vegetable mix. Swap the cream for a blend of coconut milk and a splash of maple syrup for a subtle sweetness. Top with toasted pumpkin seeds instead of breadcrumbs for a festive crunch.
Cheesy Bacon Bliss
Crumble cooked, Halal‑certified turkey bacon into the sauce before adding the cream. Use a mix of smoked gouda and mozzarella for a deep, smoky melt. The bacon adds a salty crunch that turns this casserole into a comfort food champion.
Storing and Bringing It Back to Life
Fridge Storage
Allow the casserole to cool to room temperature, then cover tightly with foil or a reusable lid. It will keep fresh for up to 4 days. When reheating, place a splash of water or broth in the bottom of the dish, cover loosely with foil, and heat at 350°F for 15‑20 minutes until hot throughout.
Freezer Friendly
Portion the casserole into freezer‑safe containers, leaving a little headspace for expansion. Freeze for up to 3 months. To reheat, thaw overnight in the fridge, then bake at 375°F for 25‑30 minutes, adding a drizzle of broth halfway through to keep it moist.
Best Reheating Method
The secret to a crispy top after refrigeration is to re‑bake uncovered for the last 5 minutes of reheating. The added water steam prevents the interior from drying, while the high heat revives the breadcrumb crunch. This trick turns leftovers into a fresh‑out‑of‑the‑oven experience.