I'll be honest — I ate half the batch before anyone else got to try it. Picture this: midnight, the kitchen light humming, chocolate melting in slow motion, and that intoxicating smell of roasted peanuts hitting hot sugar. My roommate wandered in, took one look at the tray, and declared, "You've created a monster." She wasn't wrong. These crunchy peanut butter cups aren't just candy; they're tiny, crinkled-edge trophies that prove homemade always beats store-bought. Most recipes get this completely wrong. They go soft, or cloyingly sweet, or the chocolate cracks like cheap Easter bunnies. Mine? The edges shatter like thin ice, giving way to a salty-sweet center that coats your tongue like velvet, while roasted peanut bits surprise you with every bite. Future pacing: Picture yourself pulling these out of the freezer, the metallic thud of the tray on the counter, the anticipation of that first crack. Okay, ready for the game-changer? We're using two kinds of peanut butter, a sneaky cornflake crunch, and a tempering trick so simple you'll wonder why everyone else burns their chocolate. Stay with me here — this is worth it.
It started as a dare. My friend claimed no homemade peanut butter cup could top the orange-wrapped classic. I took that personally. Three burnt saucepans and a sugar-scarred wooden spoon later, I landed on this version. The secret? We're not just mixing peanut butter with powdered sugar and calling it a day. We're layering textures like a symphony: crisp rice cereal for snap, flaky salt for sparks, and a whisper of espresso powder that makes the peanut flavor sing. If you've ever struggled with gritty fillings or waxy chocolate, you're not alone — and I've got the fix. We'll bloom cocoa notes in the microwave instead of babysitting a double boiler, and we'll freeze our filling so it doesn't melt into a sad swirl when we seal the top. By the end, you'll wonder how you ever made it any other way.
Let me walk you through every single step — yes, even the part where you impatiently tap the muffin tin like it'll hurry up and set. Because here's the truth: these cups reward the restless. They're ready faster than Netflix asks "Are you still watching?" yet they taste like you spent the afternoon in some artisanal chocolate shop. Grab your muffin tin, a rubber spatula, and that half-eaten jar of peanut butter lurking in your pantry. We're about to turn humble ingredients into the best version you'll ever make at home.
What Makes This Version Stand Out
Double Peanut Punch: We blend creamy peanut butter for silkiness and crunchy for fireworks. The contrast keeps every bite interesting, like a conversation you don't want to end.
Cornflake Crunch: Forget bland graham crackers. Crushed cornflakes add a malty, almost caramel note that makes people ask, "Why does this taste like Saturday morning cartoons?" It's nostalgia in a cup.
Tempered Chocolate Without the Thermometer: We'll seed already-tempered chocolate so it snaps like a pro. No marble slabs, no candy thermometers, no tears.
Flaky Salt Halo: A snowflake of Maldon on top isn't just pretty; it cuts through richness like a squeeze of lemon on oysters. Sweet needs salt the way beaches need waves.
Freezer-Speed Setting: Ten minutes in the freezer equals professional shine. Your impatience is now a feature, not a bug.
Make-Ahead Champion: They keep for a month in the freezer, tasting freshly dipped every time. Holiday gifting? Done. Emergency dessert? Also done.
One-Bowl Wonder: No food processors, no stand mixers. We're keeping dishes minimal so you can focus on licking the spoon.
Crowd Reaction: I've watched grown adults fight over the last cup like seagulls over a French fry. Make extra; thank me later.
Alright, let's break down exactly what goes into this masterpiece...
Inside the Ingredient List
The Flavor Base
Chocolate chips aren't just chocolate chips; they're the roof over our peanut butter paradise. Go for 60% bittersweet — dark enough to swagger, sweet enough to play nice. Milk chocolate melts into a floppy mess, and anything above 70% bulldozes the peanut flavor. If you must use milk chocolate, cut it with a bar of semi-sweet like you're bartending a cocktail. Store brands work, but splurge on a bag with real cocoa butter; the cheap stuff contains palm oil and blooms into white freckles overnight. Buy two bags because, between nibbling and coating, you'll use more than you think.
The Texture Crew
Peanut butter choice makes or breaks the soul of the cup. Standard creamy spreads are stabilized with hydrogenated oils that taste like plastic left in a hot car. Instead, reach for the natural jar where oil floats on top like a lazy lava lamp. Stir it well, then measure. For crunch, we're adding crushed roasted peanuts, not the bland cocktail variety. Toss them in a dry skillet for three minutes until they smell like baseball games and summer fairs. Cornflakes bring the shatter; place them in a zip bag and roll once with a wine bottle — we want shards, not dust. Butter binds everything and carries flavor like a gossip. Melt it until it smells nutty; brown butter here is a cheat code for caramel depth.
The Unexpected Star
Espresso powder is the invisible hype-man. You won't taste coffee; you'll just wonder why everything tastes more...everything. A pinch is enough; more and your cups will haunt insomniacs. Coconut oil sneaks into the chocolate to thin it for easier dipping, plus it gives that professional snap. Don't worry, the flavor disappears faster than your willpower. Vanilla extract warms the peanut notes the way sunshine coaxes roses open. Buy the real stuff; imitation vanillin smells like sad birthday parties.
The Final Flourish
Maldon salt isn't table salt wearing a tux; it's flaky, pyramid-shaped crystals that crunch like tiny firecrackers. Sprinkle three flakes per cup — no more, or you'll channel seawater. If you can't find Maldon, crush coarse kosher salt between your fingers for a similar effect. Powdered sugar sweetens without grit, dissolving into the peanut butter like gossip into a neighborhood. Sift it if yours has lumps that refuse to play nice.
Everything's prepped? Good. Let's get into the real action...
The Method — Step by Step
- Start by making the filling because it needs to chill while you question your life choices. In a medium bowl, dump ¾ cup natural creamy peanut butter, 2 tablespoons softened butter, ½ cup sifted powdered sugar, ½ cup crushed cornflakes, ¼ cup finely chopped roasted peanuts, ½ teaspoon vanilla, and that sneaky ⅛ teaspoon espresso powder. Stir with a spatula until it looks like cookie dough that hit the gym — thick, nubby, and impossible to resist. I dare you to taste this and not go back for seconds. Once combined, scoop heaping teaspoons, roll into 24 balls, and flatten slightly into discs. Pop them onto a parchment-lined plate and freeze for 15 minutes. They should feel like little hockey pucks. This next part? Pure magic.
- While the filling firms up, let's talk chocolate. Pour 2 cups bittersweet chips into a microwave-safe bowl with 1 tablespoon coconut oil. Microwave on 50% power for 30 seconds, stir, repeat until only a few lumps remain. Residual heat will finish the job; overheated chocolate seizes faster than you can say Pinterest fail. The mixture should drip off your spoon like slow lava. If you've ever struggled with dull, streaky chocolate, you're not alone — and I've got the fix. We'll seed it with a handful of unmelted chips, stirring until glossy. This stabilizes the crystals so your cups snap instead of crumble. Set the bowl on a towel so it doesn't skate around while you work.
- Grab your mini muffin tin and line it with 24 silicone or paper cups. Spoon 1 teaspoon melted chocolate into each, then nudge it up the sides with the back of the spoon to create a shell. You're painting a thin edible wall that will cradle the peanut filling. If the chocolate starts setting, wave a hair dryer over the bowl for five seconds — yes, really. Tap the tin on the counter to settle and remove air bubbles. That sizzle when it hits the pan? Absolute perfection. Slide the tin into the freezer for 5 minutes to set the base. Meanwhile, keep the remaining chocolate warm and fluid by placing the bowl over a pan of hot (not boiling) water.
- Retrieve the filling pucks and press one into each chocolate-lined cup. They should fit snugly without touching the top edge; think of it as tucking in tiny peanut sleeping bags. If you overfill, the top and bottom chocolate layers won't seal, and you'll get the dreaded peanut butter lava leak. Spoon another teaspoon of chocolate over each filling, nudging it to the edges to seal. Give the tin a gentle shake so the surface levels like a chocolate mirror. Sprinkle a few flakes of Maldon on each now — the residual heat makes them stick like glitter. Return to the freezer for 10 minutes until the tops lose their shine and feel firm to the touch.
- Now for the grand reveal. Peel back the edge of one cup slowly — the chocolate should snap audibly, revealing a glossy underside. If it bends, it needs more freezer time. The bottom should be smooth, no peanut butter oozing like a crime scene. Pop the rest out onto a platter, stacking them like shiny coins. They'll keep their snap at cool room temperature for two days, but who's kidding whom? And now the fun part: decorating. Melt ¼ cup white chocolate, drizzle in zigzags, then dust with a whisper of gold luster for drama. Suddenly you're a chocolatier in a Paris atelier — or at least that's what you tell yourself while licking the bowl.
- Cleanup is mercifully quick. The bowl wipes clean with hot water; coconut oil keeps chocolate from gluing itself like cement. Silicone cups rinse in seconds, ready for your next craving. I store mine in a metal tin between layers of parchment, hidden behind the frozen peas so I don't eat them for breakfast. A friend tried skipping the freezer step once — let's just say it didn't end well. The chocolate bloomed into ghostly streaks, and the filling squished out like toothpaste. Learn from her hubris.
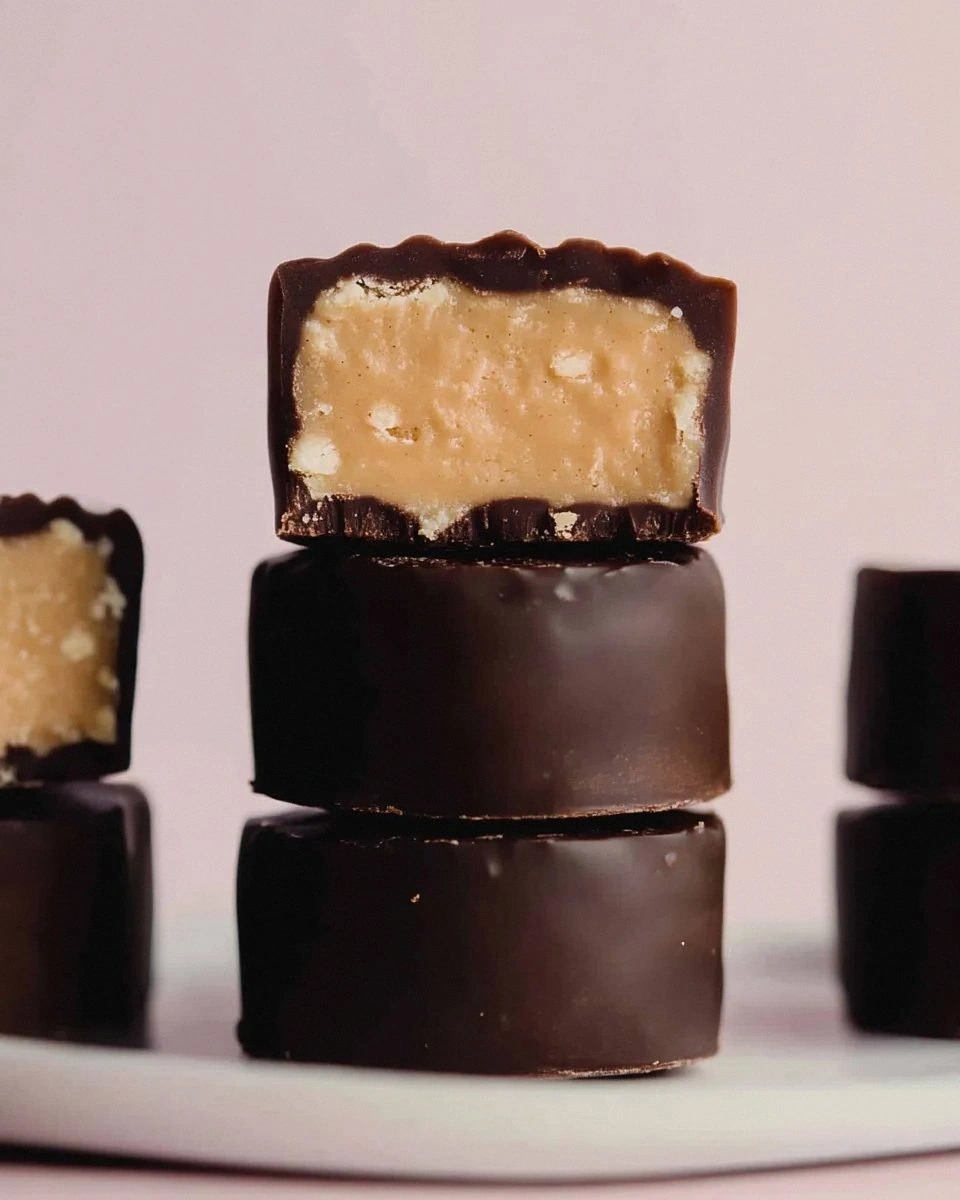
- Before you share, perform the bend test. Gently flex a cup; it should fracture cleanly, exposing a cross-section of peanut butter studded with cornflake confetti. If it crumbles, the chocolate was overheated. If it bends, the chocolate was under-tempered. Either way, they still taste like a childhood memory wrapped in silk. Snap a photo quickly; these disappear faster than evidence.
That's it — you did it. But hold on, I've got a few more tricks that'll take this to another level...
Insider Tricks for Flawless Results
The Temperature Rule Nobody Follows
Room-temperature filling refuses to chill under chocolate, creating a swirly mess. Freeze those discs rock-solid; warm filling bleeds into the shell and ruins the snap. Conversely, if your kitchen is tropically hot, refrigerate the lined tin before adding chocolate so the base sets instantly. Chocolate hates sudden temperature shocks; move from freezer to counter, not freezer to hot summer kitchen, or you'll get condensation spots. Think of it as dating: introduce changes gradually, and everybody stays happy.
Why Your Nose Knows Best
Toasted nuts are done when they smell like popcorn, not when they look golden. Color lags behind aroma by a solid minute, so trust your olfactory alarm system. If you wait for visible browning, they'll taste burnt once cooled. Shake the skillet every 30 seconds so they toast evenly; nuts are social creatures that prefer company. Cool completely before folding in, or they'll melt the surrounding mixture and you'll lose the crunch.
The 5-Minute Rest That Changes Everything
After the final freeze, let cups sit at room temp exactly five minutes before serving. Too cold and the chocolate mutes flavors; too warm and fingerprints mar the shine. Five minutes relaxes the fats so the peanut butter softens to fudge instead of taffy. Set a timer; this is the line between amateur and aficionado. Your patience will be rewarded with a glossy sheen and a center that yields like a dream.
Chocolate Seeding Ratio
Add ¼ cup unmelted chips to warm chocolate and stir until they disappear. This "seeds" stable crystals so your chocolate sets with professional snap, not chalky streaks. If you skip this, your cups will bloom white freckles within 24 hours. They'll still taste great but will look like they've been cryogenically frozen since the '90s. For extra insurance, reserve a teaspoon of seeded chocolate to patch any thin spots before chilling.
Creative Twists and Variations
This recipe is a playground. Here are some of my favorite ways to switch things up:
Dark Chocolate Raspberry Riot
Swirl 2 teaspoons freeze-dried raspberry powder into the filling for a PB&J vibe that tastes like summer camp. Top with a sliver of dried raspberry for color. The tartness slices through richness like a zingy pop song.
Thai-Inspired Curry Crunch
Add ½ teaspoon red curry paste and 1 tablespoon toasted coconut flakes to the filling. Dip in dark chocolate and crown with a cilantro leaf. It's the backpacking trip you never took, packed into candy.
Salted Caramel Pretzel
Replace cornflakes with crushed mini pretzels and fold in 1 tablespoon caramel sauce. Finish with smoked sea salt. It's state-fair nostalgia minus the Ferris wheel nausea.
White Chocolate Matcha
Use white chocolate for the shell and whisk 1 teaspoon matcha into half the batch for a marbled top. Earthy tea meets sweet peanut in a zen garden moment.
Keto Fat-Bomb Edition
Swap powdered sugar for powdered erythritol, use coconut oil instead of butter, and coat in 100% cacao chocolate. Net carbs drop to 2g per cup, and they still taste like dessert, not punishment.
S'mores Campfire
Mix in crushed graham crackers and mini marshmallow bits. Torch the tops lightly for campfire char. You'll swear you hear crickets and acoustic guitars.
Storing and Bringing It Back to Life
Fridge Storage
Refrigerate in an airtight tin for up to two weeks. Layer parchment between rows so the salt doesn't migrate and the chocolate doesn't scuff. Let sit five minutes at room temp before serving to wake up the flavors. If your fridge smells like last week's garlic chili, double-wrap in plastic so the cups don't absorb eau de leftovers.
Freezer Friendly
Freeze up to three months in a zip bag with the air squeezed out. No need to thaw; they snap straight from frozen, making them the fastest dessert in your arsenal. For gift giving, tuck a silica packet in the tin to prevent condensation during temperature swings. Label with the date; future you will send grateful vibes.
Best Reheating Method
There is none — these are meant to be eaten cold or room temp. If your chocolate blooms white, gently warm a damp towel in the microwave and wave it over the cups for 30 seconds; steam smooths the surface. Add a tiny splash of water before reheating — it steams back to perfection. Actually, ignore that; just eat another from the freezer and call it a day.