Imagine the first bite of a golden, crackling pickle that shatters with a satisfying snap, releasing a burst of vinegary tang that instantly awakens your palate. I first discovered this delight at a bustling Southern barbecue, where a neighbor’s secret fried‑pickle recipe turned a simple side into the talk of the night. The combination of the briny cucumber and the fiery mayo dip sparked a memory of summer evenings spent around a fire pit, laughing with friends and sharing stories over plates piled high with comfort foods.
Fried pickles have roots in Southern American cuisine, where they were originally a clever way to use up leftover pickles and stretch pantry supplies. Over time, they evolved from a humble bar snack into a celebrated appetizer found on menus from dive bars to upscale gastropubs. The spicy mayo adds a creamy, peppery counterpoint that elevates the dish from a novelty to a sophisticated bite.
In this article, I’ll walk you through every step—from selecting the perfect pickles and mastering a light, airy batter, to creating a mayo dip that balances heat and coolness. You’ll learn why a quick‑fry technique yields the best crunch, how to avoid soggy results, and the science behind seasoning the batter just right. By the end, you’ll have a reliable, repeatable recipe that impresses both casual snackers and food‑savvy guests.
Ready to dive in? Let’s turn those jarred pickles into a crispy masterpiece that will have everyone reaching for seconds.
🌟 Why This Recipe Will Capture Your Heart
Crispy Fried Pickles combine texture, flavor, and nostalgia into a single bite that’s impossible to resist.
- ✨ Irresistible Crunch: The light corn‑flour batter creates a delicate crust that stays crisp even after a brief resting period, delivering that perfect snap you crave.
- ✨ Balanced Heat: The spicy mayo dip blends sriracha, lime, and a hint of smoked paprika, offering a gentle heat that complements rather than overwhelms the pickle’s acidity.
- ✨ Quick Turn‑Around: From prep to plate in under half an hour, this recipe fits perfectly into busy weeknight gatherings or spontaneous weekend get‑togethers.
- ✨ Versatile Pairings: Serve them as a starter, a side for burgers, or a party finger food—each scenario shines with the same delightful flavor profile.
- ✨ Budget‑Friendly: Pickles are inexpensive, and the batter ingredients are pantry staples, making this dish a cost‑effective crowd‑pleaser.
- ✨ Fun to Customize: Adjust the heat level, experiment with different pickle varieties, or swap the mayo for a vegan alternative—your creativity is the only limit.
🥗 The Ingredients
📝 Complete Ingredient List
For the Pickles:
For the Spicy Mayo Dip:
For Frying:

🔍 Focus on Key Ingredients
Dill Pickles
Dill pickles bring a bright, briny backbone that cuts through the richness of the batter and mayo. Choose pickles that are firm to the touch; softer varieties can become mushy when fried. If you prefer a milder flavor, opt for bread‑and‑butter pickles, but remember they will add a subtle sweetness.
Cornstarch
Cornstarch is the secret to a light, airy crust. It creates a barrier that prevents the oil from soaking into the pickle, preserving the interior’s crispness. Mixing it with a small amount of flour adds structure while keeping the coating delicate.
Sriracha Mayo
The spicy mayo dip balances acidity, heat, and creaminess. Sriracha supplies a clean, garlic‑forward heat, while lime juice lifts the flavor and prevents the mayo from feeling heavy. Smoked paprika introduces a whisper of wood‑smoked depth, making the dip feel more complex.
🔄 Quick Substitutions
| If you don’t have… | Use instead… |
|---|---|
| All‑purpose flour | Rice flour (for gluten‑free) |
| Cornstarch | Potato starch |
| Sriracha | Chili garlic sauce mixed with a dash of honey |
👨🍳 Step‑by‑Step Instructions
Follow these detailed steps to achieve perfectly crispy pickles and a dip that sings with flavor.
📋 Phase 1: Preparation & Mise en Place
Gather your tools, measure ingredients, and prep the pickles for coating.
Pat the Pickles Dry
Remove the pickles from their brine and spread them on a clean kitchen towel. Pat each spear dry with another towel, ensuring no excess moisture remains. This step is crucial because any remaining liquid will steam the batter, leading to soggy results. The surface should feel slightly tacky, not wet.
Mix the Dry Batter
In a shallow bowl, whisk together the all‑purpose flour, cornstarch, baking powder, salt, and black pepper. The baking powder introduces tiny air pockets that expand during frying, giving the crust a light texture. Make sure the mixture is uniform to avoid pockets of flour that could create uneven browning.
Prepare the Wet Dip (Optional Rest)
While the batter rests, whisk the mayonnaise, sriracha, lime juice, smoked paprika, and a pinch of salt in a small bowl. Cover and refrigerate; the flavors meld better after at least 10 minutes. This dip can be made up to a day ahead and stored in an airtight container.
🔥 Phase 2: Frying & Assembly
Heat the oil and coat the pickles before frying to golden perfection.
Heat the Oil
Pour the vegetable oil into a deep‑fat fryer or a heavy‑bottomed pot, filling it to about 2 inches deep. Heat the oil over medium‑high heat until it reaches 350°F (175°C). Use a kitchen thermometer; if the oil is too hot, the batter will burn before the pickle heats through.
Coat the Pickles
Place a few pickles at a time into the dry batter, turning them to ensure an even coat. Shake off excess flour; a light dusting is ideal. For extra crispness, dip the coated pickles briefly (1–2 seconds) into a shallow bowl of cold water before the second coating, then return them to the flour mixture for a double‑dip.
Fry Until Golden
Gently lower the coated pickles into the hot oil using a slotted spoon. Fry for 2–3 minutes, turning once, until the crust is a uniform golden‑brown. The interior should be heated through, and the batter should stay light and airy.
✨ Phase 3: Finishing & Plating
Drain, season, and serve with the prepared dip.
Drain and Salt
Using a slotted spoon, transfer the fried pickles onto a plate lined with paper towels. While still hot, sprinkle a light pinch of sea salt over them; this enhances the flavor and adds a subtle crunch.
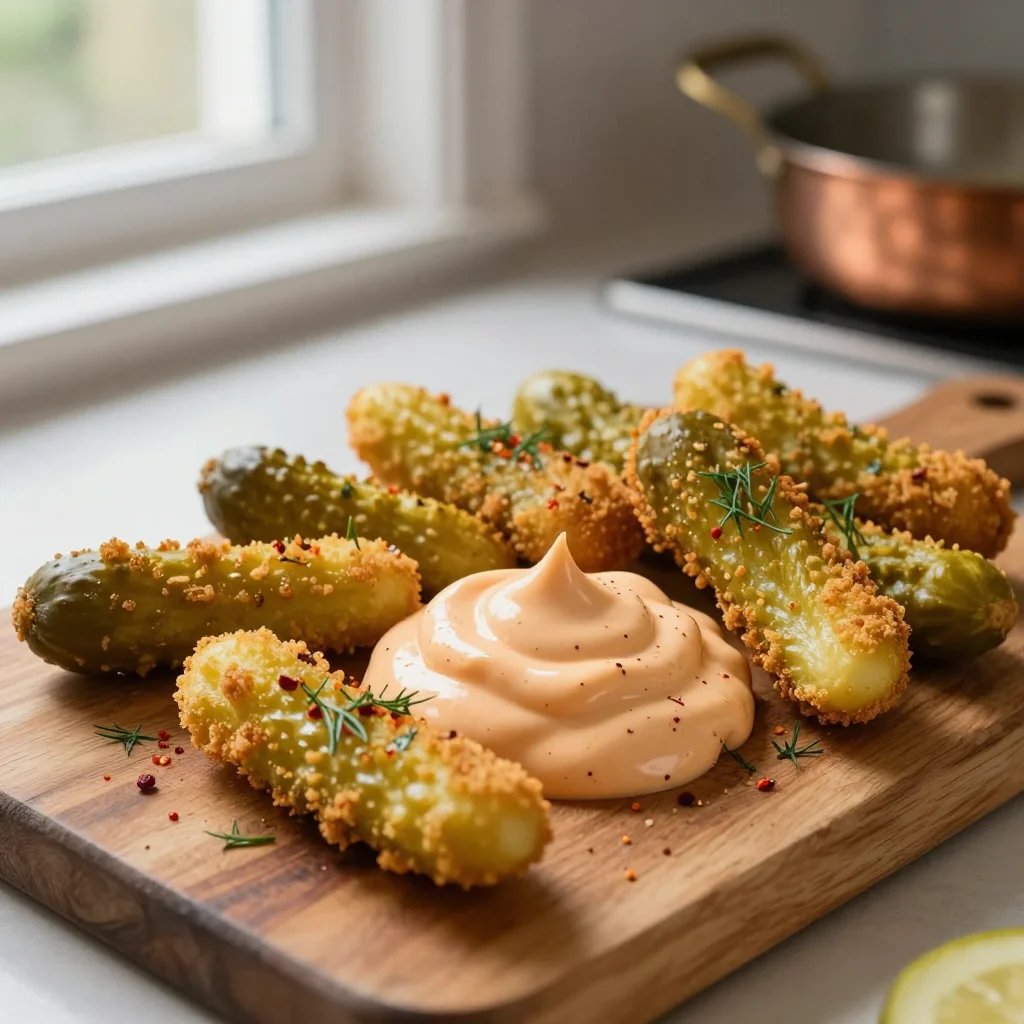
Plate and Garnish
Arrange the pickles on a serving platter. Drizzle a thin line of the spicy mayo around the edge, or serve the dip in a small ramekin for dipping. Garnish with a few fresh cilantro leaves or a wedge of lime for a pop of color.
Serve Immediately
Fried pickles are best enjoyed hot, while the crust remains crisp. Pair them with a cold beer, sparkling water, or a crisp white wine to balance the heat and acidity.
💡 Expert Tips & Tricks
🛒 Choosing the Right Ingredients
When selecting pickles, prioritize those that are firm and have a bright dill flavor. Avoid overly soft or overly sweet varieties, as they can become soggy when fried. For the oil, a high smoke‑point oil like vegetable, canola, or peanut ensures a clean fry without imparting off‑flavors. Freshness matters for the mayo as well—use a high‑quality brand or make your own for the best texture.
🔪 Preparation Techniques
Drying the pickles thoroughly is the single most important step. Moisture is the enemy of crispness. After patting dry, you can lightly dust the spears with a mixture of flour and cornstarch before the batter; this creates a dry surface that helps the batter adhere without becoming gummy. A double‑dip (flour, water, flour) adds an extra layer of crunch without making the coating too thick.
🌡️ Mastering the Fry
Maintain oil temperature between 340°F‑360°F (170°C‑180°C). If the temperature drops too low, the batter will absorb oil and become greasy; too high, and the exterior will burn before the interior warms through. Use a thermometer and adjust the heat as needed, especially when adding new batches of pickles, which can lower the temperature temporarily.
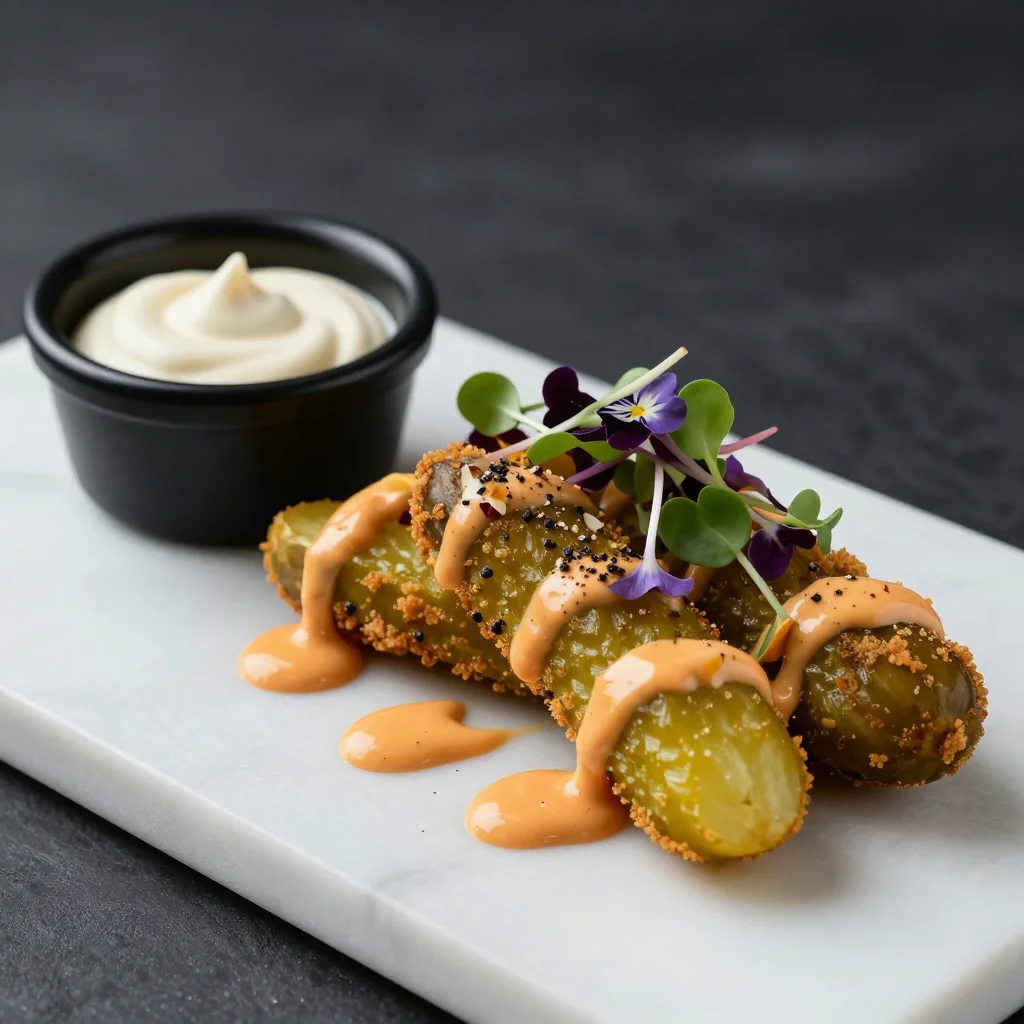
🍽️ Presentation & Service
Serve the pickles on a wooden board or a slate platter for a rustic feel. Add a small ramekin of the spicy mayo dip alongside a few lime wedges. For a touch of elegance, drizzle a thin line of smoked paprika or a few microgreens over the top. This visual contrast makes the dish look as good as it tastes.
🏆 Pro Tips
Master chefs know that subtle adjustments can turn a good dish into an unforgettable one.
- 🎯 Temperature Layering: Start frying at 340°F for the first 30 seconds to set the crust, then raise to 360°F to finish. This technique creates a multi‑layered crunch that stays crisp longer.
- 🎯 Batter Aeration: Whisk the dry batter with a fork instead of a whisk to incorporate tiny air bubbles. These pockets expand during frying, making the coating lighter.
- 🎯 Spice Balance: Add a teaspoon of honey to the mayo dip if you prefer a sweet‑heat combo. The honey rounds out the acidity of the lime and the heat of the sriracha.
- 🎯 Oil Reuse: After frying, let the oil cool, strain through a cheesecloth, and store in a sealed container for up to three uses. This saves money and reduces waste.
- 🎯 Portion Scaling: Use the portion adjuster below to automatically recalculate ingredient amounts, ensuring consistent flavor whether you serve 2 or 12 people.
- 🎯 Final Touch: Finish each batch with a light spray of sea salt flavored with smoked paprika. This adds a burst of aroma right before serving.
"The secret to great fried foods is in the temperature and the batter – keep it light, keep it hot." — Chef Thomas Keller
🔄 Variations & Adaptations
This recipe is a flexible canvas for your culinary imagination. Below are several ways to tweak the flavor profile, texture, and dietary considerations.
🥬 Vegetarian / Vegan Version
Swap the mayonnaise for a vegan mayo made from aquafaba or soy. Ensure the sriracha you choose is free from fish sauce. The rest of the recipe remains unchanged, delivering the same crunch and heat.
- Use plant‑based oil such as avocado oil for a richer flavor.
- Replace the egg‑based batter (if you add egg) with a mixture of sparkling water and a tablespoon of chickpea flour for binding.
🌶️ Flavor Variations
Explore different cultural twists by adjusting the spices in the batter or the dip.
Spicy Version:
Increase sriracha to 3 tbsp, add a dash of cayenne pepper to the batter, and finish with a drizzle of hot honey for a sweet‑heat combo.
Mediterranean Version:
Replace dill pickles with lemon‑zested pickles, add dried oregano to the batter, and serve with a tzatziki dip flavored with fresh mint.
Asian Fusion Version:
Use Japanese rice vinegar pickles, incorporate a teaspoon of toasted sesame oil into the batter, and serve with a soy‑ginger mayo dip (mix mayo, soy sauce, grated ginger, and a splash of rice vinegar).
⚠️ Dietary Adaptations
Gluten‑Free:
Swap all‑purpose flour for rice flour or a certified gluten‑free blend. Ensure the cornstarch is pure and not mixed with wheat starch.
Lactose‑Free:
The recipe is already lactose‑free; just verify that your mayo does not contain dairy.
Low‑Calorie:
Air‑fry the pickles at 400°F for 8–10 minutes instead of deep‑frying. Use a light coating of spray oil and reduce the amount of mayo by half, mixing the remaining mayo with Greek yogurt for a lighter dip.
👶 Kid‑Friendly Version
Reduce the heat by using a milder hot sauce like Frank’s RedHot, or omit it entirely. Serve the dip with a little honey mixed in for a sweet touch that kids love. Cut the pickles into bite‑size pieces to make them easier for small hands.
📦 Storage & Reheating
🧊 Conservation
Refrigerator:
- Duration: 3 days
- Container: Airtight glass container
- Tip: Place a paper towel on top to absorb excess moisture.
Freezer:
- Duration: 1 month
- Method: Cool completely, then freeze on a parchment sheet before transferring to a zip‑top bag.
- Defrosting: Thaw overnight in the refrigerator.
💡 For best texture, re‑heat from frozen rather than thawed, as this reduces sogginess.
♨️ Reheating
🔥 Oven (Recommended):
- Preheat to 200°C (390°F).
- Place pickles on a baking sheet lined with parchment.
- Cover loosely with foil and heat for 8 minutes.
- Remove foil and continue for 4 minutes to crisp the crust.
⚡ Microwave (Quick):
- Cover with a microwave‑safe lid.
- Heat on medium power for 45 seconds.
- Check and repeat in 15‑second bursts until hot.
🍳 Skillet:
Heat a thin layer of oil over medium heat, add pickles, and cook 2‑3 minutes per side until the crust revives.
🍷 Perfect Pairings
🥗 Side Dishes
- Coleslaw: A creamy, slightly sweet coleslaw balances the acidity and heat.
- Grilled Corn on the Cob: Sweet corn kernels contrast the salty, tangy pickles.
- Sweet Potato Fries: Their natural sweetness pairs well with the spicy mayo.
🍷 Wine & Drink Pairings
- Riesling (off‑dry): Its bright acidity mirrors the pickle brine while softening the heat.
- Pilsner: Light, crisp carbonation cuts through the richness of the batter.
- Non‑alcoholic: Sparkling water with a splash of lime keeps the palate refreshed.
🍰 To Complete the Meal
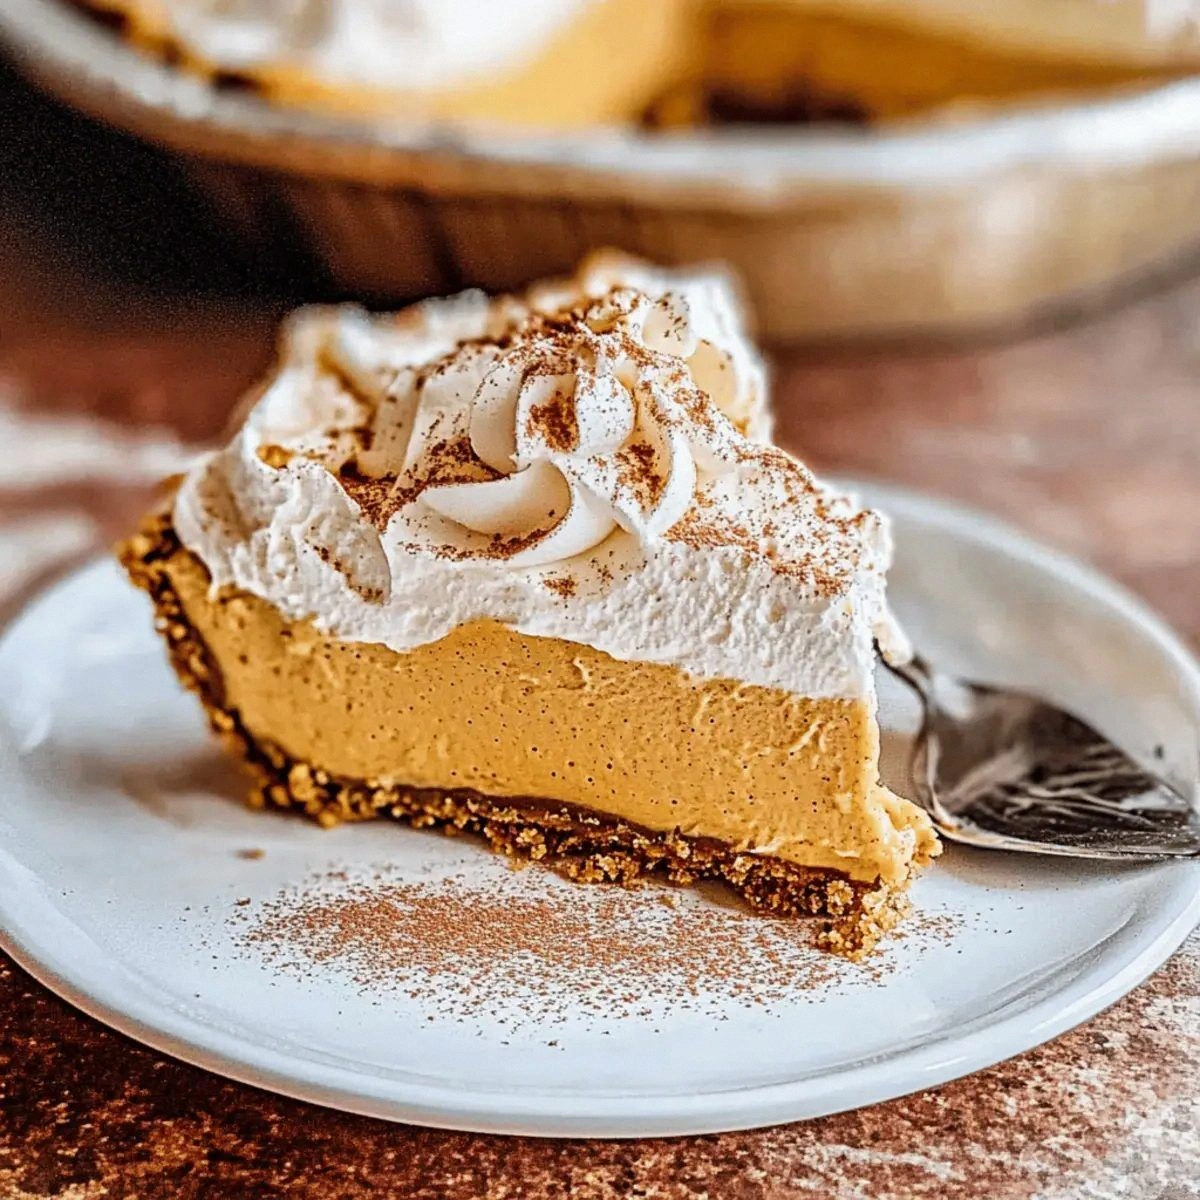
Start with a light citrus salad, move to the fried pickles as the main appetizer, and finish with a lemon tart or key‑lime cheesecake for a bright, refreshing dessert that echoes the lime in the dip.
❓ Frequently Asked Questions
Q: Can I use other types of pickles?
A: Absolutely! Bread‑and‑butter pickles give a sweeter profile, while kosher dill offers a sharper bite. Just ensure they are firm and not overly watery, as excess moisture can affect the crust.
Q: How do I prevent the batter from becoming too thick?
A: Keep the batter dry and sift the flour mixture before coating. If you notice clumps, gently tap the coated pickles to shake off excess. A double‑dip with a brief water rinse also helps achieve a thin, even layer.
Q: What oil is best for frying?
A: Use high smoke‑point oils like vegetable, canola, or peanut. These oils stay stable at frying temperatures and impart a neutral flavor, allowing the pickle and seasoning to shine.
Q: My pickles turn soggy after a few minutes. Why?
A: This usually happens when the oil temperature drops too low or the pickles are not dried properly. Maintain a steady 350°F and pat the pickles completely dry before coating. Also, avoid overcrowding the pan.
Q: Can I make this recipe gluten‑free?
A: Yes! Substitute all‑purpose flour with a 1:1 gluten‑free flour blend and ensure the cornstarch is pure. The texture remains light, and the flavor stays unchanged.
Q: How far in advance can I prepare the spicy mayo dip?
A: The dip can be prepared up to 24 hours ahead. Store it in an airtight container in the refrigerator; the flavors will meld and become even more harmonious.
🎉 Let’s Get Cooking!
This Crispy Fried Pickles recipe delivers a perfect blend of crunch, tang, and heat that makes it an instant crowd‑pleaser. From the moment you hear the sizzle to the final dip into the spicy mayo, each step is designed to maximize flavor while keeping the process approachable. Whether you’re hosting a game night, a backyard barbecue, or simply craving a bold snack, this dish checks every box: quick, affordable, and endlessly adaptable.
Give it a try, experiment with the variations, and share your results. I love hearing how you make the recipe your own—whether you turn up the heat, swap in a vegan mayo, or serve it alongside a fresh salad. Your feedback helps the community grow, and your photos inspire others to pick up a jar of pickles and start frying.
Have you tried this recipe?
Leave a comment and rating below! Share your photos on Instagram with #CrispyPickleBite for a chance to be featured.
Crispy Fried Pickles with Spicy Mayo Dip
Golden, crunchy pickles served with a tangy, spicy mayo that makes every bite unforgettable.
📝 Ingredients
Pickles
Spicy Mayo Dip
Frying Oil
👨🍳 Instructions
- 1 Pat the pickles dry with paper towels, ensuring no moisture remains.
- 2 Whisk together flour, cornstarch, baking powder, salt, and pepper in a shallow dish.
- 3 Heat oil to 350°F (175°C) and maintain temperature throughout frying.
- 4 Coat pickles in the dry mixture, shaking off excess.
- 5 Fry in batches for 2‑3 minutes until golden, then drain on paper towels.
- 6 Sprinkle a pinch of sea salt while still hot.
- 7 Mix mayo, sriracha, lime juice, smoked paprika, and salt for the dip.
- 8 Serve pickles with dip, garnish with cilantro or lime wedges.
- 9 Enjoy immediately for maximum crunch.
- 10 Store leftovers in an airtight container; reheat in the oven for best texture.
🥗 Nutritional Information (per serving)
*Values are approximate and based on standard ingredient brands.
📚 You Might Also Like
Buffalo Chicken Wings
Loaded Nachos
Garlic Breadsticks
💬 Comments & Reviews
Leave a Comment
No comments yet. Be the first to share your thoughts!