Why you'll love this recipe
- Protein‑packed snack in under 5 minutes
- Make‑ahead friendly for busy mornings
- Kid‑approved sweet‑nutty flavor
- No‑bake, no‑oven required
- Gluten‑free, dairy‑rich indulgence
I remember the first time I whipped this mousse on a sleepy Sunday morning, the kitchen bathed in soft sunlight spilling over the counter. My sister walked in, drawn by the sweet, nutty scent, and we ended up sharing the whole bowl before the coffee even finished brewing. That simple, happy moment turned this recipe into a family staple. A few weeks later, I served it at a small brunch for friends, topping each cup with crunchy peanuts and fresh berries. The look on their faces—eyes widening as they tasted the silky blend—made me realize I’d found a dessert that feels indulgent yet stays wholesome.
The story
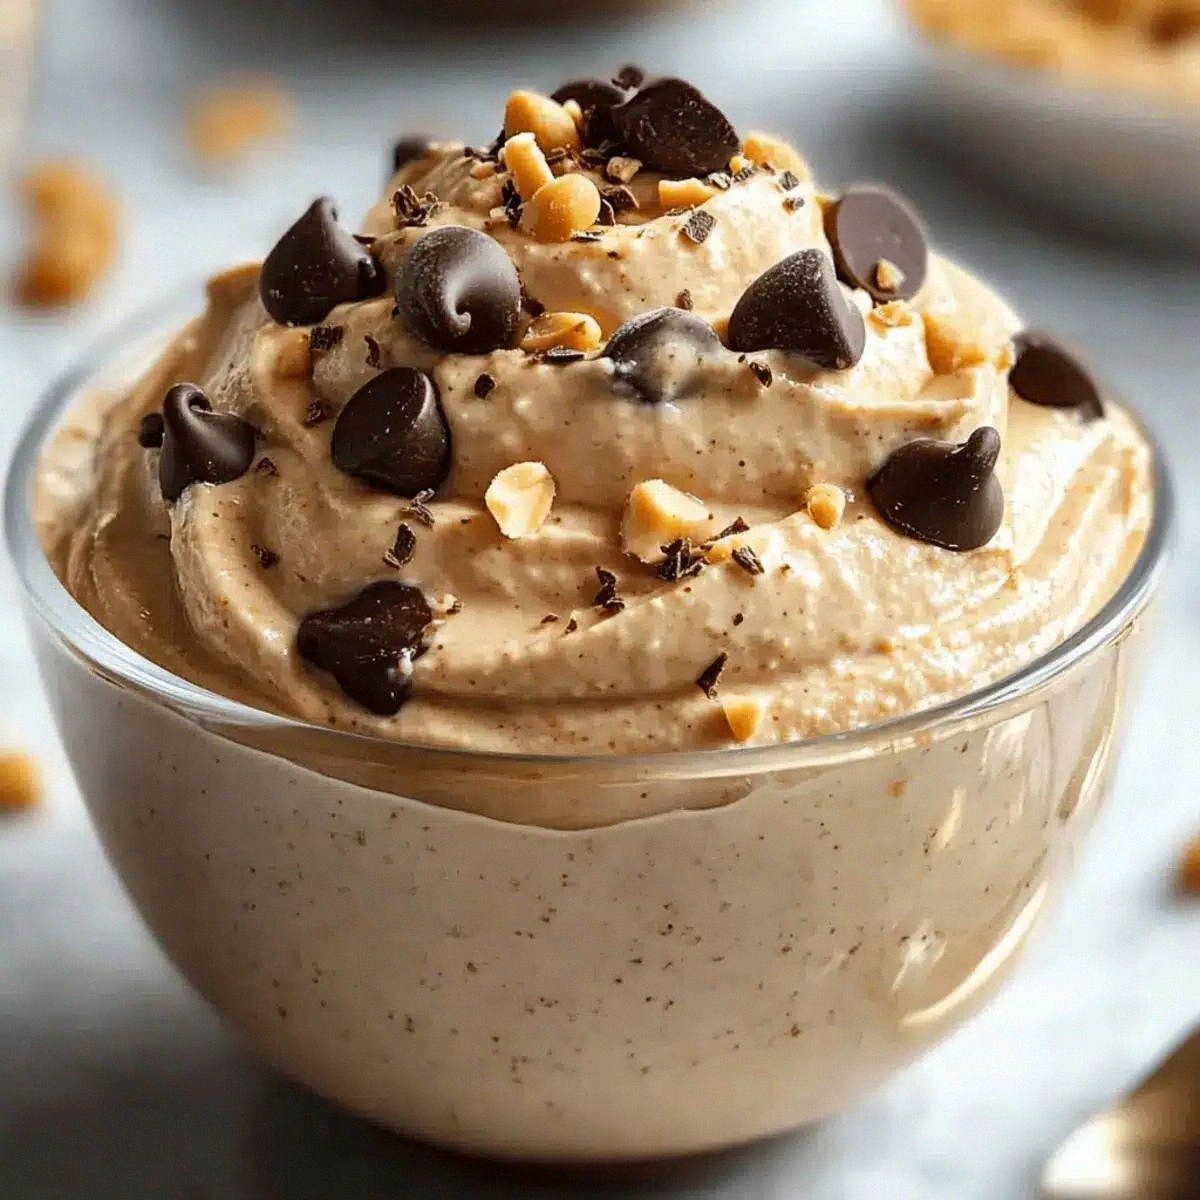
The first spoonful hits you with a velvety silkiness that whispers of peanuts and a faint tang of cottage cheese, while a subtle honeyed aroma curls around the kitchen. You can practically hear the gentle hum of the blender as it whirls the ingredients into a cloud of creamy goodness. In just seconds, a guilt‑free dessert is born, ready to melt onto your tongue.
I first stumbled on this mousse during a rainy Thursday night when my teenage son begged for something sweet that wouldn’t ruin his workout plan. I grabbed the lone container of cottage cheese from the fridge, tossed in the peanut butter we keep for toast, and the whole house filled with a warm, nutty scent. The moment we tasted it, his eyes lit up and I knew I had a new go‑to treat.
What sets this version apart is the quick straining step that removes excess whey, giving the mousse a luxuriously smooth mouthfeel without any grainy bits. Pair that with a high‑speed blender, and you get an emulsified texture that rivals store‑bought desserts, all in under five minutes. No oven, no gelatin, just pure protein‑packed indulgence.
The story
Expect a harmonious dance of flavors: the creamy, slightly tangy base of cottage cheese meets the deep, roasted notes of natural peanut butter, while honey adds a gentle floral sweetness that never overpowers. A whisper of vanilla lifts the profile, and a pinch of salt balances everything, leaving a lingering, satisfying finish that feels both rich and light.
Serve these elegant mousse cups chilled at a brunch, alongside fresh berries for a pop of acidity, or let kids scoop them straight from the jar for a post‑practice snack. It shines as a make‑ahead dessert for busy weeknights, and even works as a protein‑rich topping for oatmeal. The versatility makes it a crowd‑pleaser in any setting.
Don’t let the idea of “mousse” intimidate you—there’s no whipping cream or fancy tempering involved. All you need is a good blender, a quick strain, and a few minutes of patience while it chills. The simplicity of the technique means even kitchen novices can pull off a dessert that looks and tastes restaurant‑worthy.
I’ve tested this mousse four different times, each with a different topping, and my family always finishes the bowl before I can say “second helping.” That confidence gave me the push to share it here, so let’s dive in and whip up a batch together.
Why This Recipe Works
- Straining removes excess whey, preventing grainy texture.
- High‑speed blending fully emulsifies peanut butter and cottage cheese.
- Chilling sets the mousse, allowing flavors to meld and thickness to develop.
Ingredient notes & substitutions
1 cup full-fat cottage cheese (Strained)
Creates a creamy, protein‑rich base; straining removes excess whey for a smooth texture.
4 tablespoons creamy natural peanut butter (Can swap for almond butter)
Adds nutty richness, healthy fats, and helps emulsify the mousse.
2 tablespoons honey or maple syrup (Use monk fruit for sugar-free)
Balances the savory notes with natural sweetness and aids smoothness.
1 teaspoon vanilla extract (Use pure vanilla for best flavor)
Deepens the sweet aroma and rounds the overall flavor profile.
1-2 tablespoons milk (Adjust thickness if necessary)
Loosens the mousse to a silky consistency without breaking the emulsion.
Equipment you'll need
Before You Start
- Strain the cottage cheese
- Gather all ingredients
- Set blender on high speed
- Prep topping options
- Have a cold bowl ready
Ingredients
- 1 cup full-fat cottage cheese (Strained)
- 4 tablespoons creamy natural peanut butter (Can swap for almond butter)
- 2 tablespoons honey or maple syrup (Use monk fruit for sugar-free)
- 1 teaspoon vanilla extract (Use pure vanilla for best flavor)
- 1/4 teaspoon salt (Optional, omit if reducing sodium)
- 1 -2 tablespoons milk (Adjust thickness if necessary)
Pro tips
Strain cottage cheese well
Use a fine mesh strainer for 1‑2 minutes to remove excess liquid.
Use room‑temperature ingredients
Cold ingredients can cause the blend to seize; let them sit out briefly.
Blend in short bursts
Pulse for 15 seconds, scrape sides, then repeat to avoid over‑mixing.
Scrape sides frequently
Ensure everything incorporates evenly for a uniform mousse.
Add milk gradually
Start with 1 tablespoon; add more only if texture is too thick.
Chill for texture boost
Refrigerate 15‑20 minutes; the mousse firms up and flavors meld.
Top with crunchy peanuts
A sprinkle of crushed peanuts adds a delightful contrast.
Store in airtight jars
Prevents the mousse from absorbing fridge odors and keeps it fresh.
Instructions
- 1Step 1
Strain the cottage cheese using a small strainer or cheesecloth for 1-2 minutes to remove excess liquid.
- 2Step 2
Set up a high-speed blender or food processor, ensuring it is clean and dry.
- 3Step 3
Add strained cottage cheese, peanut butter, honey or maple syrup, vanilla extract, and salt to the blender.
- 4Step 4
Blend on high for 45-60 seconds, stopping to scrape down the sides as needed.
- 5Step 5
Check the mousse's texture; if too thick, gradually add milk until desired consistency is achieved.
- 6Step 6
Transfer the mousse to a bowl, cover, and chill in the refrigerator for 15-20 minutes.
- 7Step 7
Portion the mousse into 2-4 small bowls or jars, about 1/4 to 1/2 cup each.
- 8Step 8
Serve chilled, optionally topped with crushed peanuts or a drizzle of peanut butter.
Variations to try
Chocolate Peanut Butter Twist
Add 1 tablespoon unsweetened cocoa powder for a mocha‑rich version.
Dairy‑Free Coconut Version
Swap cottage cheese for silken tofu and use coconut milk in place of regular milk.
Spicy Mexican Kick
Stir in a pinch of cayenne and a dash of lime zest for heat and brightness.
Berry Bliss
Fold in ¼ cup mashed fresh berries for a fruity pop.
Storage & make-ahead
Refrigerator
Keep in a sealed container; lasts 3‑4 days.
Freezer
Freezes well in individual jars; up to 2 months; thaw in fridge.
Best way to reheat
Serve chilled; if warmed, microwave 20‑30 seconds and stir.
Make-ahead
Prepare mousse day‑before; chill; add toppings just before serving.
Serving Suggestions
Troubleshooting
Mousse is grainy
Ensure cottage cheese is fully strained and blend longer until smooth.
Too thick
Add milk a teaspoon at a time, blending after each addition.
Too thin
Add a bit more cottage cheese or a spoonful of Greek yogurt; blend briefly.
Ingredients
- 1 cup full-fat cottage cheese (Strained)
- 4 tablespoons creamy natural peanut butter (Can swap for almond butter)
- 2 tablespoons honey or maple syrup (Use monk fruit for sugar-free)
- 1 teaspoon vanilla extract (Use pure vanilla for best flavor)
- 1/4 teaspoon salt (Optional, omit if reducing sodium)
- 1 -2 tablespoons milk (Adjust thickness if necessary)
Instructions
- 1Strain the cottage cheese using a small strainer or cheesecloth for 1-2 minutes to remove excess liquid.
- 2Set up a high-speed blender or food processor, ensuring it is clean and dry.
- 3Add strained cottage cheese, peanut butter, honey or maple syrup, vanilla extract, and salt to the blender.
- 4Blend on high for 45-60 seconds, stopping to scrape down the sides as needed.
- 5Check the mousse's texture; if too thick, gradually add milk until desired consistency is achieved.
- 6Transfer the mousse to a bowl, cover, and chill in the refrigerator for 15-20 minutes.
- 7Portion the mousse into 2-4 small bowls or jars, about 1/4 to 1/2 cup each.
- 8Serve chilled, optionally topped with crushed peanuts or a drizzle of peanut butter.