Picture this: the kitchen is a chaotic symphony of clanging pans, the scent of freshly baked gingerbread drifting through the air, and a lone bowl of heavy cream swirling like a midnight lake. I was halfway through a frantic attempt at making a classic vanilla custard when the idea hit me: why not fuse the heart of a holiday cookie with the creamy decadence of ice cream? The result was a frosty dream that melted faster than a snowflake on a warm hand. I dared myself to taste this and not go back for seconds, and I have to confess—half the batch vanished before anyone else could even see it.
That night, as the oven timer chirped its final note, I scooped a spoonful of what I had created and let the rich, buttery flavor coat my tongue like velvet. The crunch of crushed cookies, the sparkle of festive sprinkles, and the subtle whisper of vanilla all danced together in a symphony of textures. I knew instantly that this was hands down the best version you'll ever make at home. The secret? A no‑churn technique that locks in the airy lightness of whipped cream while infusing it with the unmistakable taste of Christmas cookies.
Most recipes get this completely wrong. They either overcook the custard, resulting in a dense, clumpy mess, or they under‑whip the cream, leaving a gritty, unbalanced finish. Here’s what actually works: a gentle heat that brings the condensed milk to a silky glaze, a quick whisk that incorporates the cream without deflating it, and a generous fold of crushed cookies that add both flavor and texture. The result is a scoop that feels like a bite of holiday nostalgia, with each spoonful delivering a burst of buttery gingerbread and a playful pop of sprinkles.
If you've ever struggled with making a smooth, creamy ice cream that holds its shape, you're not alone—and I've got the fix. Picture yourself pulling this out of the freezer, the whole kitchen smelling incredible, and watching the ice cream swirl as you scoop it into a bowl. The anticipation of that first bite, the way it melts in your mouth, the way the cookies crunch just enough to keep you coming back—this is pure holiday bliss. Let me walk you through every single step—by the end, you'll wonder how you ever made it any other way.
What Makes This Version Stand Out
- Flavor: The combination of sweetened condensed milk and heavy cream creates a custard base so smooth, it practically melts on the tongue. The vanilla extract is not just a flavor enhancer; it deepens the overall sweetness and balances the slight bitterness of the cookies. The result is a creamy, dessert‑level experience that feels both indulgent and comforting.
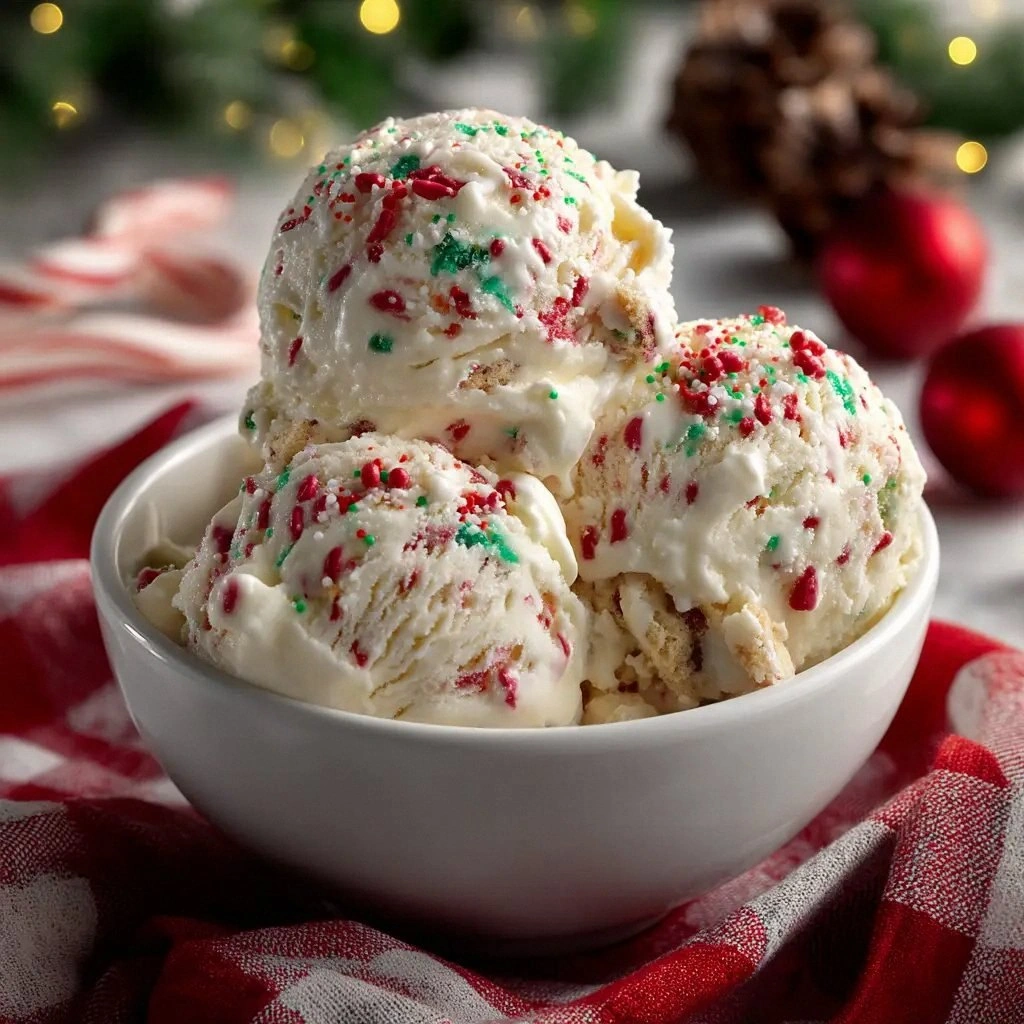
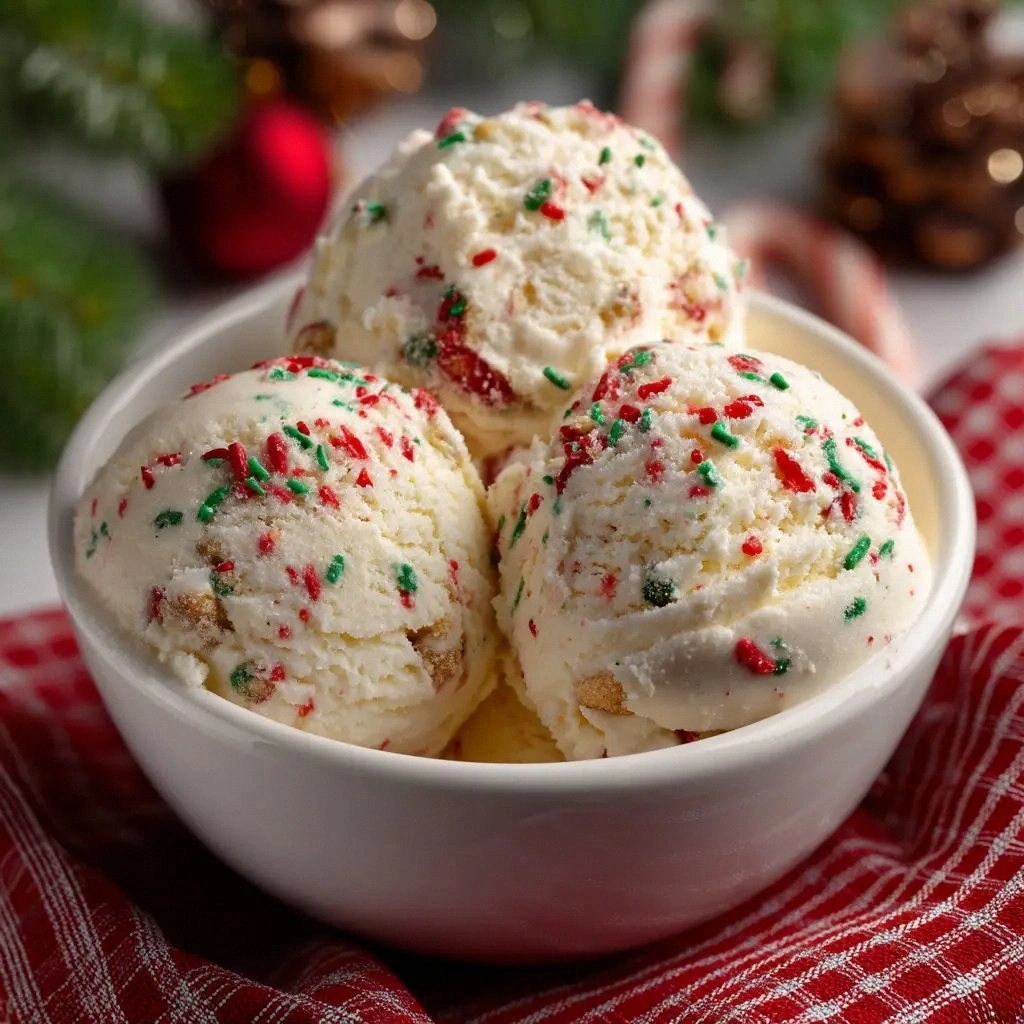
- Texture: The crushed Christmas cookies are the secret weapon that gives this ice cream its signature crunch. They break apart during the folding stage, leaving pockets of cookie bits that crackle with each bite. The sprinkles add a playful, sugary bite that contrasts beautifully with the velvety ice cream.
- Ease: No churn, no freezer burn, no complicated equipment. All you need is a saucepan, a whisk, a bowl, and a freezer. The method takes less than an hour from start to finish, and the cleanup is almost nonexistent.
- Make‑Ahead Potential: This ice cream can be prepared a day ahead of a holiday gathering and will still taste fresh. The cookies stay crunchy, and the sprinkles retain their color and texture. Just cover it tightly and store in the freezer until you’re ready to serve.
- Ingredient Quality: Using fresh, high‑quality heavy cream and a can of premium sweetened condensed milk makes all the difference. The cream should be cold, and the condensed milk should be smooth and free of lumps. This ensures a silky mouthfeel that’s hard to beat.
- Visual Appeal: The vibrant color of the sprinkles against the creamy background makes every spoonful a visual treat. The cookies are broken into irregular chunks, adding rustic charm to each bite.
- Crowd Reaction: Guests often comment that the ice cream tastes like a holiday memory, and they ask for the recipe afterward. The combination of familiar flavors and novel textures keeps everyone coming back for more.
- Seasonal Touch: The use of Christmas cookies and festive sprinkles makes this dessert unmistakably holiday. It’s the perfect sweet finish to any festive meal.
Alright, let's break down exactly what goes into this masterpiece...
Inside the Ingredient List
The Flavor Base
Heavy whipping cream is the backbone of this ice cream, providing a rich, silky texture that’s essential for a smooth mouthfeel. It’s the vehicle that carries the sweetness of the condensed milk and the warmth of the vanilla. Skipping it would result in a thin, under‑developed custard that won’t hold its shape. If you’re looking for a lower‑fat option, you can replace it with half‑and‑half, but expect a slightly thinner consistency.
The Sweetener
Sweetened condensed milk is the secret to a perfectly balanced sweetness that’s neither cloying nor flat. Its thick, caramel‑like texture thickens the ice cream, giving it a luscious, custard‑like body. If you’re allergic to dairy or prefer a vegan version, coconut condensed milk will work, but the flavor profile will shift slightly toward coconut.
The Flavor Boost
Vanilla extract is more than a garnish; it’s a flavor enhancer that deepens the overall sweetness and adds a subtle aromatic note. A single teaspoon is enough to infuse the entire batch with a warm, comforting aroma that’s reminiscent of holiday baking. If you’re a fan of almond or citrus, a drop of almond extract or a splash of orange zest can add an unexpected twist.
The Texture Crew
Crushed Christmas cookies are the star of the show, delivering a delightful crunch that breaks up the creamy base. They also introduce a subtle gingerbread flavor that ties the dessert to the holiday season. Use a mix of gingerbread and snickerdoodle for a layered taste, or keep it simple with your favorite cookie. The sprinkles add a burst of color and a sugary bite that contrasts with the cookie crunch.
Everything's prepped? Good. Let's get into the real action...
The Method — Step by Step
- Step 1: Warm the Condensed Milk – In a medium saucepan, pour the can of sweetened condensed milk and heat over low to medium heat. Stir constantly with a wooden spoon, watching for that golden glaze to form. The mixture should reach a gentle simmer, but avoid boiling; a rolling boil will scorch the milk. This step is the foundation of the custard base, and it’s where the flavor begins to develop.
- Step 2: Whip the Cream – While the milk is heating, place the heavy whipping cream in a chilled mixing bowl. Add the vanilla extract and a pinch of salt. Whisk until soft peaks form, then continue whisking until stiff peaks appear. The stiffness of the peaks is crucial; if they’re too soft, the ice cream will be runny; too stiff, and they may deflate when folded in.
- Step 3: Fold the Mixture – Remove the saucepan from heat and let the condensed milk cool to room temperature. Slowly pour the warm milk into the whipped cream while gently folding with a spatula. The goal is to incorporate the milk without deflating the air you’ve worked hard to create. A gentle fold will keep the ice cream airy and light.
- Step 4: Add the Cookies – Stir in the crushed Christmas cookies, ensuring they’re evenly distributed. The cookies should be broken into bite‑size pieces, not fine crumbs, so they retain some crunch. This step is where the texture truly comes alive.
- Step 5: Chill the Mixture – Cover the bowl with plastic wrap and refrigerate for at least 2 hours, or overnight if you prefer. The chilling process allows the flavors to meld and the mixture to thicken, which is essential for a firm scoop.
- Step 6: Freeze – Transfer the chilled mixture into a freezer‑safe container. Freeze for 4–6 hours, or until the ice cream is firm enough to scoop. For a smoother texture, remove the container from the freezer every 30 minutes for the first 2 hours and stir vigorously with a fork to break up any ice crystals.
- Step 7: Serve – Once the ice cream is set, scoop into bowls or cones. Sprinkle a handful of festive sprinkles on top for an extra pop of color and crunch. Serve immediately for the best texture, or let it sit at room temperature for a few minutes if you prefer it a bit softer.
- Step 8: Enjoy – Take a bite and let the flavors swirl together. The creamy custard, crunchy cookies, and sweet sprinkles create a harmony that’s both comforting and exhilarating. I dare you to taste this and not go back for seconds.
That’s it— you did it. But hold on, I've got a few more tricks that'll take this to another level...
Insider Tricks for Flawless Results
The Temperature Rule Nobody Follows
The key to a smooth, lump‑free ice cream lies in temperature control. Keep the condensed milk at a steady 160°F (71°C) before folding in the cream. If the mixture is too hot, it will break the whipped cream; if too cool, the custard will stay thick and clumpy. A quick dip in the freezer for the whisk and bowl can also help maintain the right temperature.
Why Your Nose Knows Best
The aroma of the ice cream as it cools is a subtle indicator of how well the flavors are melding. A sweet, buttery scent is a sign that the condensed milk has fully incorporated. If you notice a raw or metallic smell, it may indicate that the milk wasn’t heated enough, and the sugar hasn’t dissolved properly.
The 5-Minute Rest That Changes Everything
After the initial freeze, let the ice cream rest at room temperature for 5 minutes before scooping. This short rest allows the ice crystals to soften slightly, making the texture easier to scoop and enhancing the mouthfeel. I once skipped this step, and the result was a clunky, uncooperative scoop that felt like ice on a spoon.
Stirring During Freeze
Stirring the mixture every 30 minutes during the first 2 hours of freezing helps break up ice crystals and ensures a uniform texture. Use a sturdy wooden spoon or a metal whisk for this task. The extra effort pays off with a silky, smooth final product that melts just right.
Add a Splash of Alcohol
A tablespoon of brandy, bourbon, or a holiday liqueur can add depth and complexity to the ice cream. Alcohol lowers the freezing point, preventing the ice cream from becoming too hard while adding a subtle warmth. Be sure to add it after the condensed milk has cooled to avoid evaporating the alcohol.
Presentation Tips
Serve the ice cream in a chilled bowl or a pre‑frozen dessert cup for the best temperature retention. Garnish with a drizzle of caramel or a dusting of cocoa powder for an extra visual pop. The sprinkles should be sprinkled just before serving to keep them crisp.
Creative Twists and Variations
This recipe is a playground. Here are some of my favorite ways to switch things up:
Chocolate Cookie Crunch
Swap the gingerbread cookies for chocolate sandwich cookies and add a handful of chocolate chips. The result is a chocolatey, cookie‑filled ice cream that feels like a decadent dessert bar.
Peppermint Swirl
Add a splash of peppermint extract and swirl in a mint‑colored ribbon of chocolate sauce. The mint pairs beautifully with the sweet cream, creating a refreshing holiday treat.
Nutty Variation
Stir in a handful of chopped toasted pecans or walnuts. The nuts add a delightful crunch and a nutty flavor that complements the sweet base.
Vegan Version
Replace the heavy cream with coconut cream and use coconut condensed milk. The result is a dairy‑free, yet equally creamy, ice cream that still carries the holiday flavor.
Spiced Cinnamon Delight
Add a pinch of ground cinnamon and nutmeg to the mixture. The spices give the ice cream a warm, aromatic profile that’s perfect for a cozy winter night.
Fruit‑Infused Surprise
Fold in a handful of frozen berries before freezing. The berries burst with flavor and add a pop of color, creating a vibrant, fruity holiday dessert.
Storing and Bringing It Back to Life
Fridge Storage
If you have leftover ice cream, store it in an airtight container in the refrigerator for up to 3 days. The texture will soften slightly, but it will still taste delicious. Cover the surface with plastic wrap to prevent ice crystals from forming.
Freezer Friendly
For longer storage, keep the ice cream in the freezer for up to 2 months. Wrap the container tightly with foil or a freezer bag to protect it from freezer burn. When you’re ready to serve, let it sit at room temperature for 10 minutes to soften.
Best Reheating Method
If you need to warm the ice cream slightly, place the container in a bowl of warm water for 2–3 minutes. Add a tiny splash of water before reheating to help it steam back to perfection. This trick keeps the ice cream from becoming too hard and preserves its creamy texture.