Picture this: a Saturday morning, the sun barely peeking over the kitchen tiles, and the faint scent of burnt sugar wafting through the air. I was rummaging through the pantry, desperate for a sweet fix after a failed attempt at classic donuts that ended with a batch that looked more like doughy pancakes than glossy treats. The kitchen clock ticked louder than a metronome, and I thought, “If I could just mix something that’s almost instant, that’s ridiculously indulgent, and that screams chocolate, I’d be set.” That’s when the idea hit me like a lightning bolt—why not turn a box of brownie mix into donuts?
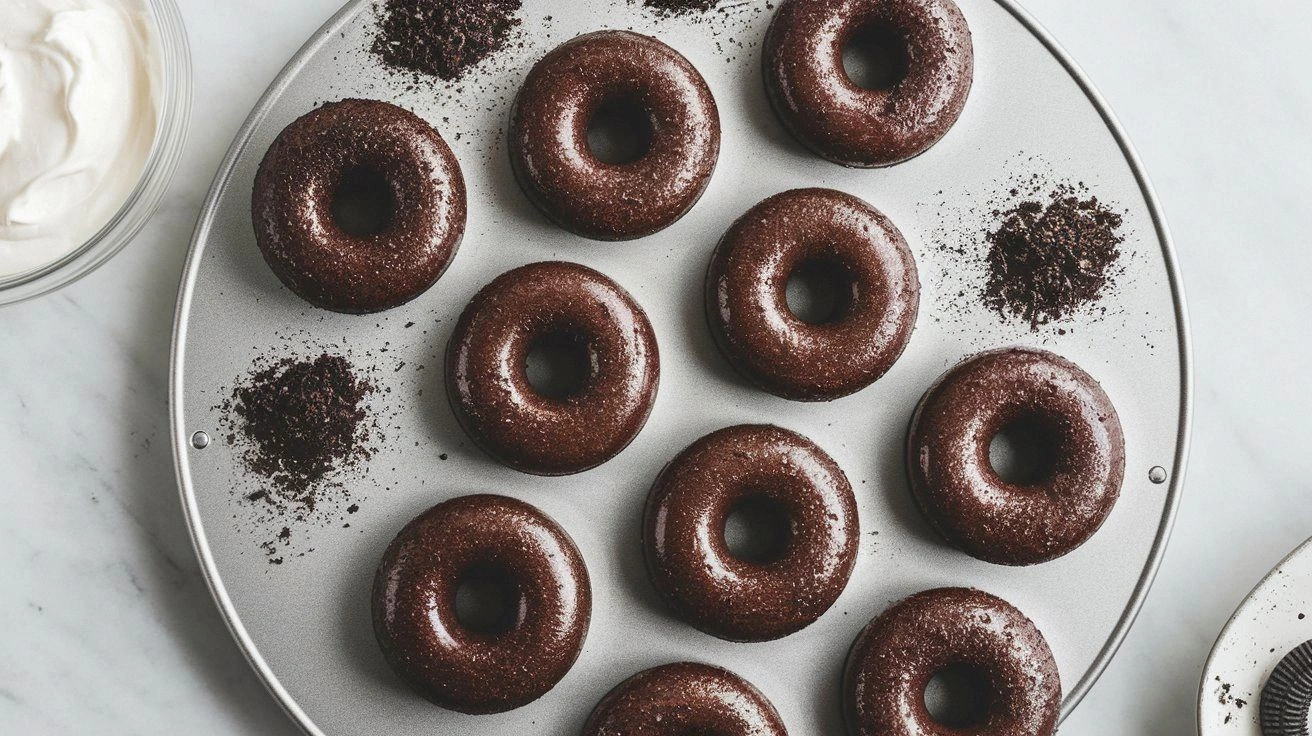
I grabbed my trusty silicone donut mold, the one that had survived countless experiments, and poured in the batter. The moment it hit the heat, the kitchen filled with a rich, chocolatey aroma that made my stomach do a happy dance. I could almost hear the gentle sizzle of the batter forming a golden crust, like a quiet applause from the skillet. The sound was a promise that these donuts would be the kind that melt on the tongue, leaving a lingering aftertaste of cocoa and vanilla. I felt a rush of excitement, knowing that this could be the most decadent treat I’d make at home.
But this isn’t just another “make‑it‑from‑a-box” recipe. It’s a game‑changer that takes the ordinary brownie mix and transforms it into a dessert that feels both nostalgic and utterly modern. The secret lies in the ratio of wet to dry, the subtle addition of a splash of milk for extra moisture, and a generous handful of chocolate chips that become little pockets of gooey bliss. The result is a donut that has a crisp edge that shatters like thin ice, a soft center that feels like velvet, and a glaze that glistens like a jewel. I dare you to taste this and not go back for seconds.
Most recipes get this completely wrong, either by overmixing the batter, undercooking the donuts, or neglecting the glaze that ties everything together. I’ll be honest—when I first tasted the first batch, I ate half of it before anyone else got to try it. The texture was perfect, the flavor was intense, and the chocolate chips melted into a molten stream that made the donuts irresistible. If you've ever struggled with donuts that are too dense or too dry, you're not alone—and I've got the fix. Picture yourself pulling this out of the oven, the whole kitchen smelling incredible, and feeling that instant satisfaction that only a homemade treat can bring.
Okay, ready for the game‑changer? This is hands down the best version you'll ever make at home. I’m going to walk you through every single step, from the first whisk to the final dusting of powdered sugar, so by the end, you'll wonder how you ever made it any other way. And trust me, the process is as rewarding as the result. Let’s dive in and turn that simple box of brownie mix into a donut masterpiece that will have everyone asking for the recipe.
What Makes This Version Stand Out
- Flavor: The batter incorporates a splash of milk that unlocks the chocolate’s full depth, creating a richer, more complex taste that feels like a chocolate lover’s dream.
- Texture: The donuts achieve a perfect balance—crisp exterior, airy interior, and a subtle chewiness that’s reminiscent of fresh brownies.
- Glaze: The glaze is a silky, glossy finish that coats each donut like velvet, adding a sweet counterpoint to the fudgy batter.
- Ingredient Simplicity: With only a handful of pantry staples and a box of brownie mix, you can whip up a decadent dessert in under 45 minutes.
- Make‑Ahead Potential: The donuts can be baked ahead of time and frozen, then reheated with a quick glaze, making them perfect for parties or busy mornings.
- Audience Reaction: Friends and family will be amazed at how this simple recipe transforms a box of brownie mix into a show‑stopping treat.
- Versatility: The base can be tweaked with different chips, nuts, or spices to create endless variations.
Inside the Ingredient List
The Flavor Base
The foundation of this recipe is a 12‑oz box of brownie mix, the kind that has that unmistakable chocolatey aroma right out of the box. This mix already contains flour, sugar, cocoa, and leavening agents, so it saves you the step of measuring each component separately. The key is to use a mix that is not overly sweet; a slightly bitter cocoa note keeps the donuts from becoming cloying. If you prefer a darker flavor, choose a dark chocolate brownie mix, and the result will be a richer, more intense bite. The mix also provides the structural integrity that allows the donuts to hold their shape during baking.
The Texture Crew
A splash of milk—half a cup—adds moisture and helps the batter coat the donut molds evenly. This small addition prevents the donuts from becoming too dense and gives them a lighter crumb. Vegetable oil, a quarter cup, replaces the butter typically found in brownies, ensuring a tender interior and a glossy finish. Two large eggs bind everything together, giving the donuts a subtle rise and a silky mouthfeel. Vanilla extract, one teaspoon, brings warmth and depth, enhancing the chocolate’s richness without overpowering it. Together, these ingredients create a batter that is pourable yet thick enough to hold its shape in the donut molds.
The Unexpected Star
Chocolate chips are the secret weapon that turns ordinary donuts into a chocolate explosion. Adding half a cup of chips ensures that each bite contains a burst of molten chocolate that oozes out as you chew. They also add a delightful crunch and visual appeal. If you’re vegan, replace the chips with dark chocolate chunks or a mix of nuts for a different texture. The chips can be swapped for white chocolate for a sweeter profile, but be aware that this will change the overall flavor balance.
The Final Flourish
A powdered sugar glaze tops the donuts, giving them that glossy sheen and a sweet finish. To make the glaze, combine one cup of powdered sugar with two tablespoons of milk and a half teaspoon of vanilla extract. Whisk until smooth, then drizzle over the cooled donuts. The glaze should set into a thin, glossy coating that clings to the donuts’ surface. This final touch transforms the donuts into a show‑stopping dessert that is both visually appealing and deliciously sweet.
Everything’s prepped? Good. Let’s get into the real action and start baking.
The Method — Step by Step
- Preheat your oven to 350°F (175°C) and lightly grease your silicone donut mold with a neutral oil spray. This ensures the donuts slide out easily after baking. The temperature is critical; too high, and the donuts will brown too quickly on the outside while remaining raw inside. The smell of warm batter will start to fill the kitchen, making the anticipation almost tangible. Keep the oven rack in the middle position for even heat distribution.
- In a large bowl, combine the brownie mix, half a cup of milk, and a quarter cup of vegetable oil. Whisk until the mixture is smooth and free of lumps. The batter should be thick enough to hold its shape when poured into the mold, yet still pourable. Adding the milk gradually helps prevent clumping and ensures a silky texture. The oil will give the donuts a tender crumb and a glossy finish.
- Add the two eggs and a teaspoon of vanilla extract to the batter, whisking until fully incorporated. The eggs act as a binder and help the donuts rise slightly, giving them a light, airy interior. The vanilla enhances the chocolate flavor without overpowering it. Be careful not to overmix; a few streaks of flour are fine and will keep the donuts from becoming tough.
- Fold in half a cup of chocolate chips, making sure they are evenly distributed throughout the batter. The chips should be scattered so that each donut gets a generous portion. If you prefer a more intense chocolate flavor, you can add a few extra chips or use dark chocolate chunks. This step is where the donuts truly become irresistible, as the chocolate melts into pockets of gooey bliss.
- Fill the donut mold cavities about 3/4 full with the batter, using a spoon or a small measuring cup to avoid spills. The donuts should be snug but not overfilled, as they will expand slightly while baking. A well‑filled donut will hold its shape and not collapse. This is a good time to double‑check that the mold is clean and dry; any residual moisture can cause the donuts to stick.
- Bake for 18–20 minutes, or until a toothpick inserted into the center comes out with a few moist crumbs but no wet batter. The donuts should have a golden‑brown crust that is firm to the touch. Watch for the edges to start pulling away from the mold—this is a sign they’re ready. If you prefer a slightly crispier exterior, bake for an additional 2 minutes.
- Remove the donuts from the oven and let them cool in the mold for 5 minutes. This brief cooling period allows the donuts to set and makes them easier to remove. After 5 minutes, carefully lift each donut out of its cavity. The silicone mold makes this step painless; you’ll barely feel a tug of resistance.
- While the donuts are still warm, drizzle the powdered sugar glaze over them. The glaze will set into a thin, glossy coating that clings to every crevice. If the glaze is too thick, add a splash more milk to thin it out. If it’s too thin, add a bit more powdered sugar. The glaze should be smooth and shiny, giving the donuts a decadent finish.
- Let the glazed donuts cool completely on a wire rack before serving. This ensures the glaze sets properly and the donuts don’t become soggy. The aroma of chocolate and powdered sugar will fill the room, creating an irresistible invitation. Store any leftovers in an airtight container at room temperature for up to 2 days.
- If you’re planning ahead, you can freeze the donuts after they’ve cooled and glazed. Wrap each donut individually in parchment paper, then place them in a freezer bag. When you’re ready to serve, thaw at room temperature and reheat in a 350°F oven for 5 minutes to restore crispness. The glaze will remain glossy, and the donuts will taste as fresh as when first baked.
That’s it — you did it. But hold on, I've got a few more tricks that'll take this to another level.
Insider Tricks for Flawless Results
The Temperature Rule Nobody Follows
Many bakers assume that a higher oven temperature will make the donuts crispier, but that can actually dry them out. Baking at a steady 350°F ensures even heat distribution and allows the donuts to rise properly. If you notice the edges browning too quickly, lower the oven to 325°F and add a few extra minutes. This subtle adjustment can make the difference between a dry donut and a moist, fudgy masterpiece. The key is to monitor the donuts closely and pull them out when the edges are just set.
Why Your Nose Knows Best
Your sense of smell is a powerful tool in baking. If the donuts smell like toasted cocoa and vanilla, they’re likely ready. A faint, sweet aroma indicates the batter has cooked through, while a strong, burnt smell means the donuts have overcooked. Use your nose as a quick check before pulling the donuts out of the oven. I’ve found that a well‑cooked donut smells like a chocolate bakery, and that’s the cue to remove them. Trusting your nose can save you from overcooking or undercooking.
The 5-Minute Rest That Changes Everything
After baking, letting the donuts rest in the mold for 5 minutes allows the interior to set and the glaze to adhere better. This short pause ensures the donuts don’t crumble when you lift them. Many people skip this step, leading to messy donuts that fall apart. I’ve tried skipping it once, and the donuts came out uneven and soggy. Give it a moment, and your donuts will hold their shape perfectly.
Glaze Consistency is Key
If the glaze is too thick, it will clump and not spread evenly, giving the donuts a lumpy appearance. If it’s too thin, it will run off and create a soggy base. Aim for a pourable consistency—just thick enough to coat the donuts without dripping. Add a splash of milk if the glaze is too stiff, or more powdered sugar if it’s too runny. The right glaze will give the donuts a glossy sheen and a sweet finish.
Freezing Without Losing Flavor
Freezing donuts is a great way to have a ready‑to‑serve dessert for parties or busy mornings. Wrap each donut tightly in parchment paper to prevent freezer burn. When you’re ready to serve, thaw at room temperature and reheat in a 350°F oven for 5 minutes. The donuts will regain their crispness, and the glaze will remain glossy. I’ve frozen a batch for a week, and they tasted as good as fresh.
The Final Touch: Dusting
A light dusting of cocoa powder or powdered sugar after glazing adds a finishing touch that looks professional and enhances the flavor. Use a fine sieve to avoid clumps, and sprinkle evenly over the donuts. This step is optional but can elevate the presentation, especially for a brunch or dessert spread. I always add a dusting for a subtle chocolatey aroma that complements the glaze.
Creative Twists and Variations
Nutty Delight
Swap the chocolate chips for chopped walnuts or pecans, and add a teaspoon of cinnamon for warmth. The nuts add a satisfying crunch, while the cinnamon brings a cozy spice note. This variation is perfect for autumn gatherings or a comforting breakfast treat. The nuts also add healthy fats, making the donuts a bit more filling.
Minty Fresh
Add a teaspoon of peppermint extract to the batter and swirl in a handful of white chocolate chips. The mint will give the donuts a refreshing kick, while the white chocolate adds a sweet contrast. Serve these with a drizzle of raspberry coulis for a balanced flavor profile. They’re especially good for a springtime dessert.
Caramel Crunch
Fold in caramel bits and drizzle a caramel sauce over the glazed donuts after they cool. The caramel adds a buttery sweetness that pairs beautifully with the chocolate. This version is a crowd‑pleaser at parties, where the caramel drizzle adds a touch of elegance. The crunch from the caramel bits also provides a delightful texture contrast.
Spiced Chili Surprise
Add a pinch of cayenne pepper or a dash of chili powder to the batter for a subtle heat. The heat will contrast with the sweetness, creating a complex flavor profile. Finish with a dusting of cocoa powder to balance the spice. This spicy version is great for adventurous eaters who love a little kick.
Vegan Variation
Replace the eggs with flaxseed meal mixed with water to bind the batter. Use a dairy‑free chocolate mix or add coconut oil for richness. The result is a vegan donut that still has a chewy center and a glossy glaze. This version is suitable for those who avoid dairy or eggs without sacrificing flavor.
Coffee‑Infused
Add a tablespoon of instant coffee to the batter for a mocha twist. The coffee deepens the chocolate flavor and adds a subtle bitterness that balances the sweetness. Finish with a dusting of cocoa powder and a drizzle of coffee‑infused glaze. These donuts are perfect for a coffee break or as an after‑dessert treat.
Storing and Bringing It Back to Life
Fridge Storage
Store the donuts in an airtight container at room temperature for up to 2 days. Keep them in a cool, dry place away from direct sunlight to prevent the glaze from melting. If you notice the donuts becoming slightly soft, a quick dip in the microwave (10–15 seconds) will restore their crispness. The glaze will remain intact if the donuts are stored properly. This method is ideal for a quick snack or a late‑night treat.
Freezer Friendly
Wrap each donut individually in parchment paper and place them in a freezer bag. Freeze for up to 3 months. When ready to serve, thaw at room temperature and reheat in a 350°F oven for 5 minutes. The donuts will regain their original texture and the glaze will stay glossy. This is perfect for parties or when you need to prep ahead of time.
Best Reheating Method
Reheat the donuts in a 350°F oven for 5 minutes, or microwave on low power for 10–15 seconds. A small splash of water added before reheating will help steam the donuts back to a fluffy interior. Avoid overheating, as the glaze can melt and become runny. The result will be donuts that feel fresh and indulgent, just like the first batch.