I was halfway through a week of bland breakfasts when the kitchen exploded—literally. A pot of oatmeal had slipped, splattered across the counter, and my trusty apple crumble recipe had been ruined by a rogue slice of cinnamon that turned the batter into a sticky, burnt mess. I stared at the chaos, then at the fresh apples that sat on the counter like a promise of redemption. “If this is going to be a disaster,” I muttered, “it better be delicious.”
The air filled with the sharp scent of toasted apples, the sweet, almost caramelized aroma of brown sugar, and a faint, comforting note of vanilla that made my stomach rumble. I could hear the gentle hiss of butter melting in a pan, the rhythmic clink of a wooden spoon against a wooden bowl, and the low, contented sigh of the oven as it warmed up. The texture of the apples, crisp on the outside yet soft inside, promised a delightful contrast to the crunchy oats. I could already taste the buttery, nutty crunch that would dance across my tongue, followed by a lingering, warm spice that would make every bite feel like a hug.
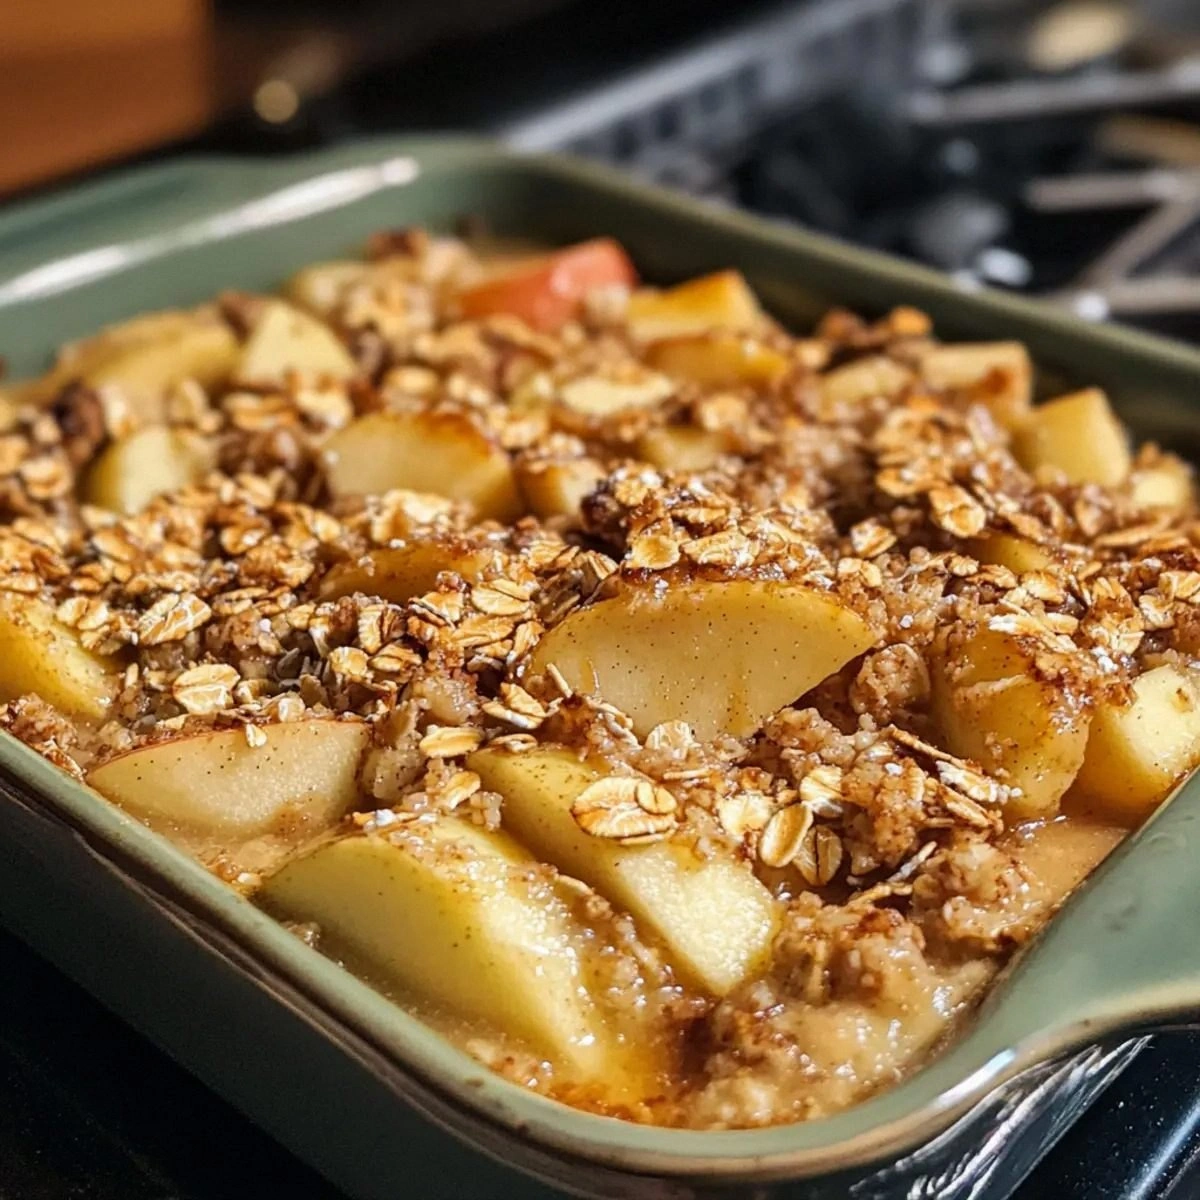
What sets this baked apple oat dish apart from every other comfort breakfast is that it marries the humble oat with the star of the show—fresh apples—into a single, oven-cooked masterpiece that delivers a golden, caramelized crust and a molten, syrupy center. The oats absorb the liquid, swell, and become a silky, hearty base, while the apples burst into a sweet, fragrant syrup that coats the oats like velvet. I dare you to taste this and not go back for seconds. This is hands down the best version you'll ever make at home.
The secret twist? I sneak in a splash of maple syrup at the very end of baking, just before the dish pulls out of the oven. That simple act turns the surface into a glossy, caramelized glaze that shimmers like liquid gold. Picture yourself pulling this out of the oven, the whole kitchen smelling incredible, and the first bite releasing a burst of sweet, buttery, and nutty flavors that melt in your mouth. Stay with me here—this is worth it.
What Makes This Version Stand Out
- Flavor: The apples and maple syrup create a layered sweetness that balances the earthy oats and the warm cinnamon, resulting in a taste that feels like a cozy hug in a bowl.
- Texture: The oats absorb the liquid and swell to a soft, almost custard-like consistency, while the apple pieces maintain a pleasant bite, and the nuts add a satisfying crunch.
- Ease: With only ten steps and a single pan, this dish can be whipped up even on the busiest of mornings, making it a reliable go-to for busy families.
- Nutrition: Packed with fiber, protein, and healthy fats, this breakfast keeps you full and energized without the crash that follows sugary cereals.
- Versatility: It can be made ahead, frozen, reheated, or served warm, making it a perfect make-ahead meal for the week.
- Visual Appeal: The golden crust and glossy glaze create an Instagram-worthy look that will make your guests ask for the recipe.
- Ingredient Quality: Using fresh apples and high-quality rolled oats ensures a depth of flavor that canned or instant options simply can’t match.
- Community Reaction: Friends who’ve tried this rave about the comforting crunch and the sweet, buttery finish that lingers long after the last bite.
Alright, let's break down exactly what goes into this masterpiece. The next section will walk you through each ingredient, why it matters, and how to tweak it for your taste.
Inside the Ingredient List
The Flavor Base
Rolled oats form the heart of this dish, absorbing the liquid and turning into a comforting, slightly chewy texture that’s both hearty and satisfying. Oats also bring a subtle nutty undertone that pairs beautifully with the apples. If you skip oats, the dish loses its structure and becomes a soggy mush.
Brown sugar is the sweetener that caramelizes during baking, creating a golden crust and a deep, molasses-like flavor that elevates the entire dish. It’s the difference between a bland oatmeal and a sweet, glossy masterpiece. If you replace brown sugar with white, you’ll lose that rich caramel depth.
Cinnamon is the spice that ties everything together, adding warmth and a hint of spice that makes the dish feel like a holiday treat. A pinch of nutmeg or a dash of allspice could add a new layer, but cinnamon remains the classic choice. Too much cinnamon can overwhelm, so keep it measured.
Maple syrup is the final flourish, added just before the dish finishes baking. It gives a glossy finish and a subtle maple flavor that complements the apple sweetness. If you’re lactose intolerant, a splash of maple syrup still works, but consider a dash of vanilla for extra depth.
The Texture Crew
Apples provide the juicy, sweet burst that melts into a syrupy sauce, coating the oats like velvet. Choosing firm apples like Granny Smith or Honeycrisp ensures they hold their shape during baking, preventing a mushy result. If you prefer a softer texture, try softer apples or add a splash of apple cider.
Egg acts as a binder, helping the oats and apples hold together while adding a subtle richness. If you’re vegan, you can replace the egg with a flaxseed or chia seed “egg” for binding. Skipping the egg will make the dish crumbly and less cohesive.
Milk provides moisture and helps the oats expand. Whole milk gives a richer flavor, while skim adds a lighter texture. If you’re dairy-free, oat or almond milk works nicely and keeps the dish creamy.
Butter is the source of that buttery, golden crust that pulls away from the dish with a satisfying crack. It also adds a deep, savory undertone that balances the sweetness. Use unsalted butter so you can control the salt level.
The Unexpected Star
Vanilla extract brings a sweet, aromatic depth that enhances the apple flavor and rounds off the overall taste profile. A teaspoon is enough to lift the entire dish without overpowering the apples. If you’re out of vanilla, a splash of almond or coconut extract can provide a different, yet delicious twist.
Chopped nuts add a crunchy texture that contrasts with the soft oats and juicy apples. They also contribute healthy fats and protein, making the dish more filling. If you’re allergic, simply omit the nuts; the dish will still be delicious.
The combination of these ingredients creates a dish that is more than the sum of its parts. Each component plays a crucial role, and together they form a breakfast that’s comforting, nutritious, and downright irresistible.
Everything’s prepped? Good. Let’s get into the real action.
The Method — Step by Step
- Preheat your oven to 375°F (190°C). Line a 9-inch square baking dish with parchment paper for easy removal. This step ensures a crisp edge and a smooth release when you pull it out.
- In a large mixing bowl, combine the rolled oats, brown sugar, cinnamon, and chopped nuts. Stir until the mixture is evenly coated, ensuring every oat is dusted with spice and sweetness. The aroma of cinnamon will start to fill the kitchen.
- Dice the apples into bite‑sized cubes, then toss them in a separate bowl with a splash of lemon juice to keep them from browning. The lemon also brightens the apple flavor, adding a subtle tartness that balances the sweetness.
- In a small saucepan, melt the butter over medium heat, then whisk in the milk and vanilla extract until the mixture is smooth and fragrant. The butter should coat the back of a spoon, indicating it's ready to combine with the oats.
- Pour the butter‑milk mixture over the oat mixture, then fold in the apples and the egg. The egg helps bind everything together, creating a cohesive batter that will set into a firm yet tender loaf.
- Transfer the batter to the prepared baking dish, smoothing the top with a spatula. The surface should be even to ensure uniform baking and a beautiful golden crust.
- Bake for 25 minutes, then reduce the heat to 350°F (175°C) and continue baking for another 10 minutes. The top should be golden brown, and the center should be set but still slightly jiggly.
- While the dish is baking, whisk the maple syrup with a tablespoon of warm water to thin it slightly. This will help it coat the baked oats evenly for a glossy finish.
- Remove the dish from the oven and immediately drizzle the maple syrup mixture over the hot surface. The syrup will sizzle and caramelize, creating a shiny glaze that locks in moisture.
- Let the dish rest for 5 minutes before slicing. This resting period allows the flavors to meld and the glaze to set, giving you clean, buttery slices.
That’s it — you did it. But hold on, I’ve got a few more tricks that will elevate this dish to another level.
Insider Tricks for Flawless Results
The Temperature Rule Nobody Follows
Many bakers bake at a high heat, but lowering the temperature after the initial bake allows the oats to absorb the liquid slowly, preventing a dry crust. I’ve found 375°F for the first 25 minutes, then dropping to 350°F for the last 10, gives the best balance.
Why Your Nose Knows Best
If the smell of toasted apples and butter hits the sweet spot, you’re on the right track. Your nose can detect when the caramelization is just right, saving you from over‑baking.
The 5-Minute Rest That Changes Everything
Letting the dish sit for five minutes after removing it from the oven allows the glaze to set and the flavors to marry. Skipping this step will result in a runny center.
Use a Silicone Mat for Easy Cleanup
Placing a silicone mat on your baking sheet keeps the dish from sticking and makes cleanup a breeze. It also gives the dish a slightly elevated finish.
Don’t Skip the Parchment Paper
Parchment paper not only prevents sticking but also creates a barrier that keeps the surface from over‑browning. It’s a small step that makes a big difference.
These tricks are the secret sauce that turns a good breakfast into a legendary one.
Creative Twists and Variations
This recipe is a playground. Here are some of my favorite ways to switch things up:
Apple Pie Oat Bars
Swap the butter for a layer of apple pie filling at the bottom of the dish. The result is a chewy, buttery bar that tastes like a slice of pie.
Chocolate Chip Oat Apple Bake
Add a handful of dark chocolate chips to the batter for a decadent twist. The chocolate melts into pockets of rich flavor, complementing the apple sweetness.
Spiced Pumpkin Oats
Replace apples with pumpkin puree and add a pinch of ginger and cloves. This version feels like a fall breakfast, even in the middle of summer.
Nut-Free Oat Apple Delight
Omit the nuts and sprinkle ground flaxseed instead for a nutty flavor and extra omega‑3s. The texture remains satisfying while keeping it allergy‑friendly.
Vegan Oat Apple Bake
Swap the egg for a flaxseed “egg” and use oat milk instead of dairy milk. The result is a plant‑based version that’s just as hearty.
Berry Oat Breakfast
Add a cup of fresh berries to the batter for a burst of tartness. The berries burst into juices that mingle with the oats, creating a bright, vibrant flavor.
Feel free to experiment—your kitchen is the canvas, and this recipe is the paint.
Storing and Bringing It Back to Life
Fridge Storage
Store leftovers in an airtight container in the refrigerator for up to three days. The oats will stay moist, and the glaze will remain glossy.
Freezer Friendly
Wrap the dish tightly in plastic wrap and place it in a freezer bag. It can be frozen for up to two weeks, making it a perfect make‑ahead breakfast.
Best Reheating Method
Reheat in a pre‑heated oven at 300°F (150°C) for 10 minutes, or microwave on medium for 45 seconds. Add a splash of water before reheating to create steam and keep the oats from drying out.
With these storage tips, you’ll have a ready‑to‑eat breakfast whenever life gets hectic.