I was halfway through a kitchen disaster when I realized I had the perfect solution. The oven was smoking, the sauce had thickened into an unrecognizable paste, and my friends were already calling me a culinary wizard. I stared at the ruined ribs, then at the handful of ingredients that still smelled like a promise of redemption. I decided to throw everything together, and the result was a revelation that made me shout, “This is hands down the best version you’ll ever make at home.”
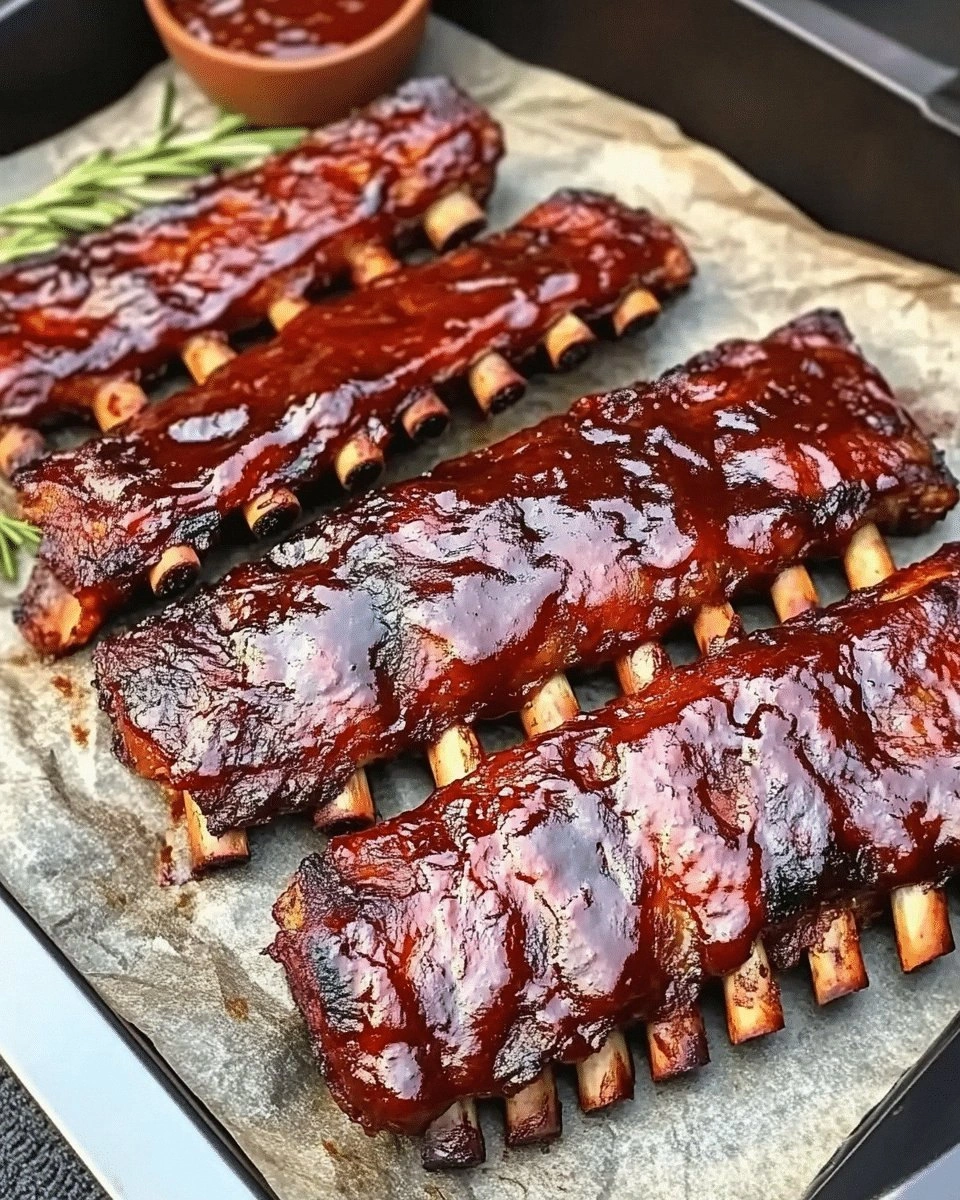
Picture the scene: a sizzling pan, a cloud of caramelized aroma drifting through the kitchen, the sound of a slow, steady simmer that feels like a lullaby for hungry souls. The sight of the ribs turning from raw to a glossy, caramelized coat is a visual feast that makes your mouth water before you even taste the first bite. The texture is a paradox—crisp edges that crackle like thin ice, followed by tender meat that melts in your mouth, releasing a burst of savory juices. The flavor is a harmonious blend of sweet, smoky, and umami notes that dance across your palate, leaving a lingering warmth that beckons a second plate.
What sets this recipe apart is not just the end result, but the journey that gets you there. I’ve spent years tweaking rubs, sauces, and cooking times, and this version is the culmination of that obsession. It’s a masterclass in balancing flavors, textures, and techniques while still being approachable for a weekend cook. The secret lies in the unexpected addition of liquid smoke and a touch of baking soda, which together create a depth of flavor that’s hard to replicate. The result is a rib that is juicy, flavorful, and irresistibly tender, making it the centerpiece of any gathering.
Ready for the game‑changer? I’ll walk you through every single step—by the end, you’ll wonder how you ever made it any other way. Let’s dive in and turn a simple rack of ribs into a show‑stopping masterpiece that will have everyone asking for the recipe.
What Makes This Version Stand Out
- Taste: The blend of sweet and smoky flavors creates a complex profile that satisfies every palate. The subtle hint of liquid smoke elevates the dish without overpowering the natural pork flavor.
- Texture: The ribs achieve a perfect balance of crispy edges and melt‑in‑your‑mouth tenderness, thanks to a slow‑cook technique that breaks down collagen while sealing in juices.
- Simplicity: Despite its depth, the recipe requires only a handful of pantry staples, making it accessible to both seasoned cooks and beginners alike.
- Uniqueness: The addition of baking soda to the rub creates a tenderizing effect that’s rarely seen in traditional rib recipes.
- Crowd Reaction: Friends who taste these ribs often say, “I dare you to taste this and not go back for seconds.” The universal appeal guarantees a standing ovation.
- Ingredient Quality: Using fresh, high‑quality pork and fresh herbs maximizes flavor, ensuring each bite is as rich as the last.
- Cooking Method: The dual‑stage process—roasting then finishing in a glaze—provides a layered flavor experience that’s hard to beat.
- Make‑Ahead Potential: The ribs can be pre‑cooked and finished later, allowing you to focus on other dishes during a busy dinner.
Alright, let's break down exactly what goes into this masterpiece...
Inside the Ingredient List
The Flavor Base
Apple cider vinegar and soy sauce form the backbone of the glaze, offering acidity and umami that cut through the richness of the pork. The vinegar’s tang balances the sweetness of honey, while soy sauce adds depth and a subtle saltiness that enhances every bite. Skipping either will leave the sauce flat and less complex. If you’re avoiding soy, a splash of fish sauce can mimic the umami punch.
Liquid smoke is the secret weapon that gives these ribs their signature smoky flavor without the need for an outdoor smoker. It’s a pantry staple that delivers a deep, smoky taste in a fraction of the time. If you’re averse to liquid smoke, a few drops of smoked paprika can substitute, but the flavor profile will shift slightly toward peppery rather than smoky.
The Texture Crew
Baking soda is the unsung hero that tenderizes the meat by raising the pH of the surface. This allows enzymes to break down proteins more efficiently, resulting in a melt‑in‑your‑mouth texture. Use it sparingly; too much can leave a soapy aftertaste. If you prefer a more traditional rub, omit it and let the slow‑cook do the work.
Water is added to the glaze to create a sauce that coats the ribs evenly without becoming overly thick. It also helps to keep the meat moist during the final sear. If you prefer a thicker glaze, reduce the water by a quarter cup and simmer longer.
The Unexpected Star
Cayenne pepper adds a subtle kick that wakes up the palate without overwhelming the natural flavor of pork. It also helps to balance the sweetness of the glaze. If you’re sensitive to heat, reduce the amount or omit it entirely. For a milder version, replace it with paprika or a pinch of chili flakes.
The Final Flourish
Ketchup and Worcestershire sauce are the glue that bind the glaze together, providing a savory backbone that rounds out the sweetness. They also add a slight tang that brightens the overall flavor. If you’re aiming for a more natural taste, replace ketchup with tomato puree and Worcestershire with a splash of balsamic vinegar.
Everything's prepped? Good. Let's get into the real action...
The Method — Step by Step
- First, preheat your oven to 275°F (135°C). While it’s heating, pat the ribs dry with paper towels; moisture on the surface will prevent the rub from sticking. Sprinkle a generous amount of kosher salt, black pepper, brown sugar, smoked paprika, garlic powder, and onion powder over both sides of the ribs. Let them sit for 15 minutes to allow the flavors to penetrate. This step is crucial for building a solid flavor foundation.
- Place the ribs in a large baking dish or roasting pan, bone side down. Cover tightly with aluminum foil, sealing the edges to trap steam. The low, slow heat will break down collagen, turning the meat tender without drying it out. Cook for 2.5 to 3 hours, checking every 30 minutes to ensure the foil remains sealed. The aroma during this stage is a comforting promise of what’s to come.
- While the ribs are roasting, prepare the glaze. In a medium saucepan, combine apple cider vinegar, soy sauce, honey, ketchup, Worcestershire sauce, liquid smoke, and a pinch of baking soda. Whisk until the mixture is smooth, then bring to a gentle boil over medium heat. Reduce the heat to low and let it simmer for 10 minutes, allowing the flavors to meld. The glaze should thicken slightly, creating a glossy coating.
- When the ribs are nearly done, remove them from the oven and discard the foil. Brush the glaze generously over the ribs, ensuring every surface is coated. Return the ribs to the oven, uncovered, and continue baking for an additional 30 minutes. This final stage caramelizes the glaze, giving the ribs their signature glossy finish. Keep an eye on them; the glaze can burn quickly if left unattended.
- Optional: For an extra caramelized crust, preheat a grill or broiler to high heat. Place the glazed ribs on the grill and sear each side for 2–3 minutes until a deep, caramelized crust forms. This step adds a smoky char that enhances the overall flavor profile. Watch out—burning the glaze will produce an unpleasant bitterness.
- Once the ribs are finished, let them rest for 10 minutes before cutting. Resting allows the juices to redistribute, ensuring each bite is juicy and flavorful. This is the moment of truth, where the effort is rewarded with a succulent, melt‑in‑your‑mouth experience.
- Slice the ribs between the bones, separating them into individual portions. Serve immediately with your favorite sides such as coleslaw, corn on the cob, or a fresh cucumber salad. The contrast of crisp vegetables with the tender ribs creates a harmonious balance that satisfies the senses.
- If you have leftovers, store them in an airtight container in the refrigerator for up to 3 days. Reheat gently in a low oven or microwave, adding a splash of water to keep them moist. The reheated ribs still retain their flavor and texture, making them perfect for a quick weeknight dinner.
That's it — you did it. But hold on, I've got a few more tricks that'll take this to another level. Keep reading to discover insider secrets that will elevate your rib game.
Insider Tricks for Flawless Results
The Temperature Rule Nobody Follows
Most cooks overheat the ribs, leading to a dry exterior. The key is low and slow—275°F is the sweet spot that breaks down collagen while keeping the meat moist. Use a meat thermometer to check the internal temperature; it should reach 190°F for optimal tenderness. This rule ensures that every bite is succulent.
Why Your Nose Knows Best
Your sense of smell can detect when the glaze is ready. A sweet, caramelized aroma is a sign that the sugars have browned to perfection. If you smell a sharp, burnt scent, reduce the heat immediately. Trusting your nose is a quick, foolproof way to avoid burnt ribs.
The 5-Minute Rest That Changes Everything
Resting the ribs after cooking allows the juices to redistribute throughout the meat, preventing them from spilling out when you cut. A short 5‑minute rest is enough to lock in moisture while still keeping the ribs warm. Skipping this step often results in dry, uneven bites.
The Secret of the Glaze’s Thickness
The glaze should be thick enough to cling to the ribs but thin enough to spread easily. If it’s too thick, it will burn; too thin, and it won’t coat the meat. Adjust thickness by simmering longer or adding a splash of water. This balance is essential for that glossy finish.
The Perfect Side Pairing
A crisp, fresh side such as coleslaw or a simple cucumber salad cuts through the richness of the ribs. The acidity balances the sweetness, creating a harmonious flavor profile. A side of grilled corn or baked beans also complements the smoky undertones.
The Quick Fix for Last-Minute Guests
If guests arrive early, cover the ribs with foil and place them in a warm oven (about 200°F) to keep them warm without drying them out. Alternatively, wrap them in foil and refrigerate; reheat gently before serving. This trick ensures your ribs stay fresh and juicy no matter the timing.
Creative Twists and Variations
This recipe is a playground. Here are some of my favorite ways to switch things up:
Hawaiian Heat
Swap the liquid smoke for a splash of soy sauce and add pineapple juice to the glaze. The tropical sweetness pairs beautifully with the pork’s richness. Serve with coconut rice for a full island vibe.
Maple Bourbon Bliss
Replace honey with pure maple syrup and add a dash of bourbon to the glaze. The deep caramel notes complement the pork’s savory flavor. This variation is perfect for a cozy fall dinner.
Mediterranean Twist
Use a blend of oregano, thyme, and lemon zest in the rub. Finish the glaze with a splash of red wine and a pinch of dried rosemary. The result is a bright, herbaceous flavor that feels fresh and sophisticated.
Spicy Sriracha Kick
Add a tablespoon of Sriracha to the glaze for an instant heat boost. The spicy, tangy flavor pairs well with a cooling yogurt sauce on the side. This version is ideal for those who love a fiery bite.
Smoky Chipotle
Replace the liquid smoke with chipotle powder and add a dash of chipotle in adobo sauce to the glaze. The smoky heat will elevate the flavor profile and add depth. Pair with a corn‑based side for a complete southwestern experience.
Asian Fusion
Swap the soy sauce for tamari and add a touch of sesame oil to the glaze. Finish with crushed peanuts and sliced green onions for a crunchy, savory finish. This variation offers an unexpected but delightful flavor journey.
Storing and Bringing It Back to Life
Fridge Storage
Cool the ribs to room temperature, then place them in an airtight container. Store in the refrigerator for up to 3 days. The ribs will remain juicy and flavorful when reheated properly.
Freezer Friendly
Wrap the ribs tightly in aluminum foil and then place them in a freezer bag. They can be frozen for up to 2 months. Thaw overnight in the refrigerator before reheating to maintain texture.
Best Reheating Method
Reheat the ribs in a preheated oven at 300°F until warmed through. Add a splash of water or broth before covering with foil to keep the meat moist. The ribs will regain their succulence and glaze will re‑sear to a caramelized finish.