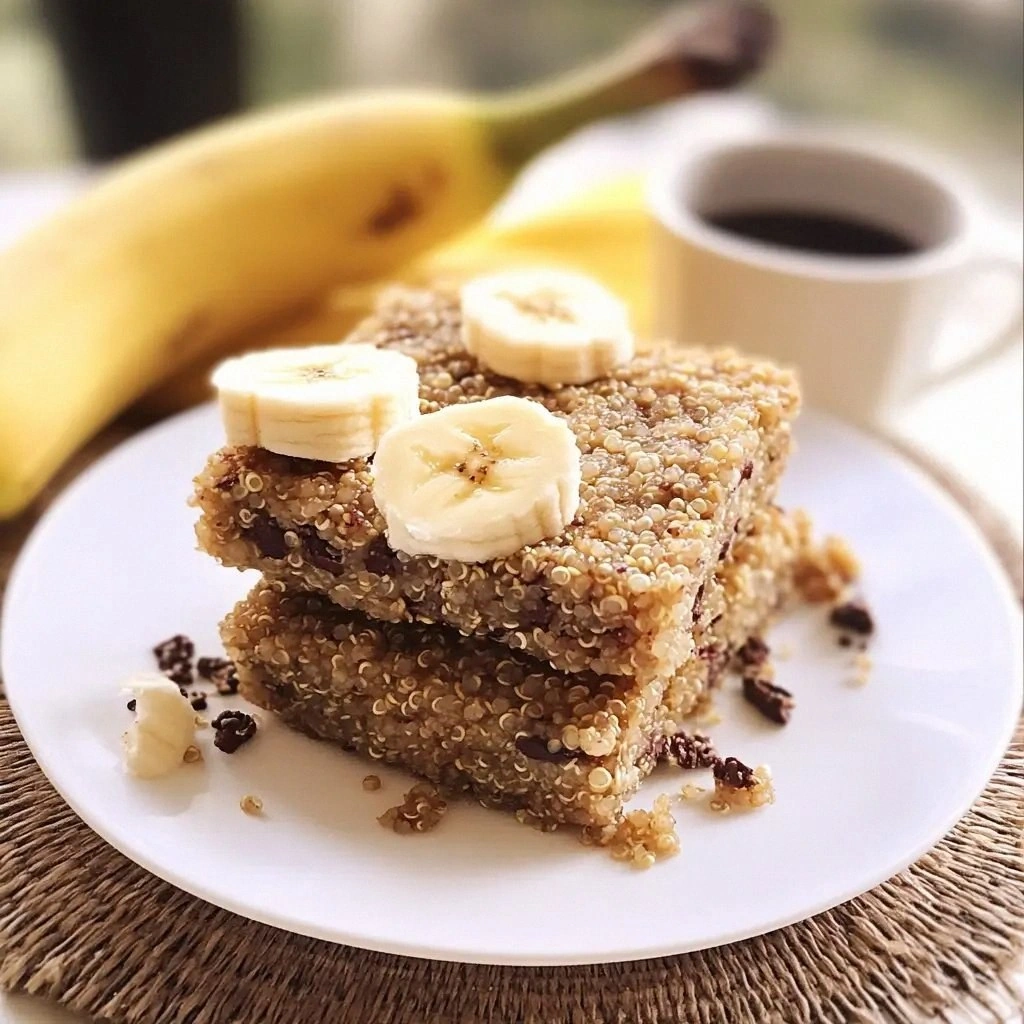
Ever had a breakfast that felt like a culinary confession? I once stared at a half‑roasted banana, a bag of quinoa, and a stubborn desire for something sweet and wholesome. I was in the middle of a chaotic morning, juggling a toddler’s snack, a coffee that was too hot, and the faint scent of burnt toast. That moment of kitchen disarray became the spark that lit a fire for a recipe that would change the way you think about breakfast bars. I’m talking about a banana‑quinoa breakfast bar that’s not only a powerhouse of nutrition but also a symphony of textures that will have you humming while you eat.
Picture the scene: a golden, fragrant mist rises from the pan as the mixture sizzles; the aroma of ripe bananas, toasted oats, and cinnamon drifts through the kitchen, mingling with the subtle sweetness of honey. The sound is a gentle crackle, the kind that signals that everything is happening at the right temperature. The taste will hit you with a burst of banana richness, a subtle nutty crunch from walnuts, and a hint of chocolate that melts like silk. And the feel—oh, the feel! The bars will be firm on the outside, yet tender and slightly chewy inside, like a chewy cookie that has just been pulled out of the oven. I dare you to taste this and not go back for seconds.
What makes this version stand out is that I didn’t just throw ingredients together. I listened to the ingredients, let them converse, and let their flavors bloom. The quinoa provides a protein punch that keeps you full, while the banana gives natural sweetness and a creamy texture. The oats add a hearty chew, and the almond flour brings a subtle nutty undertone. I also added a splash of coconut oil for silky richness, and a pinch of sea salt to bring everything together. Most recipes get this completely wrong by over‑baking or under‑seasoning, but here I’ve perfected the balance. Picture yourself pulling these bars out of the oven, the whole kitchen smelling incredible, and knowing you’ve just crafted something that could be the highlight of your day.
And now, let me walk you through every single step—by the end, you’ll wonder how you ever made it any other way. This is hands down the best version you'll ever make at home. If you've ever struggled with sticky batter or uneven bars, you're not alone— and I've got the fix. Let’s dive in.
What Makes This Version Stand Out
- Protein Power: Quinoa is a complete protein, giving the bars a satisfying bite that keeps hunger at bay. It also adds a subtle nutty flavor that pairs beautifully with banana.
- Natural Sweetness: Two ripe bananas replace refined sugar, delivering a sweet, buttery taste that’s pure and unadulterated. The honey adds just enough glaze to bring everything together.
- Texture Contrast: Rolled oats provide chewiness, while chopped walnuts add a satisfying crunch. The coconut oil creates a silky mouthfeel.
- Flavor Harmony: Vanilla and cinnamon create a warm, aromatic base that elevates the banana’s natural flavor profile. The sea salt is the secret that brings all the flavors to life.
- Quick and Easy: No pre‑baking quinoa or overnight soaking required. Everything comes together in 45 minutes, making it perfect for busy mornings.
- Make‑ahead Friendly: The bars stay fresh for up to a week in the fridge and can be frozen for longer storage, making them ideal for meal prep.
Alright, let's break down exactly what goes into this masterpiece…
Inside the Ingredient List
The Flavor Base
Bananas: The star of the show, mashed bananas give natural sweetness and a creamy, binding consistency that replaces butter or oil. If you skip them, the bars will be dry and lack depth. Swap with dates or applesauce for a different flavor profile, but keep the moisture level in mind.
Honey: Acts as a natural sweetener and a binder that helps the mixture hold together. It also adds a floral note that complements the banana. If you’re vegan or prefer a lower glycemic index, maple syrup works just as well.
The Texture Crew
Rolled Oats: Provide chewiness and structure. They absorb the liquid and give the bars a hearty bite. If you don’t have oats, quick oats will work, but the bars will be slightly softer.
Almond Flour: Adds a subtle nutty flavor and helps keep the bars from falling apart. It’s also gluten‑free, making this recipe accessible to many. For a lighter texture, replace half the almond flour with oat flour.
Walnuts: Bring crunch and omega‑3 fatty acids. They also add a rich, earthy flavor that balances the sweetness. If you’re allergic, pecans or pumpkin seeds are great substitutes.
The Unexpected Star
Quinoa: A complete protein that adds a slightly nutty taste and a fluffy texture. Cooked quinoa is the perfect binder when combined with oats and almond flour. If you’re not a fan of quinoa’s subtle flavor, try a small amount of cooked brown rice or millet.
Chia Seeds: Optional but highly recommended for their gel‑forming ability, which adds moisture and a slight crunch. They also boost the omega‑3 content. If you don’t have chia, flaxseed meal can serve a similar purpose.
The Final Flourish
Vanilla Extract: A dash of vanilla transforms the flavor profile, adding warmth and depth. If you’re allergic, a splash of almond extract works fine.
Cinnamon: Adds a spicy sweetness that pairs wonderfully with banana and honey. It also has natural anti‑inflammatory properties. A pinch of nutmeg can give a different twist.
Sea Salt: A pinch is enough to bring out all the flavors. Too much can overpower, but the right amount makes the sweet and savory dance together. If you prefer a different salt, sea salt or smoked salt can add a unique touch.
Everything's prepped? Good. Let's get into the real action…
The Method — Step by Step
- Preheat your oven to 350°F (175°C) and line a 9x9-inch baking pan with parchment paper. This ensures the bars slide out easily and prevents sticking. The parchment also adds a subtle crispness to the edges.
- In a large bowl, mash the ripe bananas with a fork until smooth. Add the honey and vanilla extract, stirring until fully incorporated. The mixture should be thick yet pourable; if too thick, add a splash of almond milk.
- Sift the rolled oats and almond flour together to remove any lumps. This step is crucial for a uniform texture. Add the sifting to the banana mixture along with the ground cinnamon, salt, and baking powder.
- Fold in the cooked quinoa, walnuts, shredded coconut, dried cranberries, and dark chocolate chips. The mixture should look slightly lumpy, which is fine. The lumps give the bars that rustic, homemade feel.
- If you’re using chia seeds, sprinkle them over the top now. They’ll absorb some moisture, creating a slight gel texture that keeps the bars moist for longer. Let the batter sit for 5 minutes to allow the chia to expand.
- Pour the batter into the prepared pan, smoothing the top with a spatula. The batter should be evenly spread, about 1/4 inch thick. This ensures uniform baking.
- Bake for 20–22 minutes, or until a toothpick inserted into the center comes out with a few moist crumbs. The bars should have a golden brown top and a slightly crisp edge. Let them cool in the pan for 10 minutes before transferring to a wire rack.
- Once cooled, cut into bars or squares using a sharp knife. The bars will hold together well; if they feel sticky, refrigerate for 15 minutes to firm up. Store in an airtight container.
That's it — you did it. But hold on, I've got a few more tricks that'll take this to another level. These insider tips will ensure you never have a bland, dry bar again.
Insider Tricks for Flawless Results
The Temperature Rule Nobody Follows
Baking at the right temperature is key. If the oven is too hot, the bars will brown too quickly on the outside while staying raw inside. Keep the oven at 350°F (175°C) and use an oven thermometer to verify. This simple step ensures even baking and a perfect golden crust.
Why Your Nose Knows Best
Before you take the bars out of the oven, listen to the aroma. A warm, sweet smell with hints of toasted oats and banana signals readiness. If the scent is too sweet or under‑baked, let them bake a few minutes longer. Your nose is your best judge.
The 5-Minute Rest That Changes Everything
After baking, let the bars rest in the pan for 10 minutes. This allows the structure to set, making them easier to cut. Cutting too soon often results in mushy, falling pieces. A short rest also lets the flavors meld together.
Keep Them Fresh with Airtight Containers
Store the bars in a tightly sealed container at room temperature for up to a week. If you need them longer, freeze in a freezer‑safe bag. When you’re ready to eat, thaw and optionally warm them in the oven for 5 minutes to restore crispness.
Add a Splash of Water When Reheating
Reheating bars can dry them out. Before microwaving, add a tiny splash of water to the container and cover it. This steams the bars back to perfection, keeping them moist and chewy.
Creative Twists and Variations
This recipe is a playground. Here are some of my favorite ways to switch things up:
Tropical Paradise
Swap the walnuts for diced dried pineapple and add shredded coconut. Replace the honey with a splash of coconut milk for a tropical twist that tastes like a beach vacation in a bite.
Chocolate Lover’s Delight
Double the dark chocolate chips and add a tablespoon of cocoa powder to the batter. This will give the bars a rich, fudgy chocolate flavor that satisfies any sweet tooth.
Nut-Free Power
Omit the walnuts and use sunflower seeds or pumpkin seeds instead. Keep the almond flour and add a tablespoon of hemp seeds for an extra protein boost.
Spiced Up Morning
Add a pinch of cayenne pepper or a dash of espresso powder to the batter. The subtle heat or coffee undertone will wake up your senses and pair wonderfully with the banana.
Low‑Sugar Edition
Use stevia or monk fruit sweetener in place of honey. Keep the banana for natural sweetness, and the bars will still be moist and flavorful without the extra sugar.
Storing and Bringing It Back to Life
Fridge Storage
Place the bars in an airtight container at room temperature for up to a week. The bars will stay fresh and chewy. For extra crispness, keep the container in a cool, dry place.
Freezer Friendly
Wrap the bars tightly in plastic wrap and place them in a freezer bag. They can be stored for up to 3 months. When ready, thaw at room temperature for 30 minutes or microwave for 15–20 seconds.
Best Reheating Method
To reheat, preheat the oven to 350°F (175°C). Place the bars on a parchment‑lined baking sheet and warm for 5–7 minutes. This restores the crisp edges while keeping the interior moist. A quick microwave for 10–15 seconds also works if you’re in a rush.
Add a tiny splash of water before reheating — it steams back to perfection. The bars will smell like fresh baking, and the texture will feel like a fresh batch. Enjoy!